How to Bend Wood to Make Pendant Lights | Bent Lamination
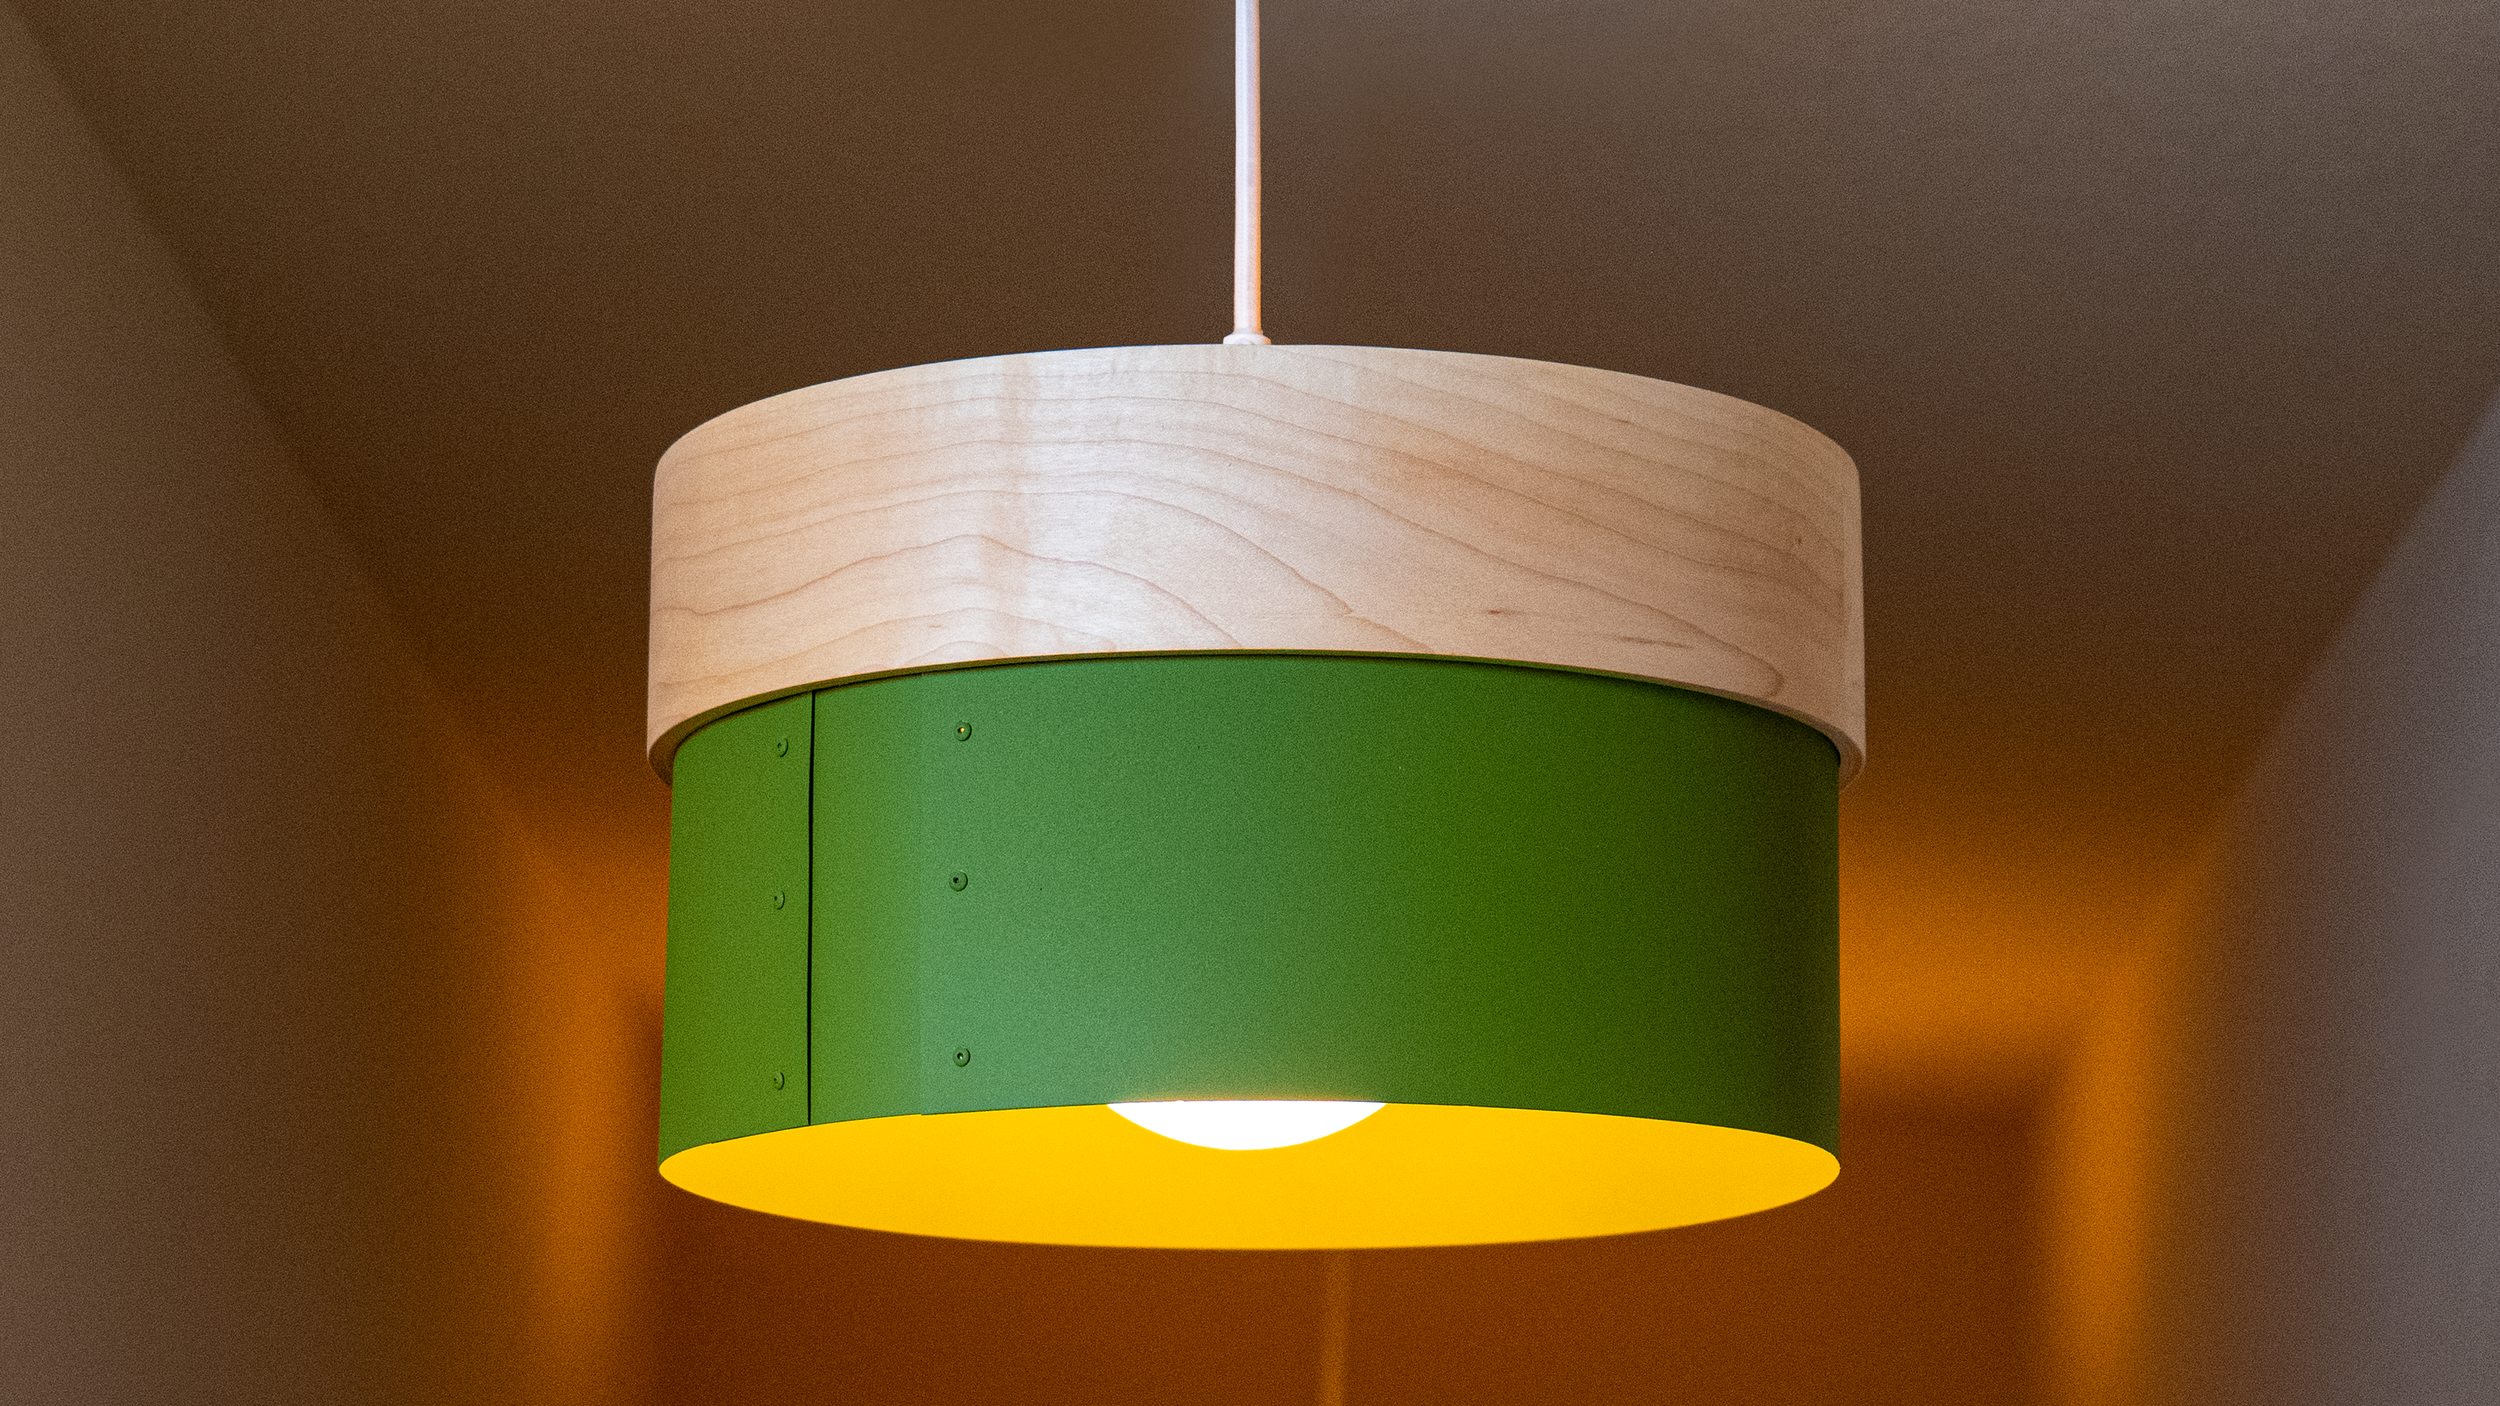
I used bent lamination to make these awesome modern pendant lights. This method of bending wood involves making a form and gluing up thin strips of wood veneer to achieve the bend you are looking for. I made 3 different size lights, 5 total for my house, which meant cutting out 65 veneers. Bent lamination may seem complicated, but the process is more repetitive than anything else and certainly takes dedication to get it done. But it is definitely worth the time it takes to create something that adds a unique visual interest.
Another cool feature is the metal shade. I used strips of aluminum and painted them to match the color scheme we have going on in our home. I love the way the hard maple and colored metal contrast and add a modern touch to a minimalist design. The metal shade is held in with a friction fit, making it easy to update the color in the future. Just think of the possibilities in your own house! I used custom white cords and fixtures in the lights too. So this build has a ton of stuff, wood bending, sheet metal bending, electrical wiring, and more!
I hope this inspires you to make your own bent lamination pendant lights for your house! Enjoy the build!
Project Plans: https://bit.ly/lightplans
Supplies
Maple Hardwood (or Hardwood of Your Choice)
Aluminum Sheet Metal
3/4” MDF
Table Saw
Band Saw
Router and Bits
Rivet Gun and Rivets
Sander
Lighting Components
Wood Glue
MAKE THE FORMS (with and without a CNC)

Cutting out the Molds with a CNC
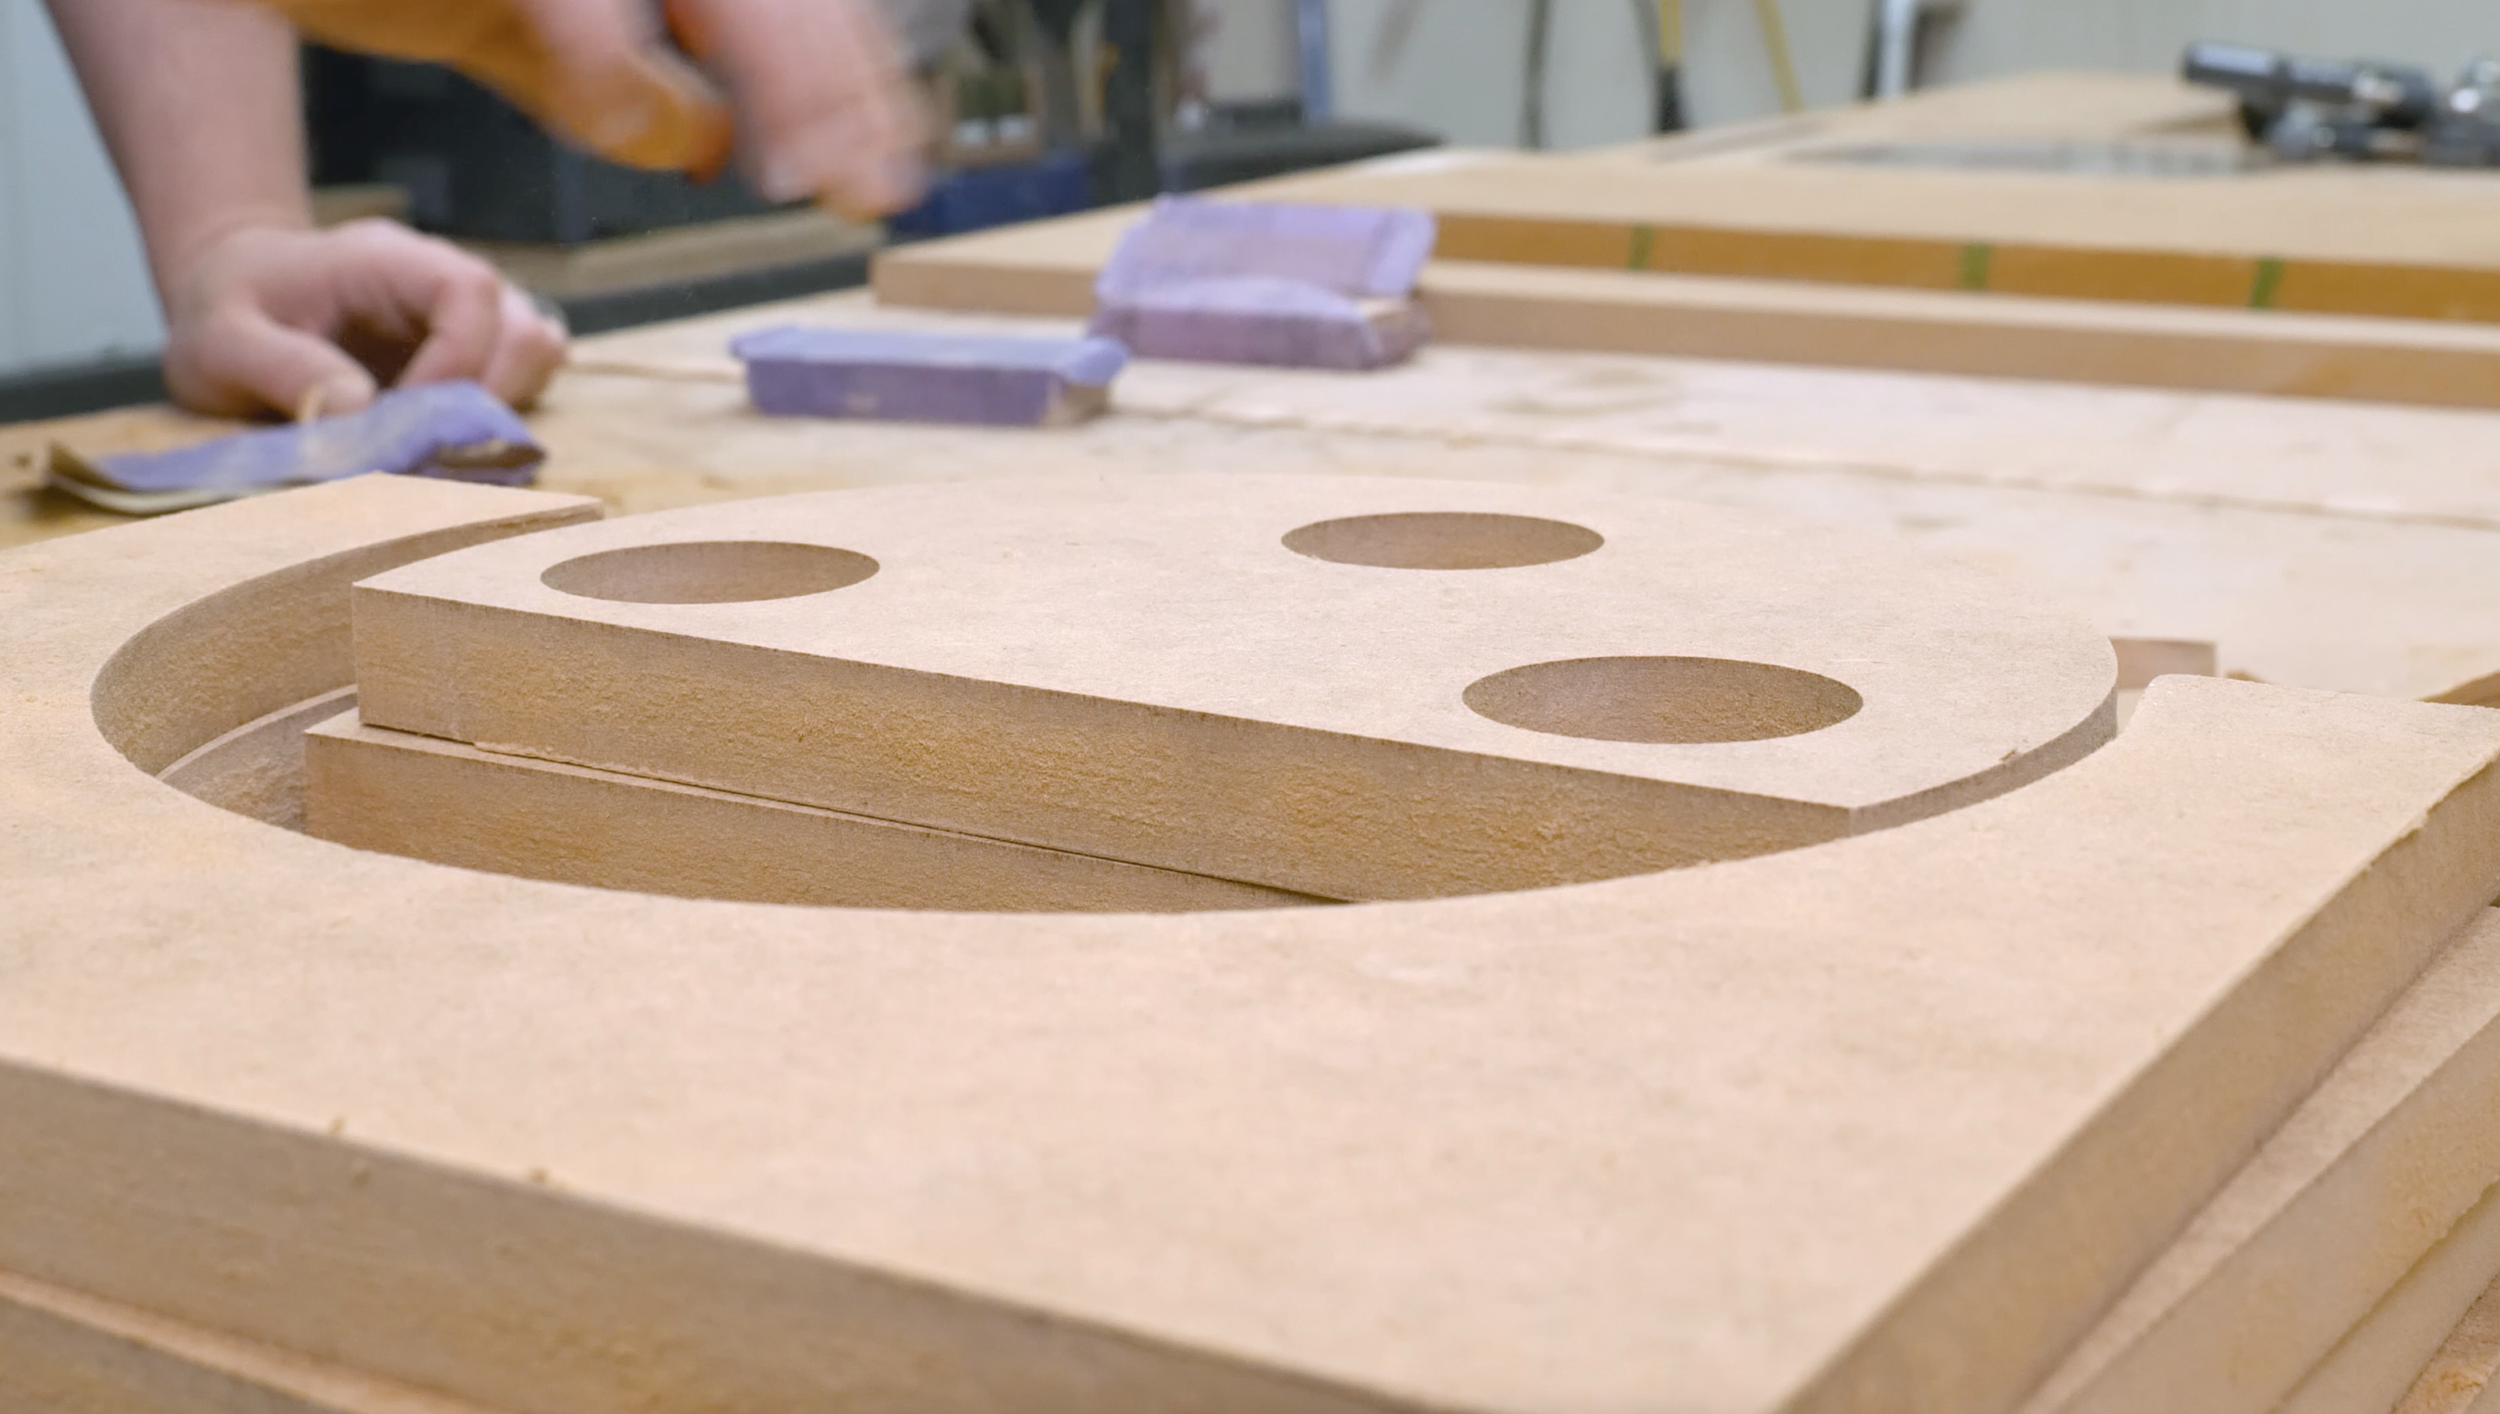
I made my forms by cutting them out on the CNC, but you can make these using a template and router table. I used 3/4” MDF board to cut out each of the forms. Make sure to add the clamping holes to make the glue-up go easier. Once they are cut out, sand the molds down to remove any rough edges.


Glue Up the Molds
I used Titebond 2 to glue-up the molds, using a brayer to spread out the glue. Make sure the edges are pretty close, but they don’t have to be exact at this step. Clamp the 5 pieces of MDF together as the glue dries. Repeat the same process for the interior curve. Only apply glue to on side of the molds. If you apply glue to both sides the pieces can slide a lot.


Making Molds Without a CNC

Trace the paper template onto the MDF for the interior and exterior mold. Rough cut these out with a jigsaw or bandsaw. Then clean them up with sand paper. Once you have one interior and exterior cut out, you can use that as the template. Rough cut out the other molds. Glue one to the first template you made. Once the glue has set up, use a flush trim bit at the router table to trim away the excess. Once you are finished flush trimming your first template, glue on the next one and follow the same process, just raise or lower your bit depending on your template placement for the cut. Use a forstner bit to add the clamping holes to the interior molds. Glue up the rest of the molds.


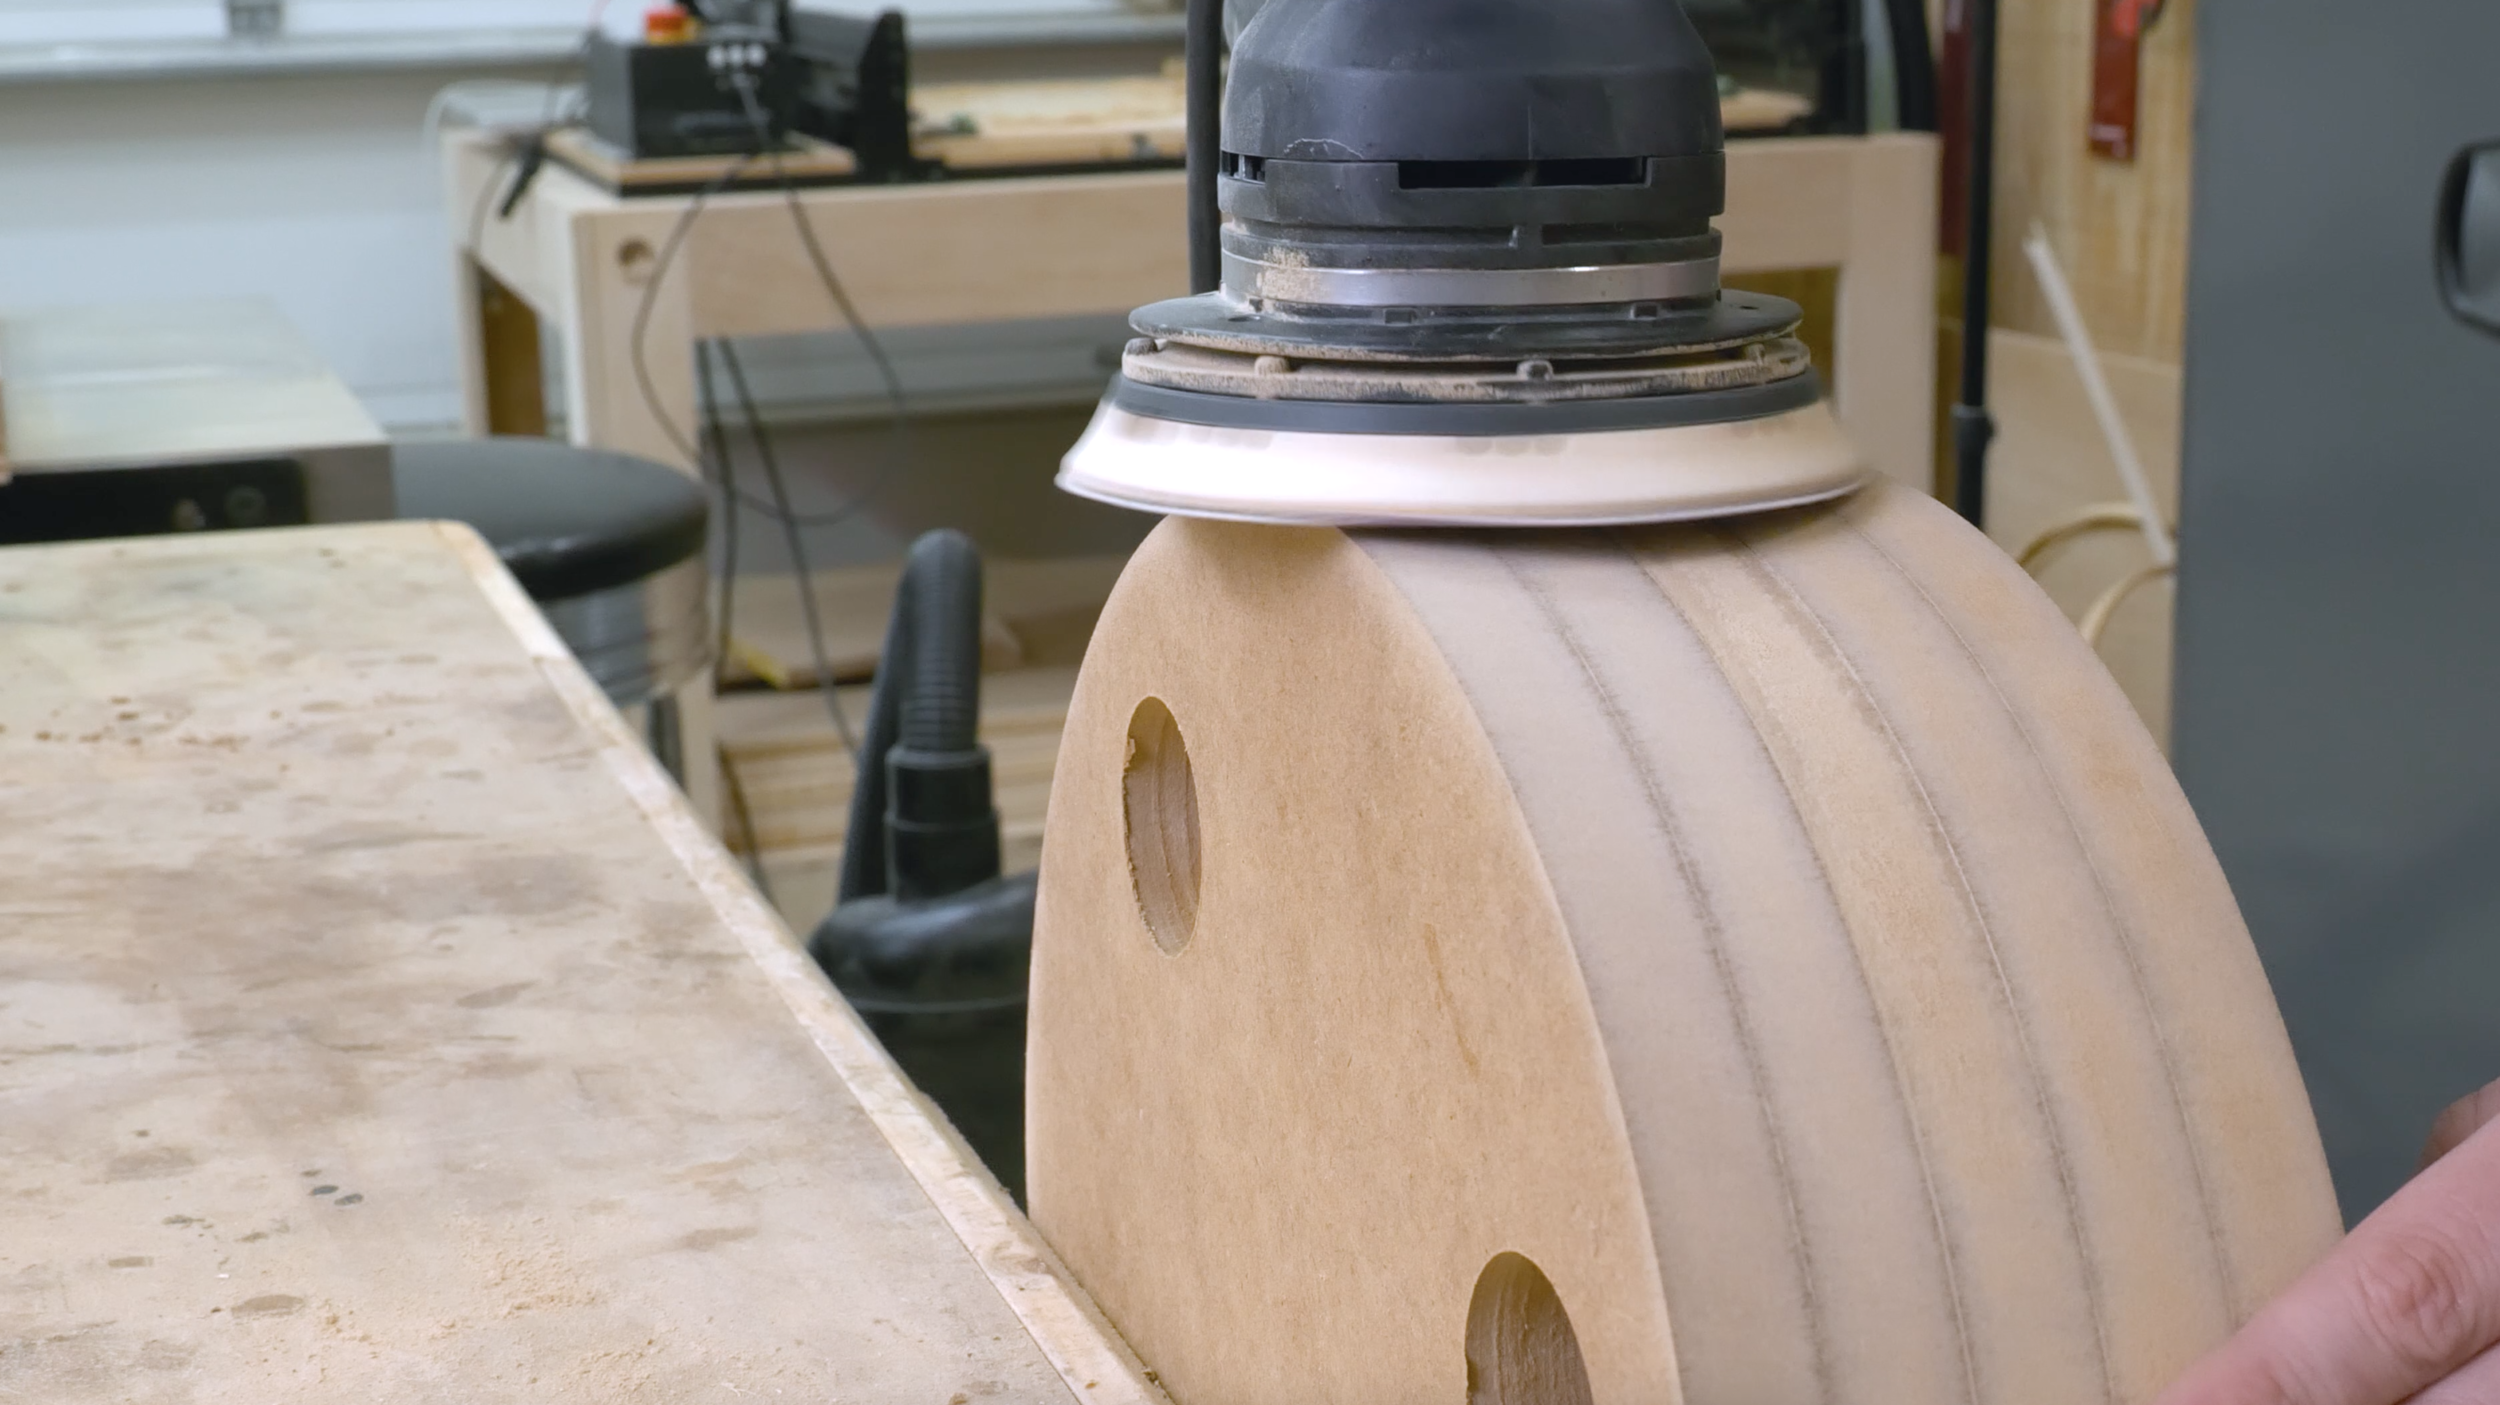
Clean Up the Molds
Clean up the exterior molds using an oscillating spindle sander to smooth out the MDF. Alternatively, you could use a dowel wrapped in some sand paper.
Use a random orbit sander to clean up the interior molds. Be careful not to stay in one place for too long so you don’t flatten out the form.

Finishing the Molds
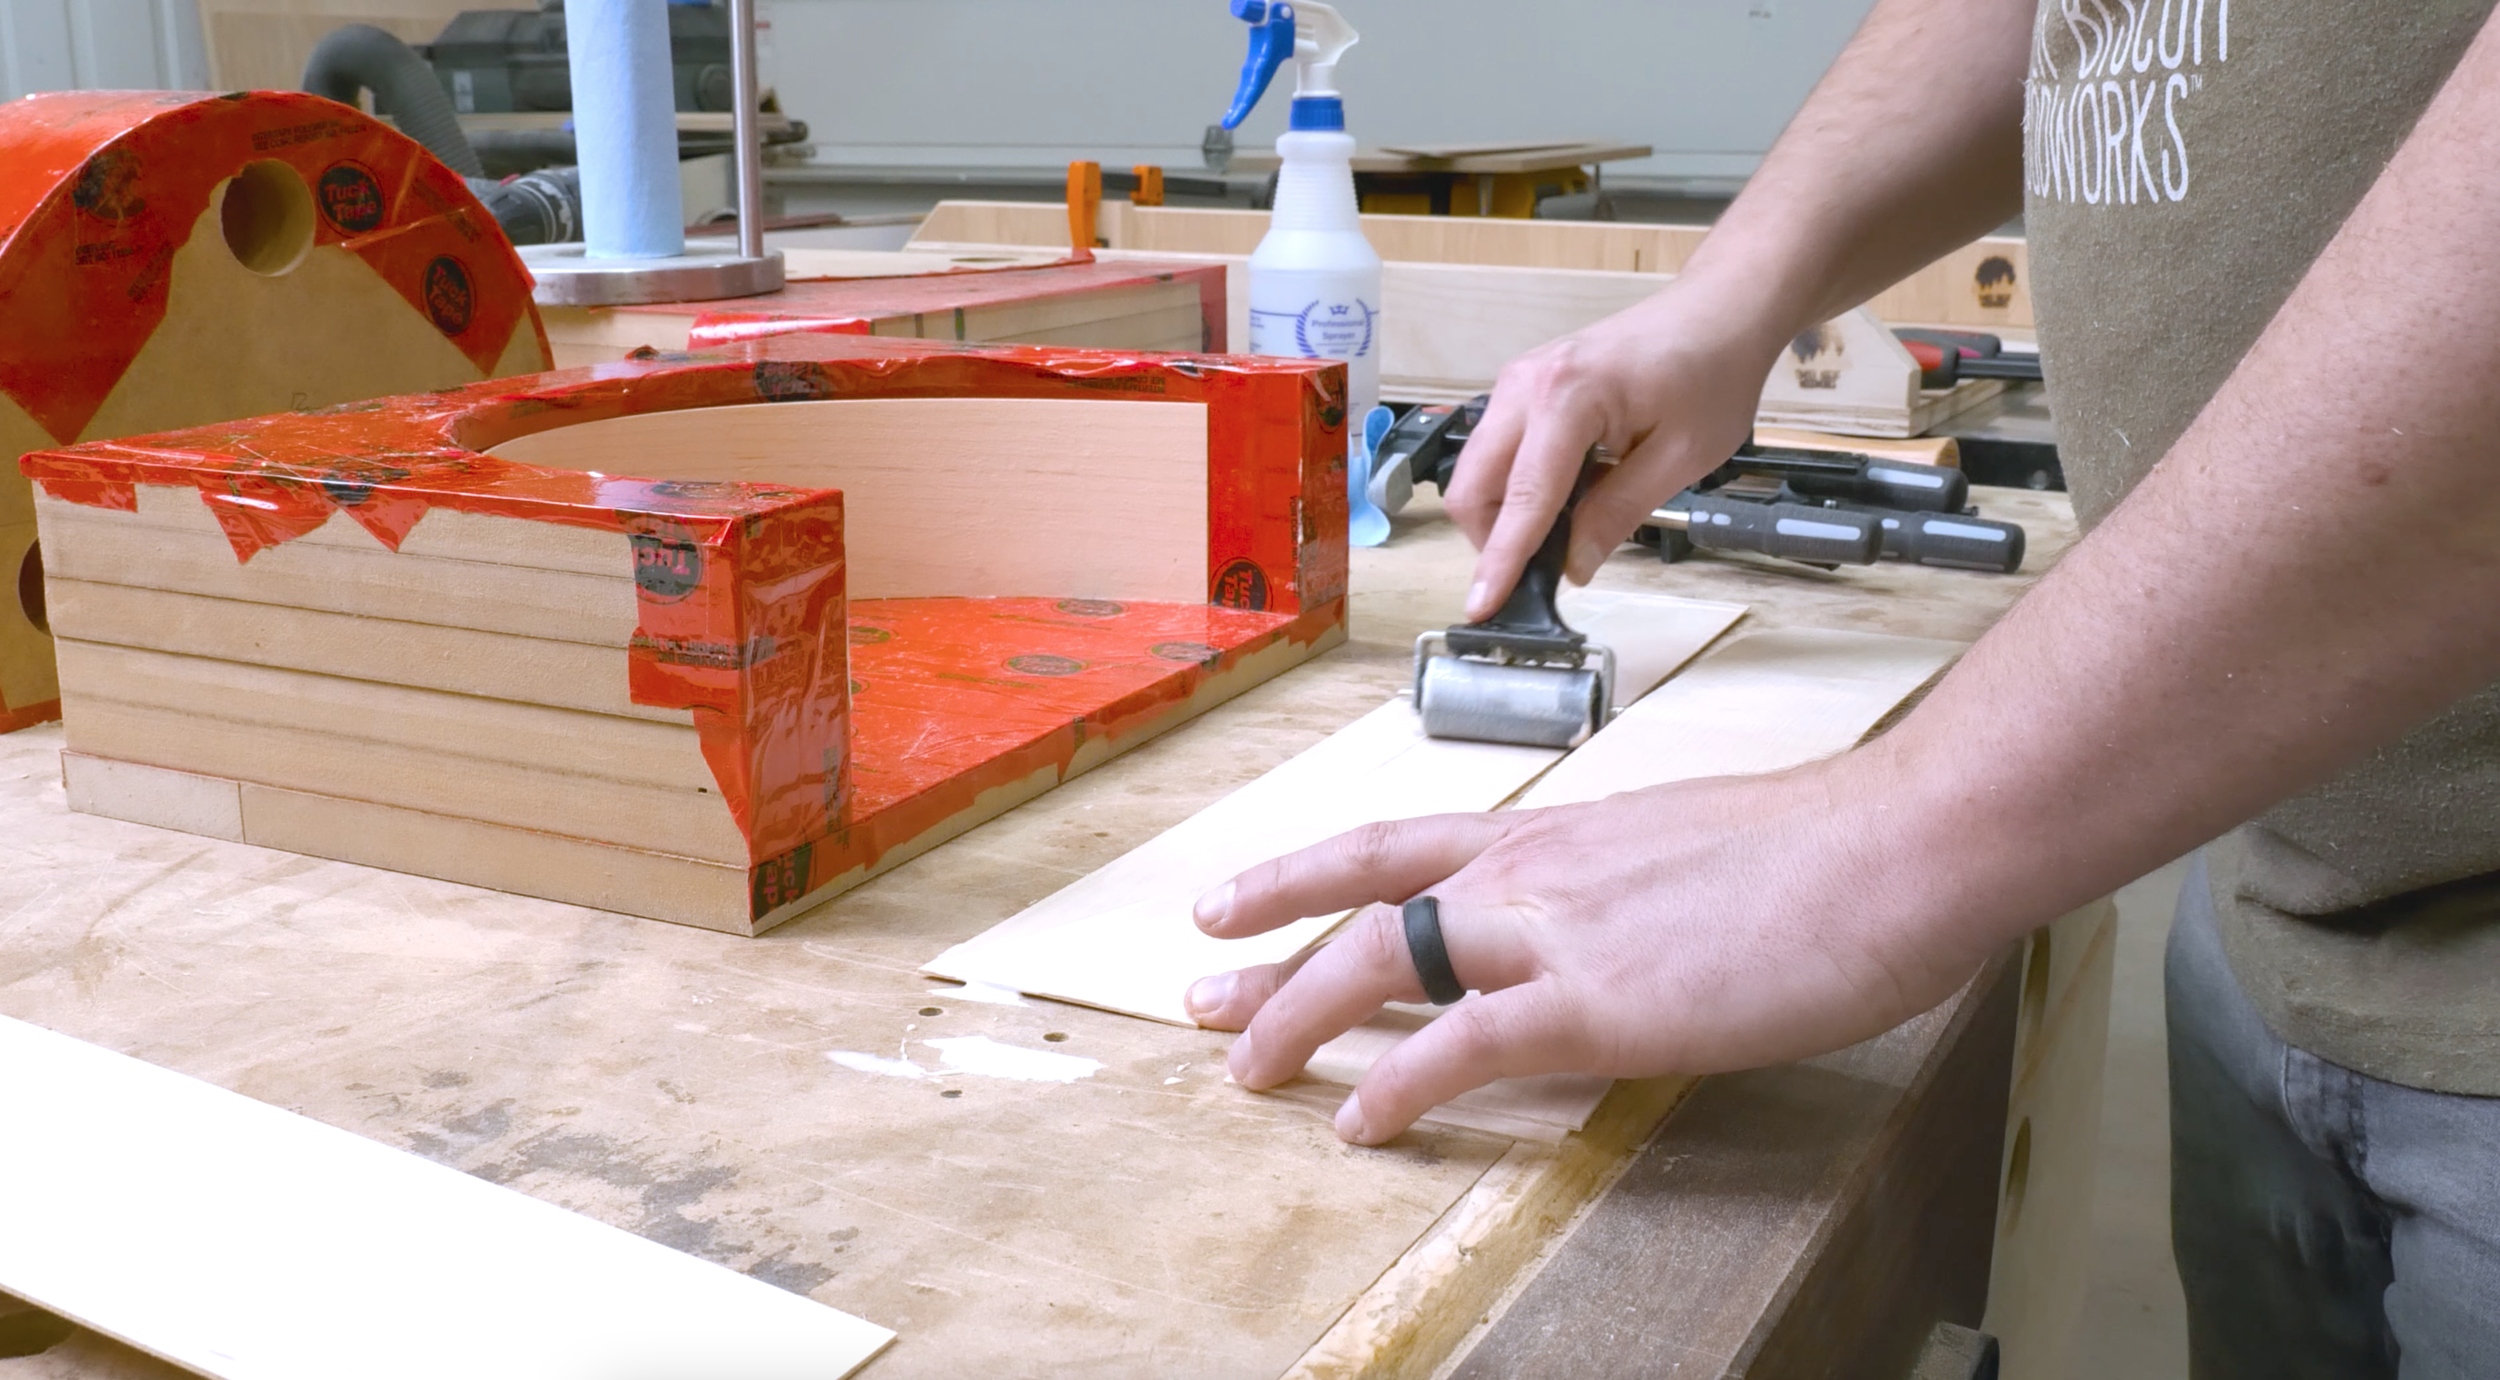
I added some cork to the interior of the molds where the laminations will sit so that it will flex a little in case there are any imperfections. I used adhesive backed cork for this, but you can also use regular cork with spray adhesive.
Next, wrap the forms in tuck tape or packing tape where it will come in contact with the glue.
To make sure the bottom of the mold will be flat, attach a couple scrap pieces of MDF to the bottom with screws so you can remove it when it is time to unmold your pieces.


CUT THE VENEERS


Mill the Lumber
Mill the hardwood you are going to use for the laminations using a jointer and planer. Rip them down at the table saw, leaving them slightly oversized so they can be trimmed to their final length later.

Cut the Veneer Oversized

At the bandsaw cut the strips to 3/32” so they can be sanded down with a drum sander or planer later. Make sure to use consistent pressure and a consistent feed rate to get consistent cuts (It also helps to have your bandsaw tuned up). You can also use a feather board here, but it tends to get in the way for me.
Sand the Veneers

Sand the pieces down until they are 1/16”. I used a drum sander for this but you could also use a planer. To do this, stick them to a sled and run them through the planer until they reach 1/16”. Of course, you can purchase the veneers pre-made and save you this hassle.
Cut the Veneers to Length

Tape your laminations together using painters tape. This will help minimize the risk of tear out while allowing you to cut multiple pieces at the same time. Using a crosscut sled at your table saw, cut the strips to length. It is important to keep in mind here that you should cut the veneers a bit longer than the outer most circumference since this will be the longest strip.
MAKE THE BENT LAMINATION
Glue Up the Veneers
Use Titebond 2 Extend here so that it will give you a little more open time. Apply glue to one side (interior side) of each lamination. Insert each strip one at a time for the smaller 9” mold. Note that the most interior strip will not need any glue because the adjoining face already has glue applied. For the larger molds, you can apply glue, stack up the pieces, and then put them in the mold at one time. Once all 5 strips are in, add the interior mold and clamp it together. Let the laminations sit in the molds overnight, or at least 8 hours.
Do your best to avoid getting dust or small particles on your veneers during glue-up because it can affect the lamination.


Unmold the Laminations
Unscrew the bottom of the molds and wiggle out your bent lamination piece. Check for any delaminations.

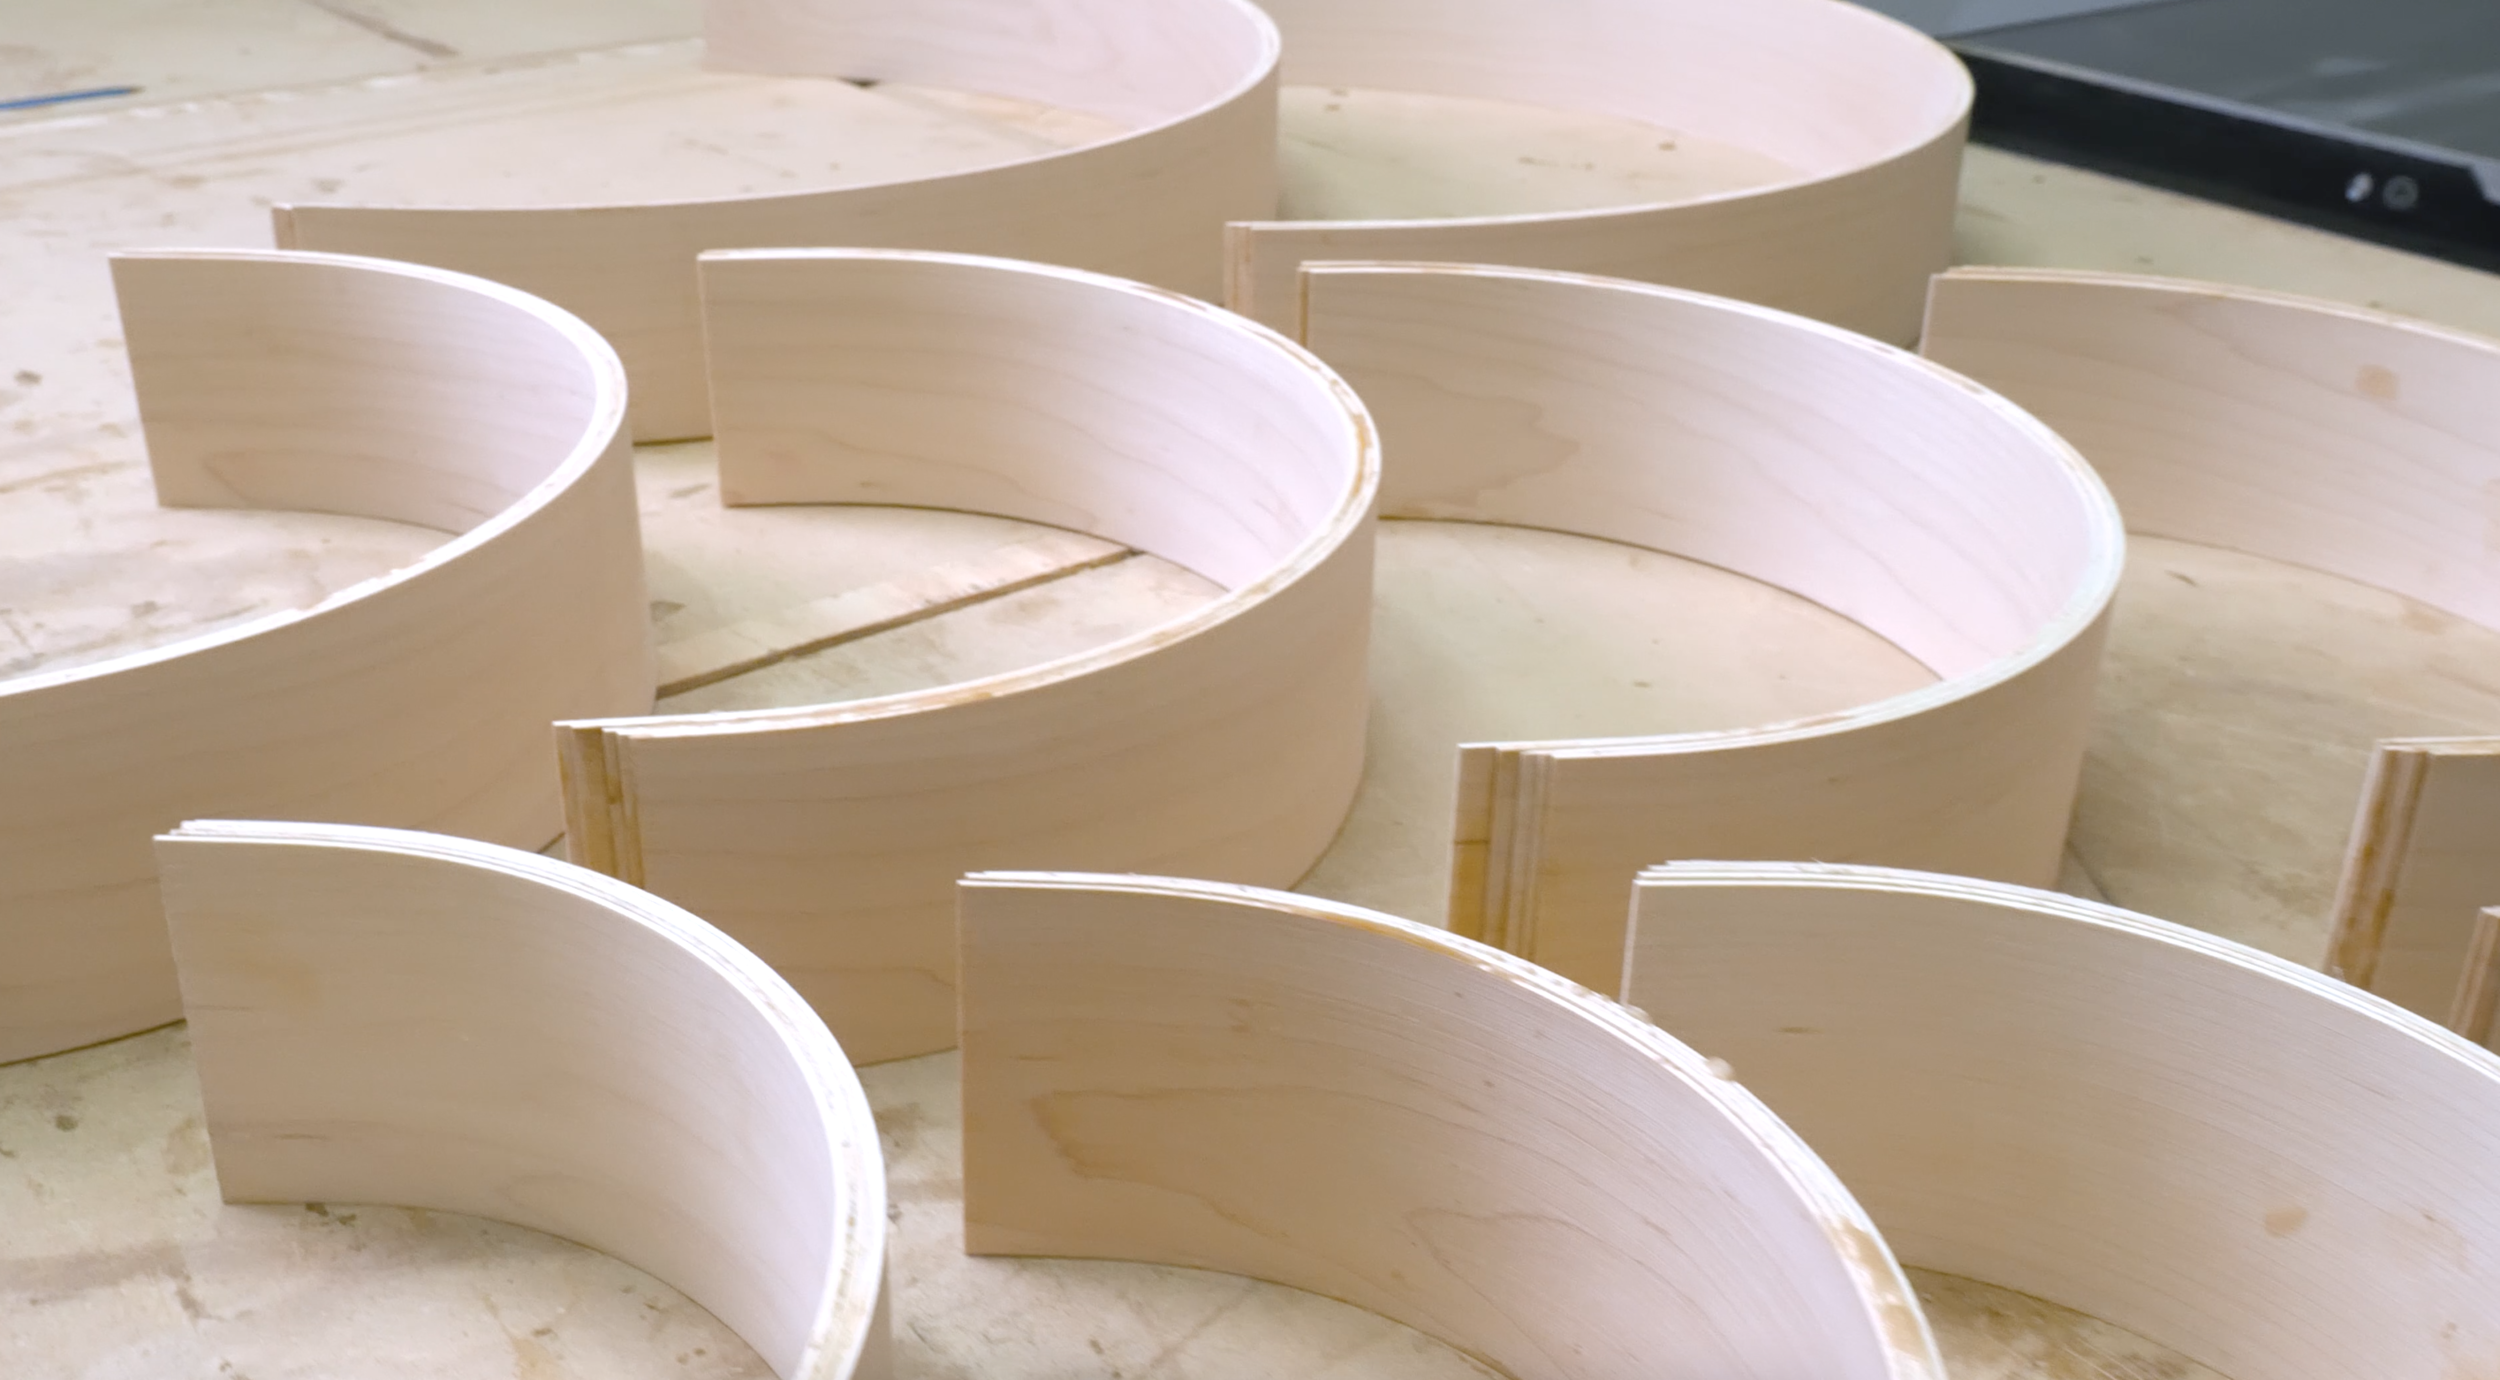
Trim Off Excess
Once they are out of the mold, they will be slightly oversized and a bit wonky since the edges don’ t match up perfectly. First, square off one end at the jointer. I pulled the guard back to expose the blade - just make sure you’re safe here!
Then cut the laminations to their final thickness at the bandsaw. Place the jointed edge against the fence and rotate the pieces.


Make the Half Circle Sled and Trim Excess

Cut a clean edge on your sled. Attach the half circle mold the to sled with some screws and some small blocks to hold the piece in place and to the form.
Then add some blue tape around the edges to help prevent tear out. Make the initial cut at the table saw and then rotate the piece, line it up to the edge and make the second pass. When removing the piece from the form, be careful so you don’t snap of the off cuts.
You will need a sled for each size light. And repeat this process for the remaining circles. Clean up the cuts with a chisel if needed. Just be sure to take light passes to avoid tear out.


Cut Rabbet into the Half Circle
At the router table, cut a rabbet into the top of the lights to hold the mounts that attach the light to the socket.

Make the Mounts
To make these mounts, I used a CNC. You can also make these with a jigsaw, bandsaw, or scroll saw.

Glue Up the Wooden Half Circles

Apply glue to the rabbet and both end grain pieces. Add and insert and clamp the circle together using strap clamps. The insert will help the circle hold its shape and give it support.

Repeat this process for all of the lights.
Once the glue is dry, sand the seams using a random orbit sander for the exterior. The interior can be hand sanded. Then apply a penetrating oil.
MAKE THE METAL SHADE

Sand both sides of the aluminum sheets with 320 grit then clean them off.
Mark out the width for the shades and cut them out using tin snips. I only used the edge pieces of the aluminum sheets to ensure the bottom of the lights had a nice clean edge.


Form the Metal
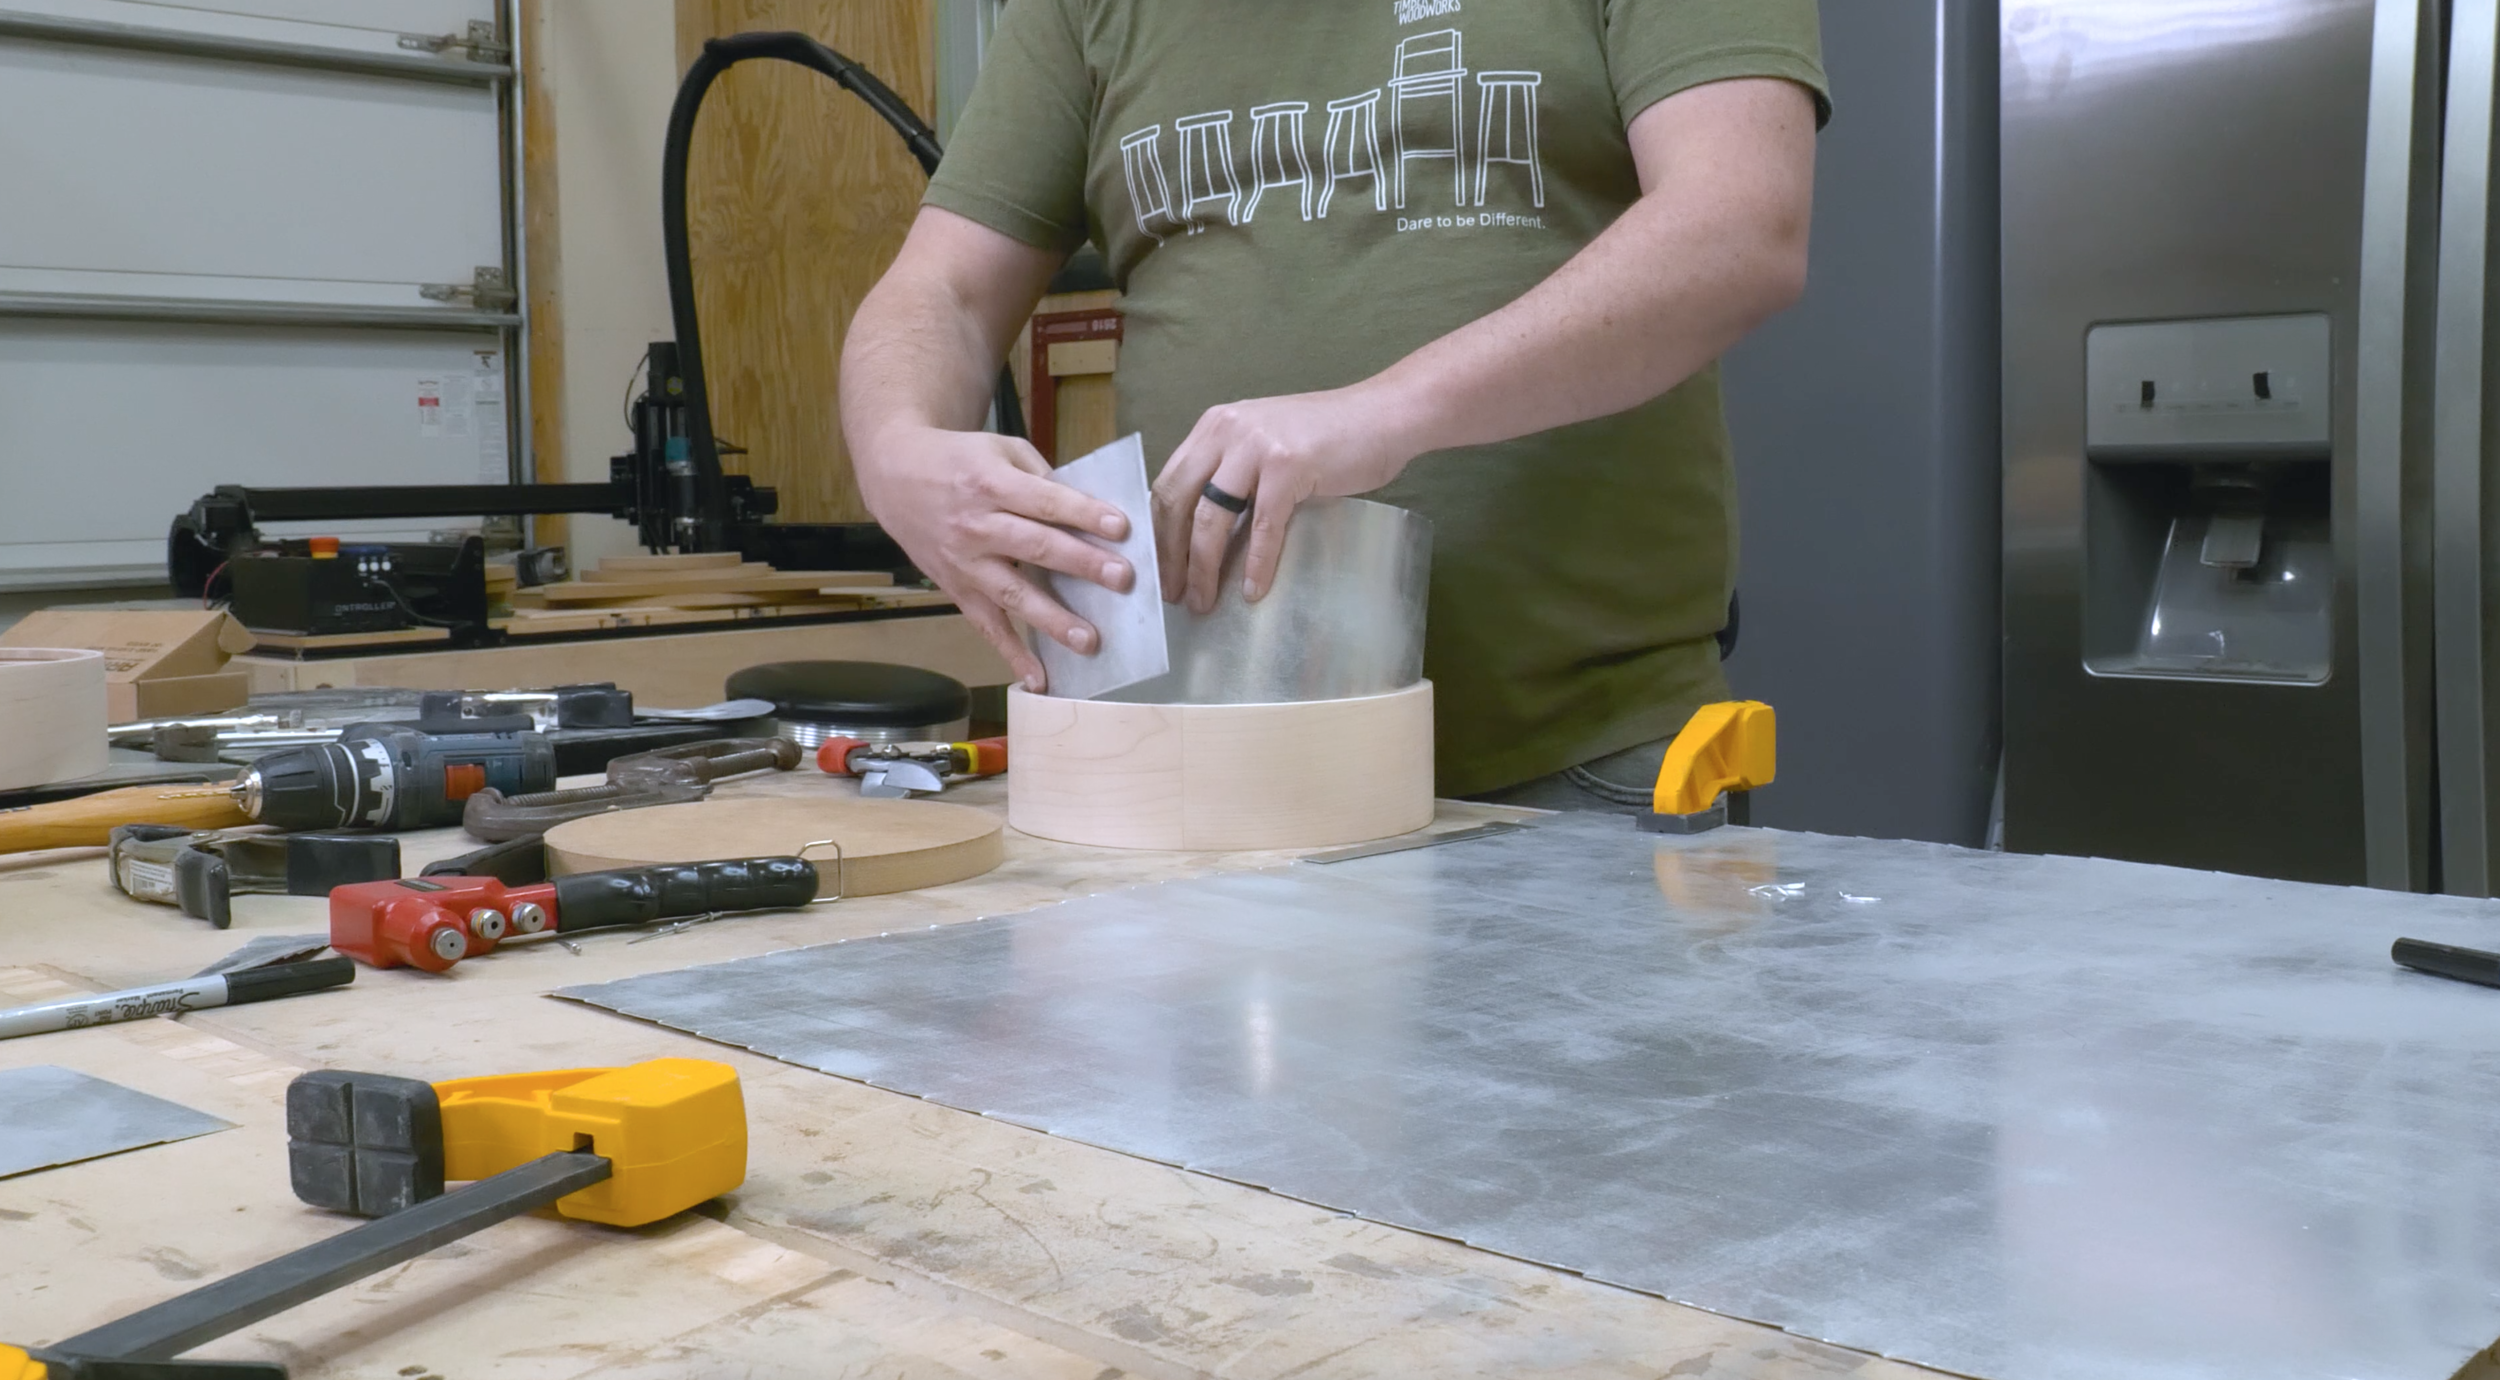
Using the interior of the wooden circle to create the metal shade. The add some rivets to hold the metal in place. Using the wooden circle to form the metal will allow it to have a friction fit, so no need for glue!

Of course, repeat this process for all of your lights.
1 strip of metal was not enough for the medium size lights, so I added a small patch using rivets.
Paint the Shades

Apply and etching primer to the aluminum and let that dry. Once dry, you can spray or paint them your color of choice. I used a spray paint and an HVLP spray gun, put they can be rolled out as well.

ASSEMBLE THE LIGHTS


Wire up your new lights. I got all of my parts from Color Cord. They have a wide variety of colors to choose from and great instructions for assembling everything.
Then add the aluminum shades to the wooden circles and hang them up! It’s time for that Aha moment - turn on your new lights and enjoy the view!


There is a complete build video on my YouTube channel (Timber Biscuit Woodworks), so you can follow along.
Tag me on social if you're building this project (@timberbiscuitwoodwork on Instagram) with the hashtag #BiscuitBuild - Happy building!