Building an Outdoor Chaise Lounge (Longue)
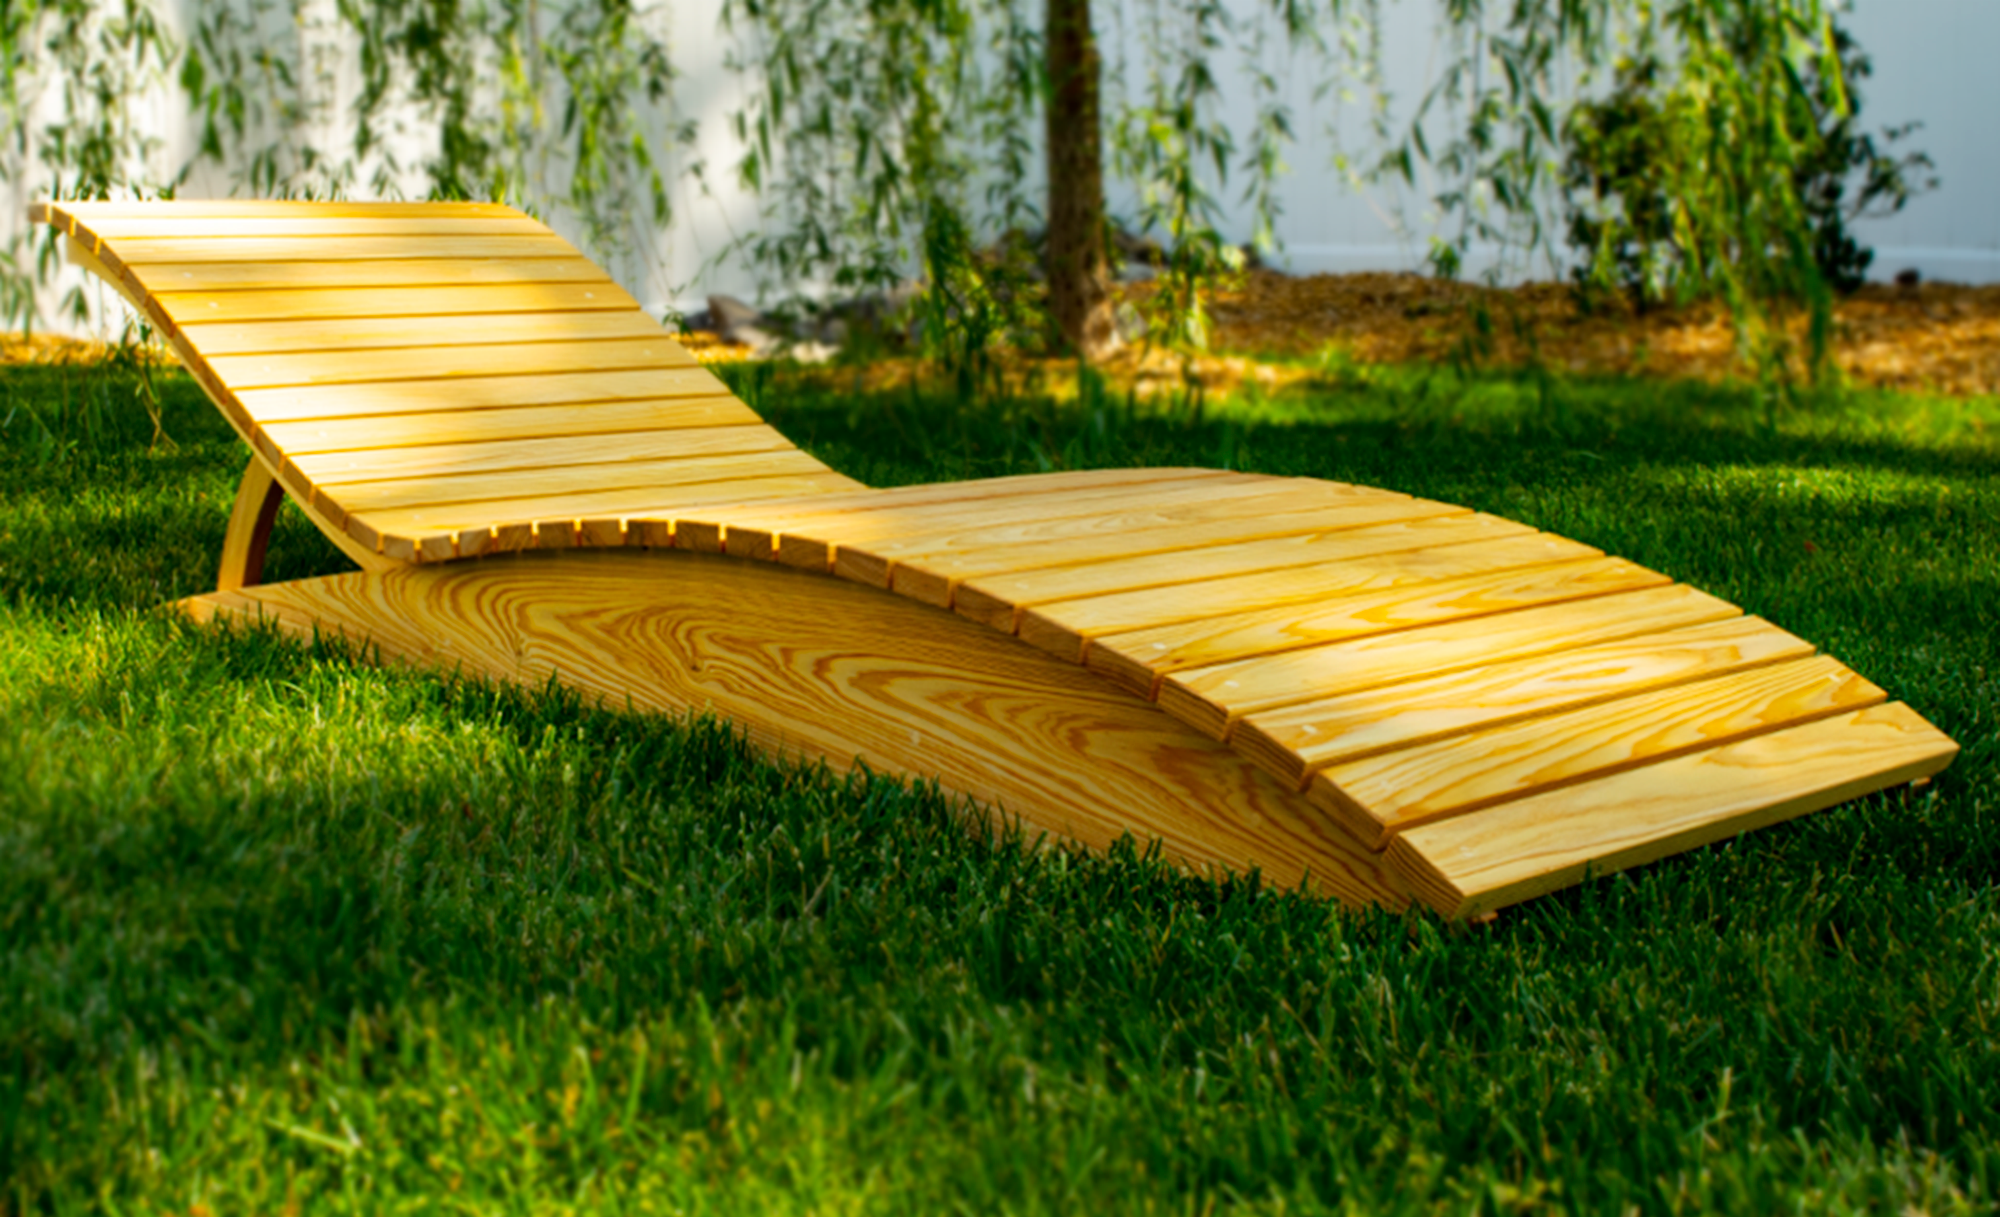
Let’s build an outdoor chaise lounge chair! I went with four-quarter cypress for this outdoor furniture project as it is a rot-resistant wood, but you can use any wood you like. I recommend using something that will hold up to the elements, though, as this piece will surely see its fair share of weather. And the sun can wreak havoc on outdoor furniture. I designed this piece to look seamless, and it almost looks like the back is just floating. It has sweeping lines and big curves that comfortably support the user. The chaise isn't like every other lounge chair with a stale design; it's more of a showpiece. I hid all of the screws in this piece with plugs, so there is no visible hardware. And I finished this piece with penetrating oil to give it some protection against moisture and UV.
Supplies
Materials Needed
36 Board Feet of Cypress (or any other rot resistant wood)
Penetrating Oil
Wood Glue
Tools Needed
Table Saw
Jig Saw
Clamps
Router and bits
Sander
Dowels
Drill/Drill Press
Countersink Drill Bit
Screws
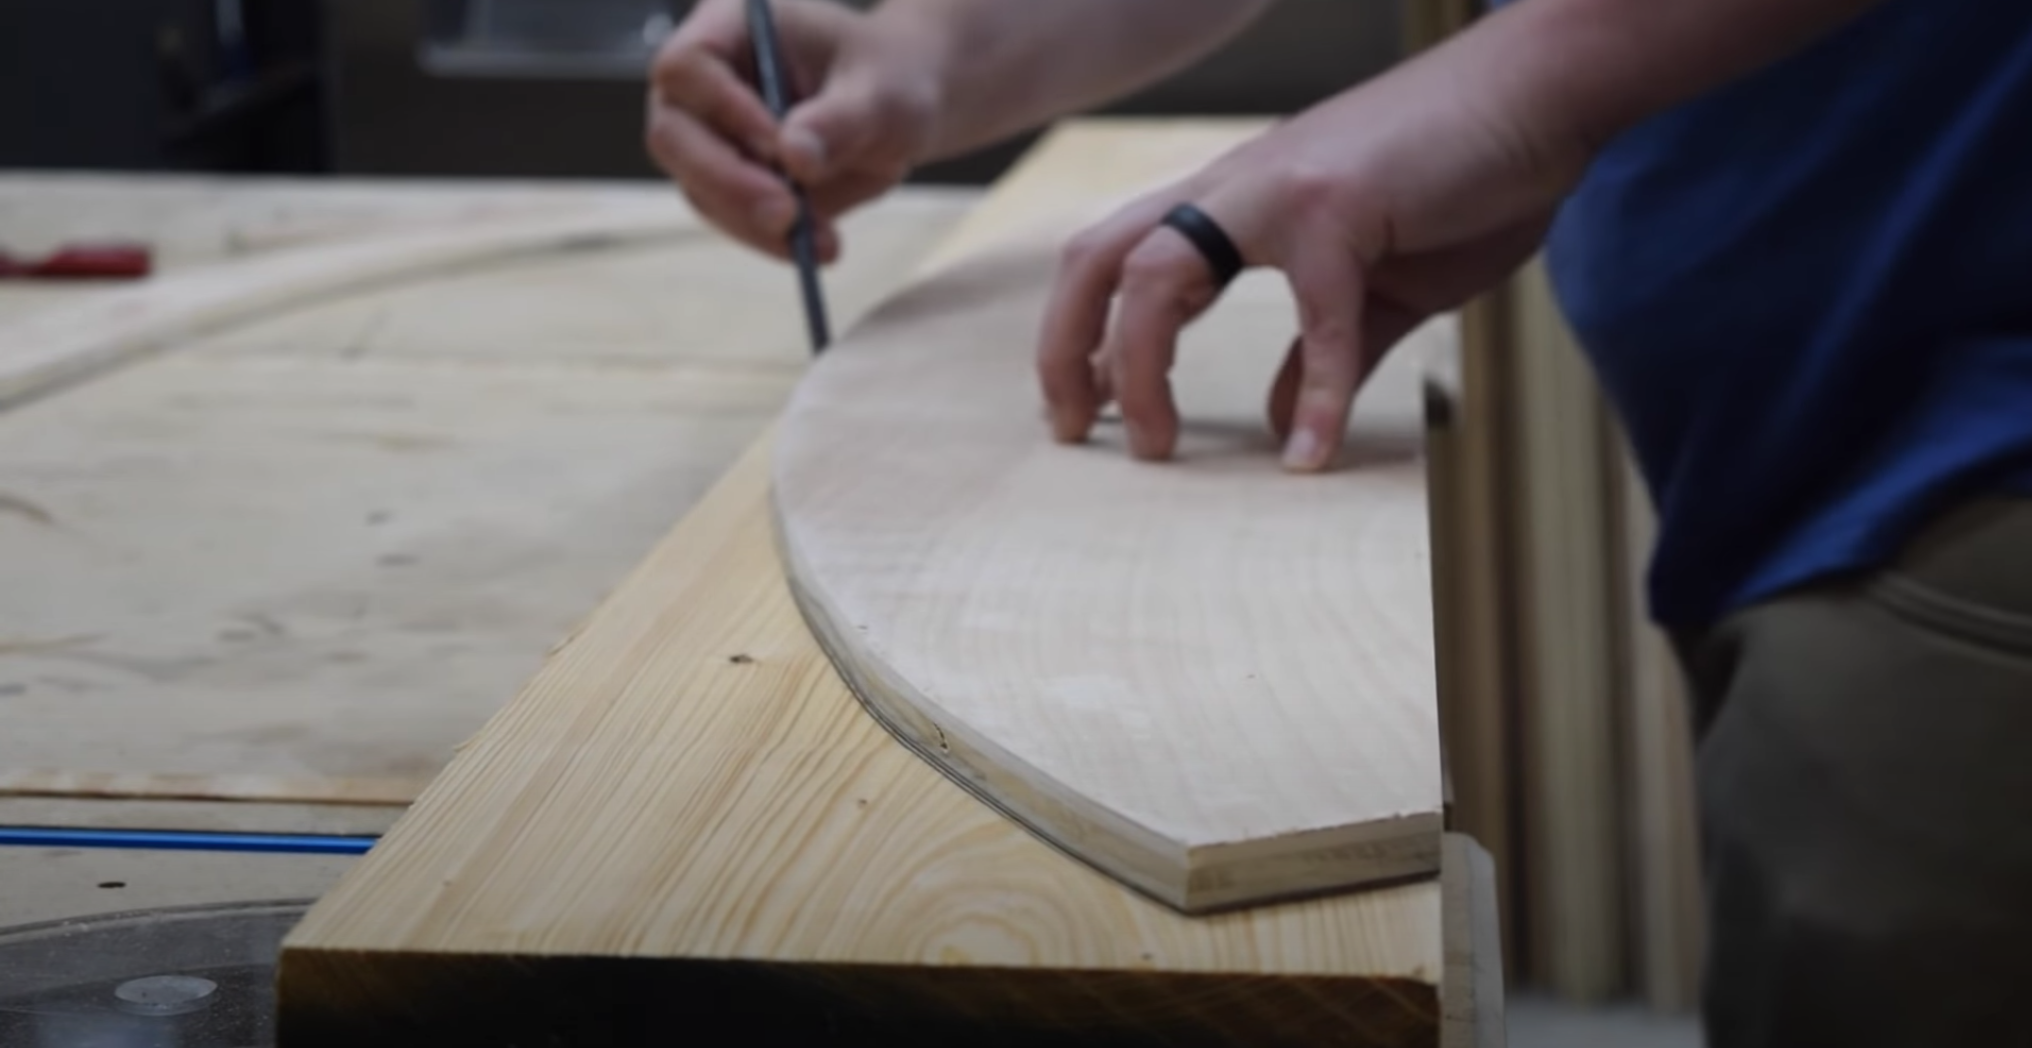
MAKE THE TEMPLATES

If you would like, these full-scale templates, they are available HERE
Once the templates were printed and cut out, I attached them to plywood with some spray adhesive.
Then, with a bandsaw and jigsaw I cut the pieces to a rough shape. Once my templates were cut, I sanded down the plywood to its final shape.


MILLING THE LUMBER

I am using four-quarter cypress since it is super rot-resistant and pretty easy to work with and I start out with jointing the boards.
With my templates done, I trace my them onto the jointed boards.
Once I had my pieces laid out, I used the same process as making the templates: I used a combination of a bandsaw and a jigsaw to cut the pieces out to rough shape. If you don't have a bandsaw, you could cut all these pieces out with a jigsaw.
Try to cut as close as you can to the line. I wouldn't recommend leaving more than a quarter-inch of extra material, but here the less you have, the better.
I used some double-sided tape to attach the templates to the rough cut pieces. Then, over at the router table, I used a flush-trim bit to route the wood chunks to their final shape. Take your time when routing the end grain. I didn't have any tear-out, but it would more than likely occur here if it was going to happen.
When I am routing a bunch of pieces like this, I constantly check my hand placement to not get complacent. If you don't have a router table set up, you could opt for doing the routing with a fixed base or plunge router.


MAKING THE SLATS

I marked out and cut down my boards for the slats. Then, I used my jointer to put a clean edge on the boards before cutting them down on the table saw. But this can be done at the table saw with a sled or at the router table with a jointing set up.

At the table saw, I cut a clean 90 onto two edges of the boards.
To cut the slats to their final length, I used my miter gauge with a stop. With this setup, I can cut with the clean edge against my stop. Then flip the timber slice and cut the other side.
With all my boards cut down to length, I swapped in a ripping blade and ripped the boards to their final width. This process goes pretty quickly, and using a feather board like the one from Magswitch makes it a lot easier to get consistent results because it attaches anywhere to the tabletop.
Back at the router table, I used an eighth-inch round-over bit to round all of the top edges of the slats.


SEALING THE BOTTOM OF THE LOUNGE BASE
To seal the bottom of the lounge from ground moisture, I mixed some two-part epoxy from Total Boat and spread a thin layer onto the bottom edges of the boards.
This will prevent water from getting sucked into the wood from the ground and help protect the wood from getting torn up when it's moved around.


ROUTING AND ATTACHING THE BACKREST

I used a strip of tape on the vertical piece to indicate my rough placement of the vertical support and routed around that area.
Next, I marked out the placement for the screw holes for the stretchers. Then used a punch and countersink bit to pre-drill all of the screw holes.
For this piece, I went with Titebond III to glue the pieces together. And after applying glue, I predrilled and drove in the screws for the backrest.

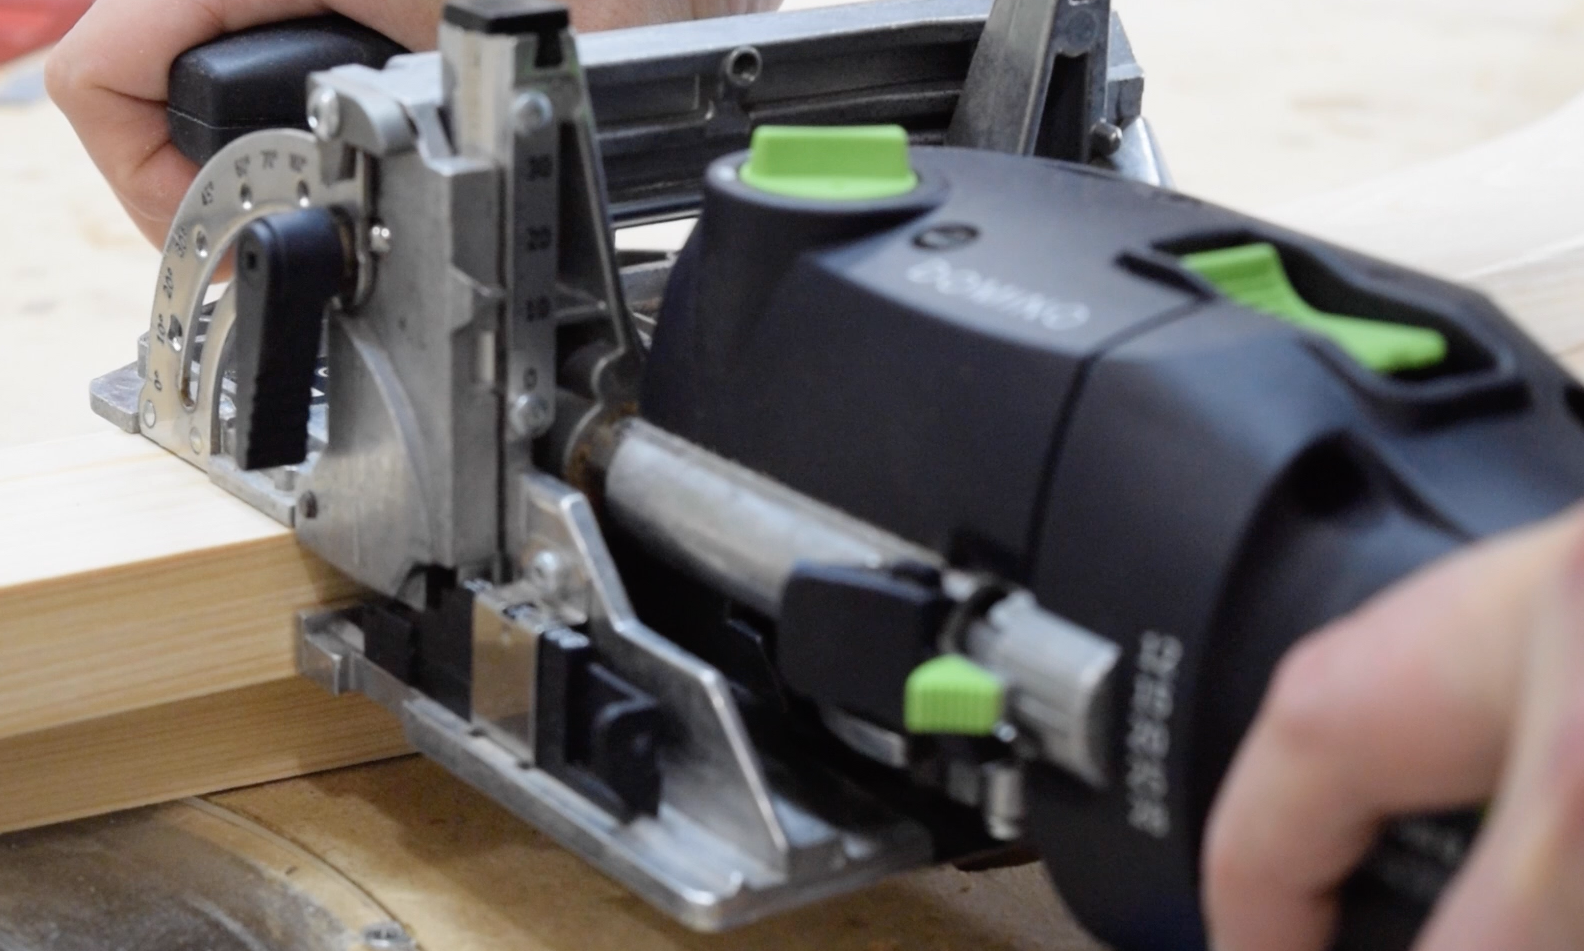
I next scribed the backrest support and cut the support to length at the bandsaw. Then I sanded the cut flat a the disk sander and I marked out the placement for my dominoes. If you don't have a domino, this can just as easily be done with dowels.
I glued in the dominoes and screwed the supports into the base. Then squeezed the joint closed with a clamp.
To round over any of the remaining exposed edges, I used a combination of a rasp and sandpaper.
Then I laid out the screw holes for the stretchers on the backrest.
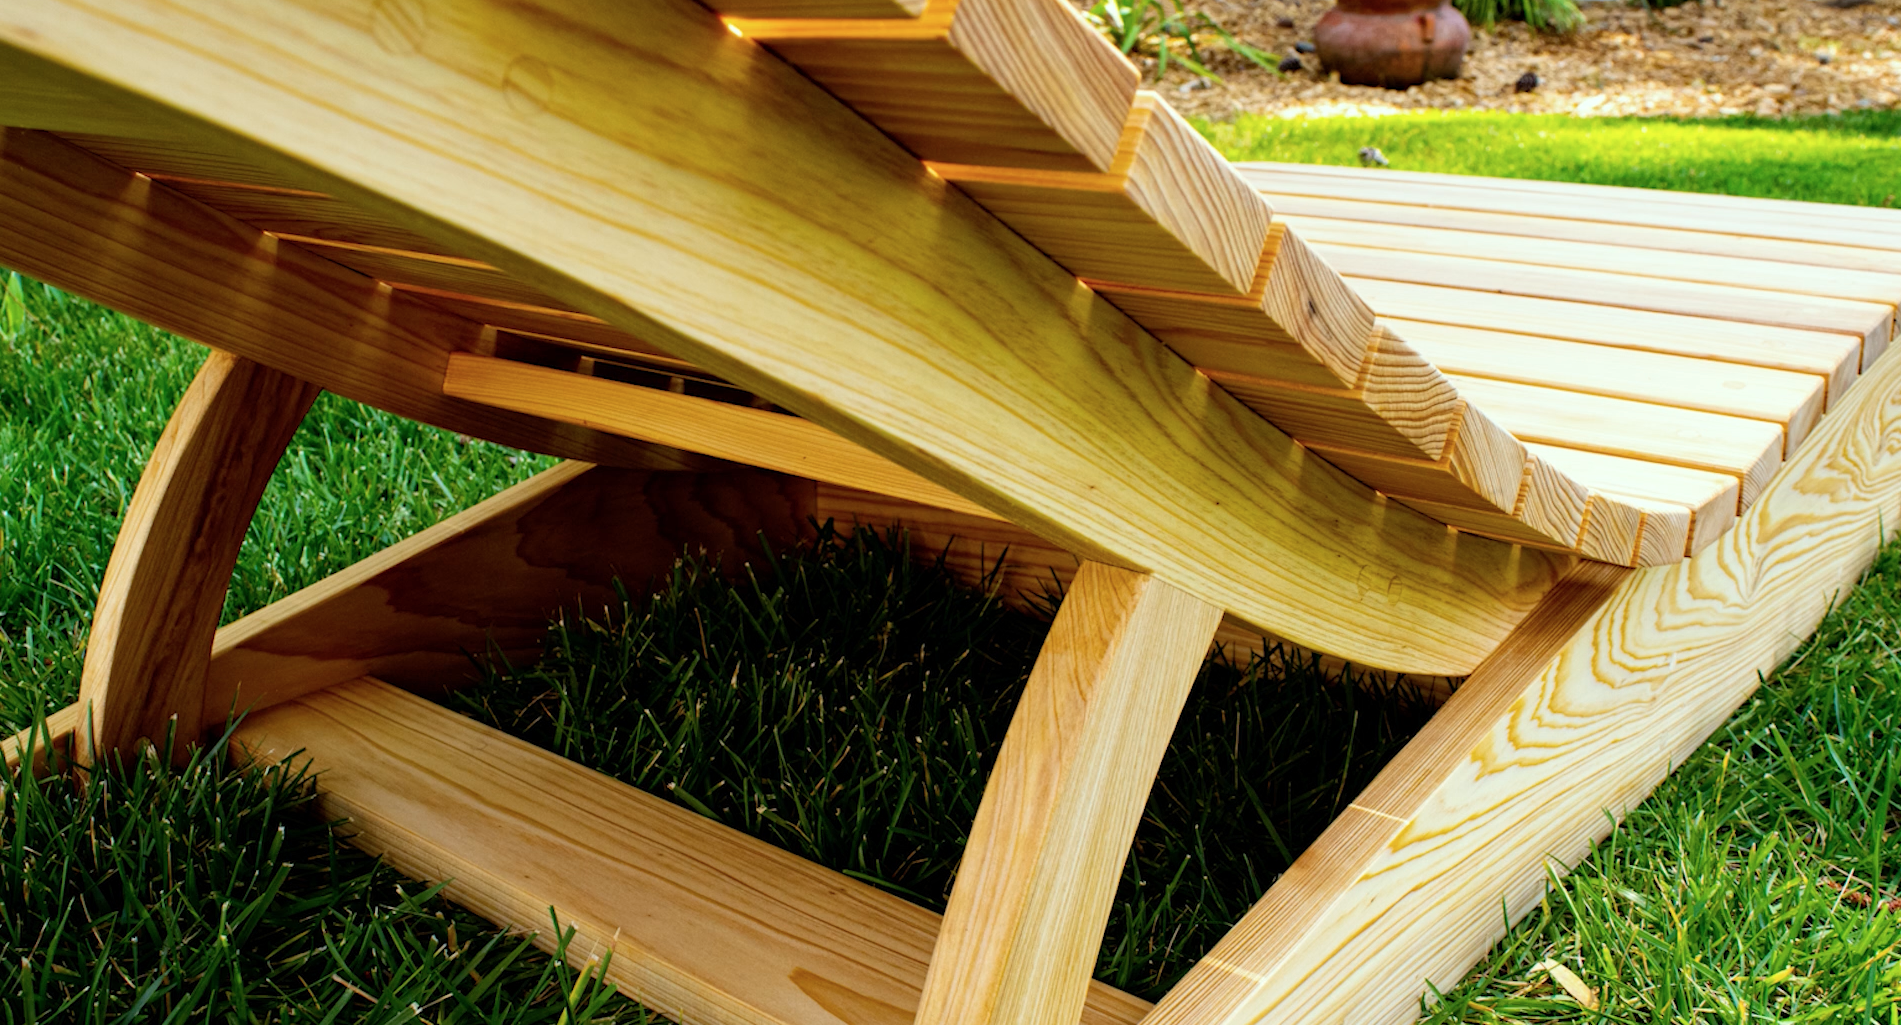
ASSEMBLING THE SIDES AND STRETCHERS

The stretchers are elevated a quarter-inch off the ground to help with moisture. So, I used some plywood offcuts to hold them up while I glued and screwed them in place. The upper stretchers should fit snug enough that you don't need clamps to support them while you attach them.

To conceal the screw holes, I'm using plugs. So over at the drill press, I cut the plugs using a plug cutting bit.
Then I could pop out the plugs and glue them in.
I used the countersink bit and set up a stop at the drill press to pre-drill all of the lower slats that attach to the base. The holes for the backrest are offset by one inch to accommodate for the material thickness.


Then I marked a starting line and attached the slats. I used double-sided tape here to hold the first slat in place.
Then, to attach the remaining slats, I used a strip of quarter-inch MDF as a spacer. I also made a small reference square from plywood to help keep the slats centered while I attached them. From there, it was rinse and repeat for the lower slats.
Once I was sure about the slat's transition point, I could pre-drill the upper slats with an updated stop at the drill press. Then I attached the upper slats in the same fashion as the bottom. As a side note, the upper portion does require a new setup square.

I left the top of the backrest long as I wasn't 100% sure about where the slats would end. So after marking the end, I cut the piece off with a pull saw. Then I chamfered the ends of all of the base pieces

I cut the remaining plugs out, marked the grain direction with a pencil, and glued them in place. I will say the plugs are not 100% necessary, but they do add to the flowing design of this piece. Then trim the plugs flush and sand them.

FINISHING THE LOUNGE CHAIR
Finally, it was time for the finish. I decided to go with a penetrating oil as it should hold up well to the elements. That being said, I will likely have to refinish this piece every year or two.
Full plans for this build are available HERE or click HERE to watch the build video. Please like and subscribe if you think I earned it! I appreciate the support!
Let me know if you have any questions below or in the video comments, I tend to respond pretty quickly!


There is a complete build video on my YouTube channel (Timber Biscuit Woodworks), so you can follow along.
Tag me on social if you're building this project (@timberbiscuitwoodwork on Instagram) with the hashtag #BiscuitBuild - Happy building!