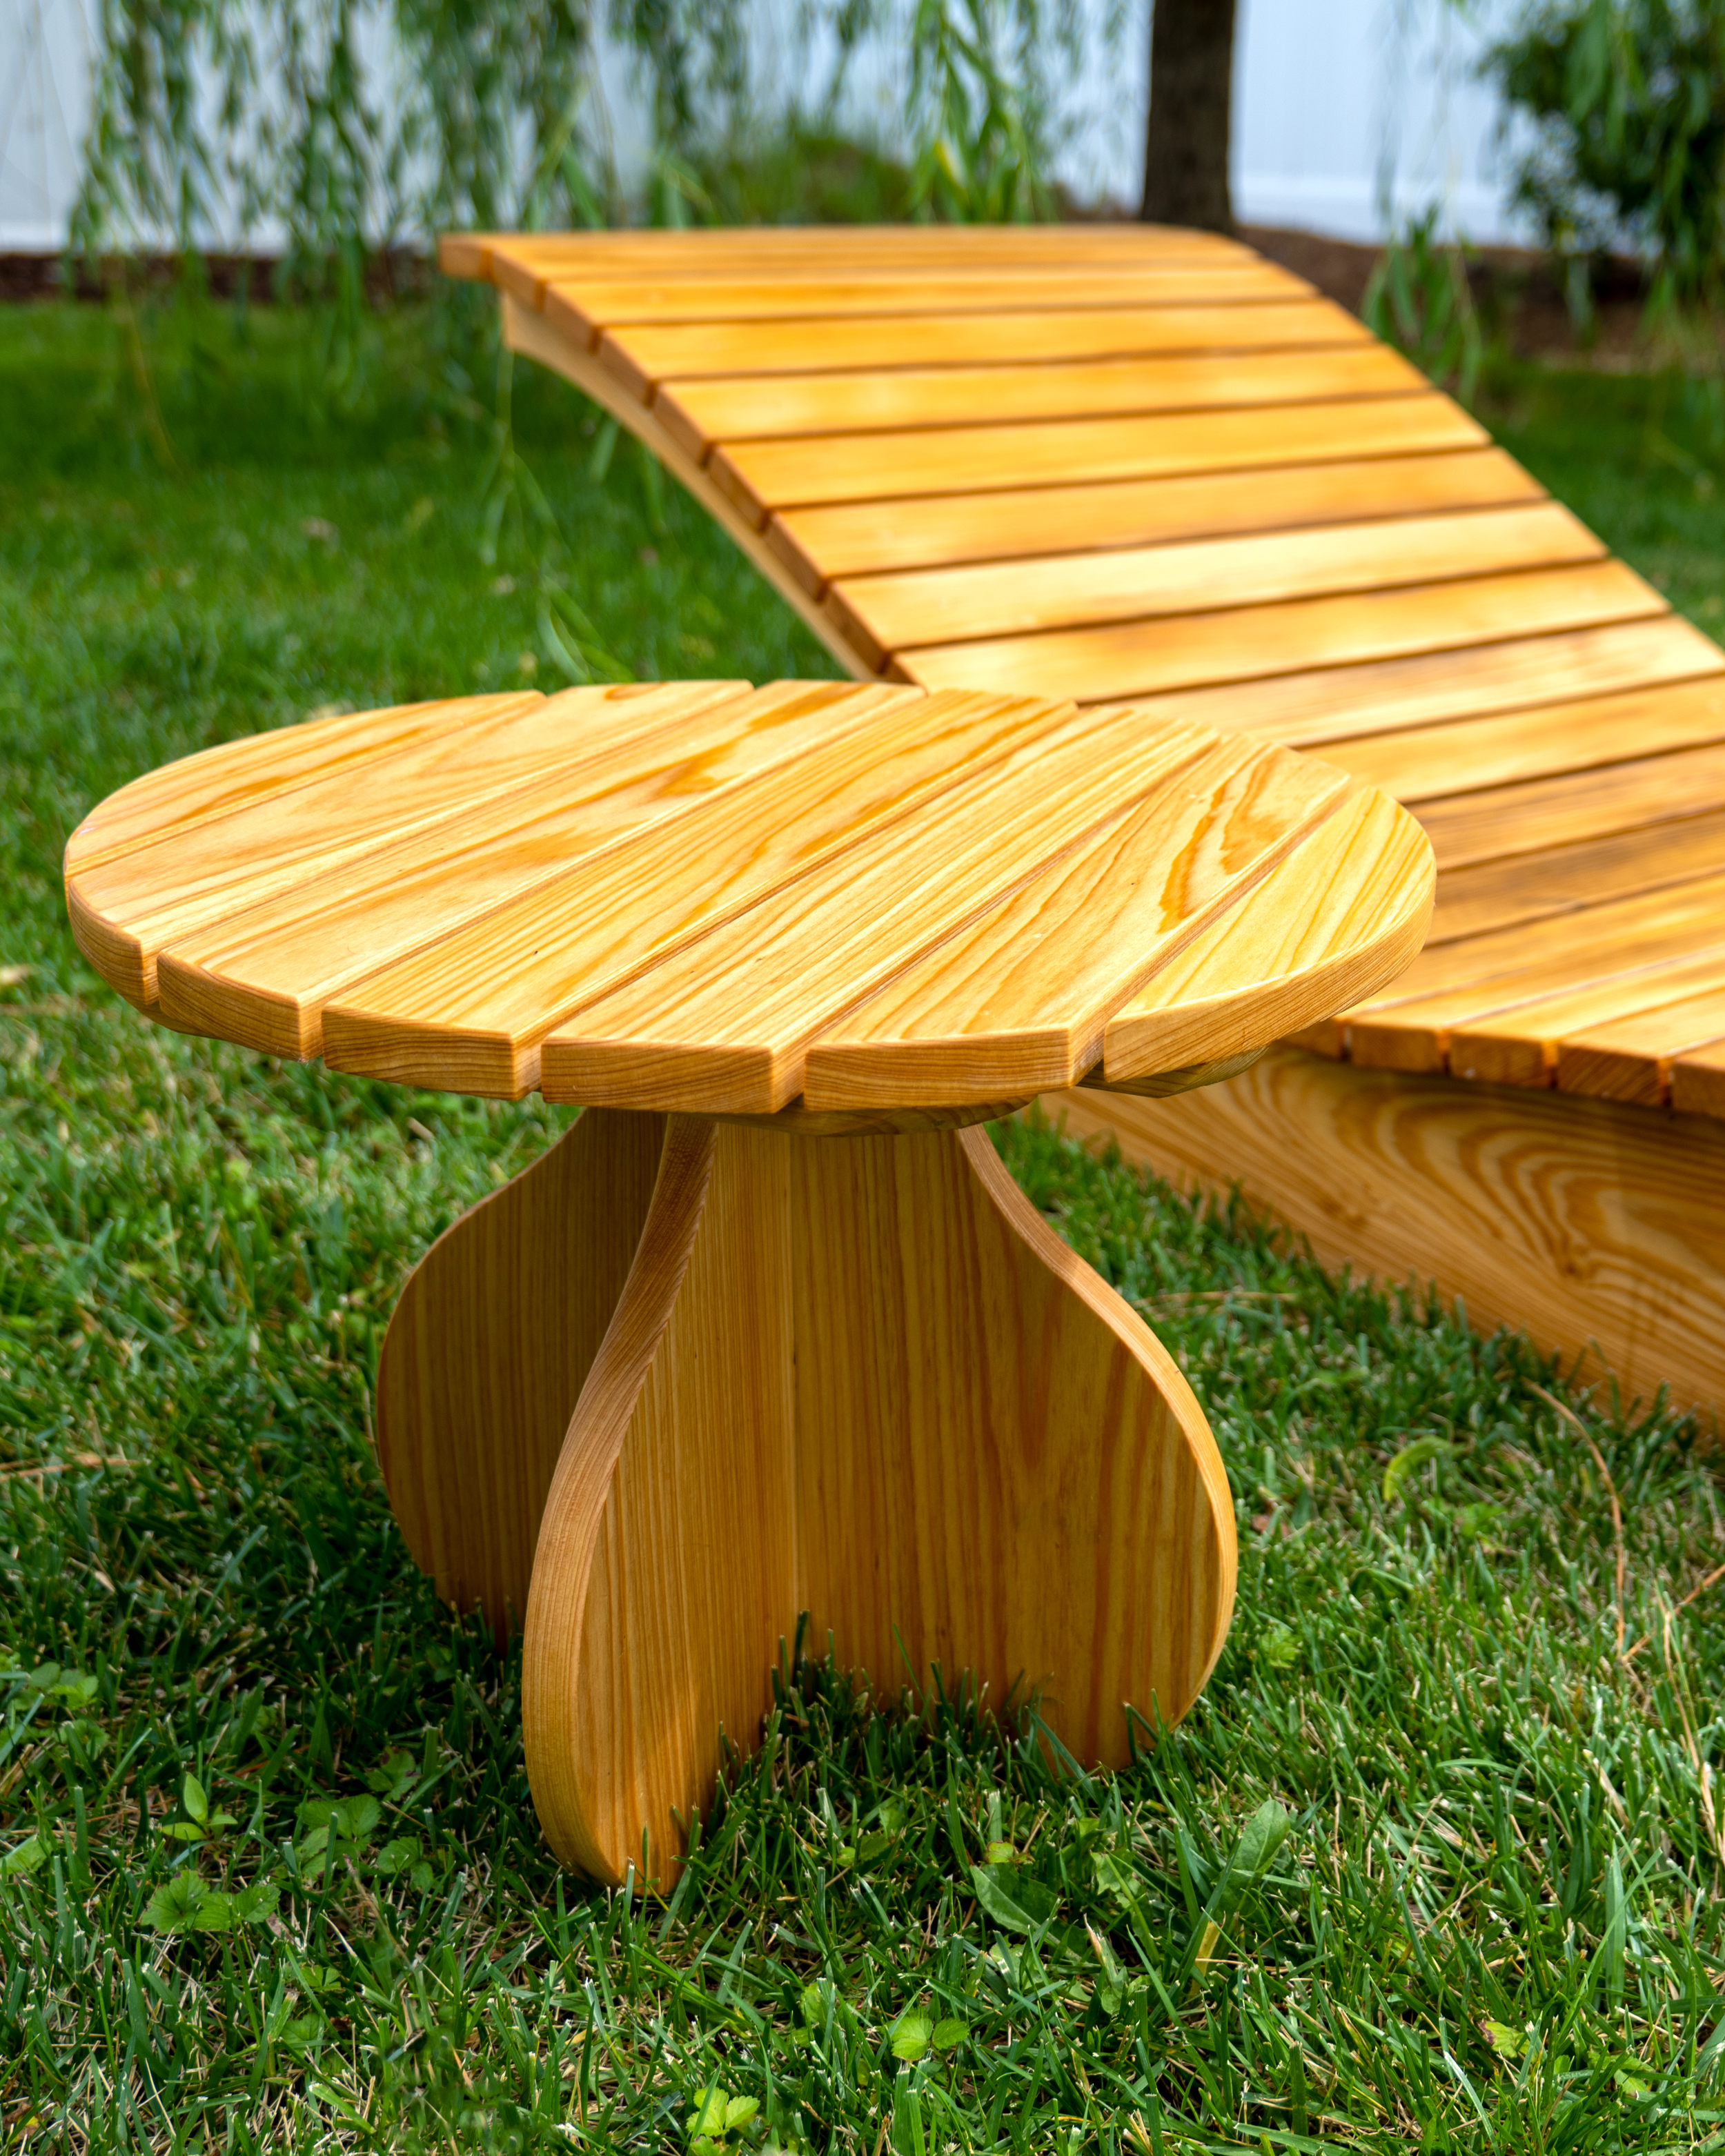
Building an Outdoor Side Table for my Chaise Lounge

One of my most popular projects has been the outdoor chaise lounge that I made last year. One thing that my wife complained about when she used it was that there was no place for her drink. So it was about time that I built a side table to go with it. I wanted the design of the table to compliment the chaise lounge with smooth flowing lines. And what I created is now referred to as our “toadstool table” since it is quite reminiscent of a mushroom. Which, if I’m being honest, just makes the project that much better since it will live outdoors.
This is a great weekend project that uses both template routing and circle cutting techniques that are easy to learn and give this side table a professional look.
If you're interested in building this side table, make sure you watch the full build video and get the plans here.
Using Cypress Wood for Outdoor Furniture
Choosing the right type of wood is essential to ensure your piece will last. If you're looking for a sturdy, long-lasting wood for your outdoor side table, cypress is a great option. This type of wood is naturally resistant to rot and decay, making it ideal for furniture that will be exposed to the elements. Additionally, cypress has a beautiful grain pattern that will give your table a unique look. I talk more about the other types of wood to use outdoors here, when I built the outdoor planters. So check that out if cypress is not your cup of tea or is not available in your area.
Using Template Routing for Woodworking

Template routing is a woodworking technique that allows you to create clean, precise cuts in your wood. This is especially useful when you're working with delicate materials or want to create intricate designs. Additionally, template routing is relatively easy to learn, even for beginners.
For this side table I used template routing for the base of the table. If you're new to woodworking, template routing can seem like a daunting task. However, it's actually quite easy once you get the hang of it. Here are some tips to help you get started:
Choose the right router bit for your project. There are many different types of router bits available, so make sure to choose one that is suitable for the material you're working with and the type of cut you want to make. I like using compression bits with a bottom barring because they tend to tear out less than strait bits.
Choose your template method. This will help you create clean, precise cuts. There are a couple ways to go about creating a template. In this project I used a CNC to create it, but I have also worked off of paper templates as well. Check out this quick video where I go over how to make a template without using a CNC. You can also check out the chaise lounge build where I use template routing without using a CNC.
Take your time. Rushing through your project will likely result in mistakes. So, take your time and focus on making each cut perfect.
With these tips in mind, you'll be template routing like a pro in no time!
Circle Cutting in Woodworking
Cutting circles at the bandsaw is a woodworking technique that allows you to create curved or circular cuts in your wood. This is especially useful when you're working with rounded or irregularly shaped pieces. Additionally, cutting circles at the bandsaw is relatively easy to learn, even for beginners.
To use a circle jig, simply attach it to your workpiece at the center point of your circle radius and align it with the blade of your bandsaw. Then, start the saw and guide it around the jig to cut your circle. It's really that simple!
There are other methods that you can use to cut circles besides setting up a jig, but it will take a bit longer. You can create a template and cut it out at the router table or use a jigsaw and sand back to the circle. Choose whichever method you are most comfortable with and will work best for you. But I will say, once you use a circle jig, you won’t go back to the other methods.


Finishing the Project to Last
When you're working with wood for outdoor projects, it's important to use a finish that will protect the wood from the elements. Epoxy is a great option for this because it creates a durable, water-resistant barrier. Additionally, epoxy is easy to apply and will give your project a professional-looking touch. I only applied epoxy to the end grain at the bottom of the table base that would come in contact with the ground. This will prevent moisture from being sucked up into the wood. The rest of the piece I used Osmo UV protection oil. This is the same oil that I used for the outdoor planters and it has held up nicely. I even sanded back and refinished the outdoor chaise lounge with this same protection oil so that it would match the table.
Building an outdoor side table is a great way to add storage and style to your patio or deck. By using template routing and circle cutting techniques, you can create a beautiful table that will last for years. And, by choosing the right wood and finish, you can protect your table from the elements and give it a professional-looking finish. With these tips, you'll be able to build an outdoor side table that you can be proud of!
Don’t forget to check out the full video for the project and let me know if you have any questions about the build!