Building a Modern Sofa Table | C-Table
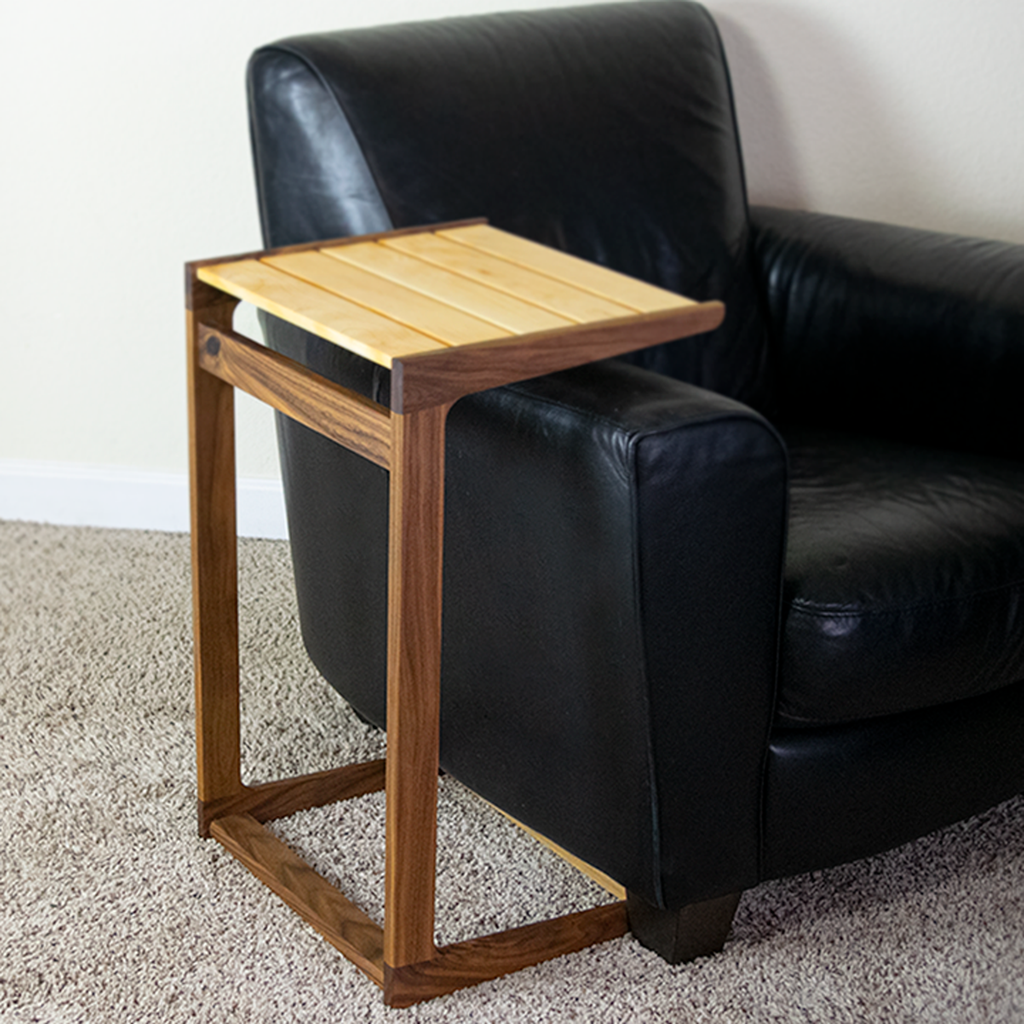
This Modern Sofa Table was a ton of fun to build! It is a perfect sofa side table and fits the mid-century modern style to a T. To build this c-shaped table, I used many different woodworking techniques. The slats are held in with dominos, but you could use dowels or attach a thin strip on the underside to support the top. I created router templates and used a flush-trim bit at the router table to create the shapes for the tapered legs and base.
I used walnut and maple hardwood, and the contrast from the tabletop to the base looks great. I designed it to sit right above the height of the arm on my couch. If you decide to make it, be sure to measure your couch height and adjust it to fit your setup. I made this one go right over my couch's arm, but your size probably differs. So keep that in mind.
Check out the plans so you can make your own modern sofa table!
Project Plans: https://bit.ly/ctableplans
Supplies
Hardwood of your choice
Jigsaw
Table-saw
Router and Router Bits
Domino or Dowels
Sand Paper
Wood Glue
Clamps
Finish
You can find the full scale templates here: https://bit.ly/ctableplans
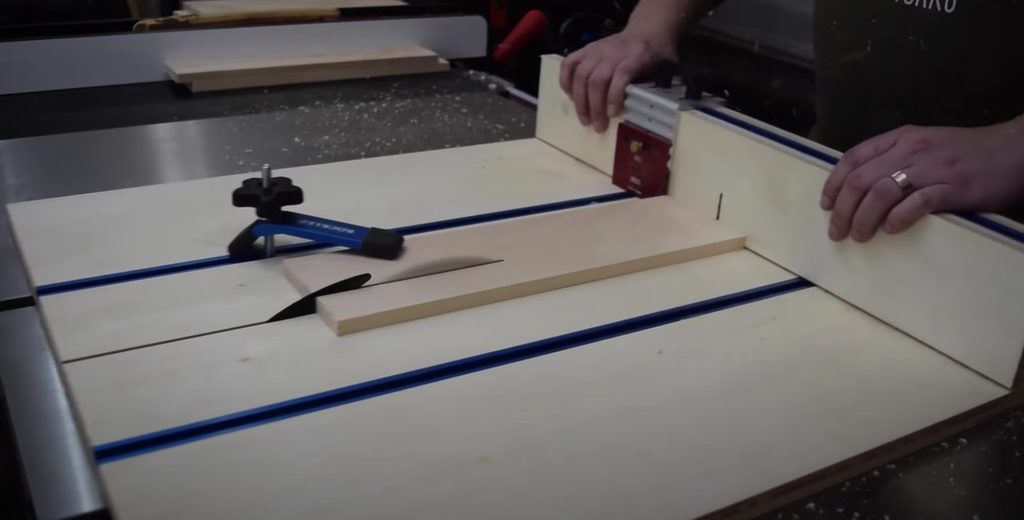
MILL LUMBER AND CUT TO WIDTH

Mill down the boards to their final thickness.
Cut them down to their final width
Use a crosscut sled with a stop for repetitive pieces


CUT THE TAPERS AND MAKE VERTICAL LEG PIECES


Mark out a template to set up a sled for the table saw.
you will have 2 sleds in total - one for the top and one for the base.
Screw in some plywood pieces to hold the boards in place.
Holding the sled flush against the fence in the same initial cut setting, make the cuts.
Be mindful of you finger placement here. if you are not comfortable holding the piece down, you can screw in a few hold down clamps.
Rough out the vertical leg pieces at the band saw.
You can also use a jigsaw here.
Make sure to leave the pieces long to avoid any tear out at the router table.
Attach the template to the vertical leg pieces.
Finish the vertical leg pieces at the router table or hand held router with a flush trim bit.


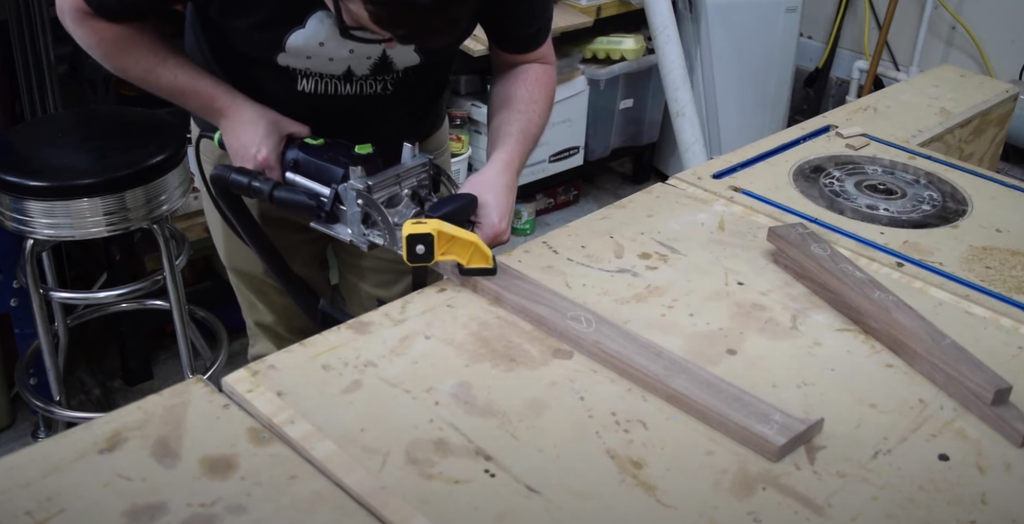
CUT THE MITERS FOR TOP AND BOTTOM OF THE LEGS

Mark out the miter cuts for the top and bottom of the legs.
Use a miter gauge to cut the miters into the leg at the table saw with a crosscut blade.
Take light passes and just sneak up on the line.


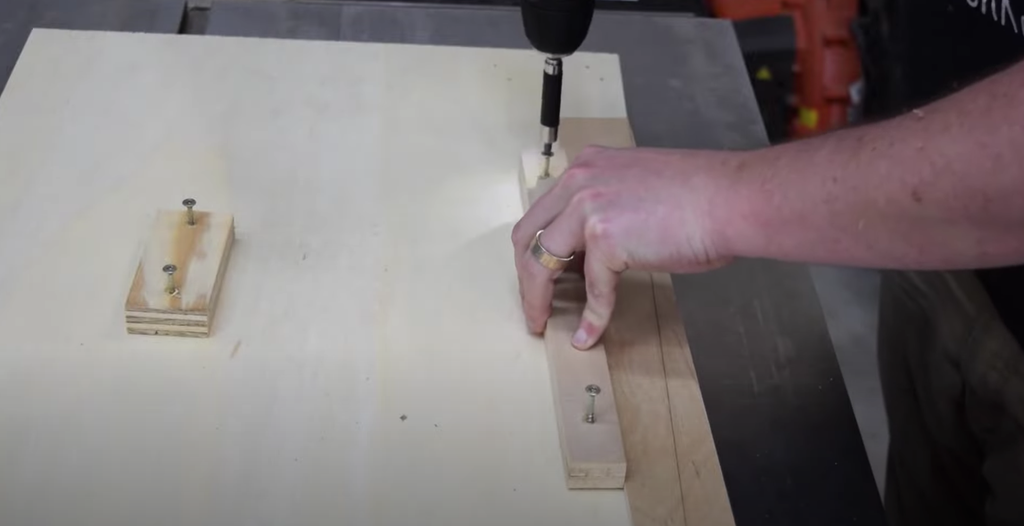
PLUNGE MORTISES FOR LEGS AND SLATS


Mark out the placement for the dominoes or dowels.
Plunge the mortises.
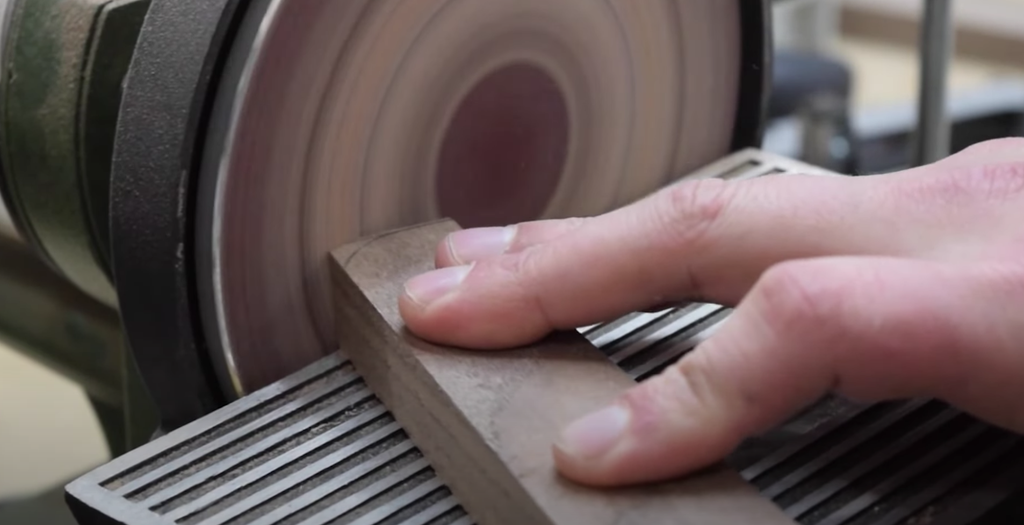
Mark out the curves for the tips of the horizontal pieces.
Round off the curved edges with a disc sander.
Plunge the mortises into the horizontal pieces.
Mark out the domino placement on the slats.
Test the fit of the pieces.
To attach the tabletop slats I used dominos. You could also use pocket screws or a cleat along the bottom to support the slats.


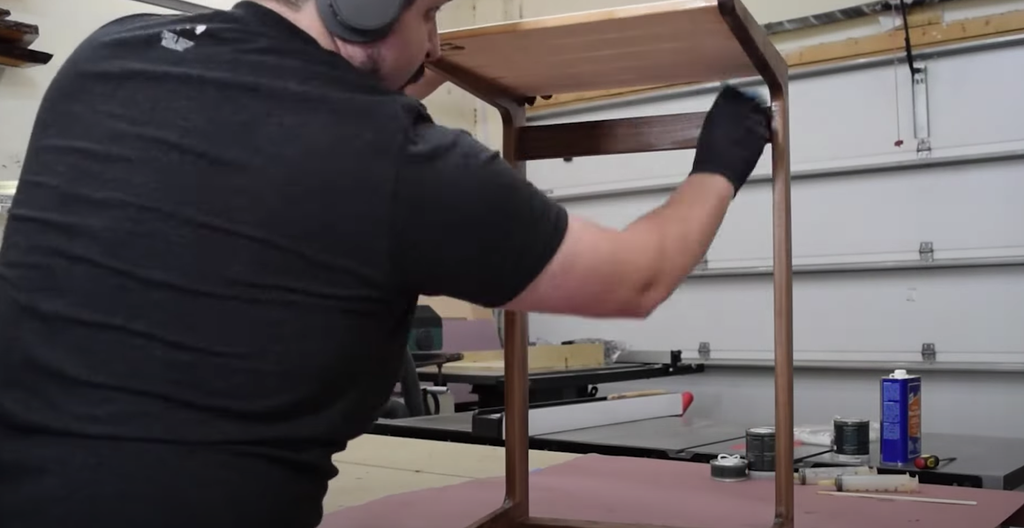
ASSEMBLE AND GLUE THE LEG PIECES

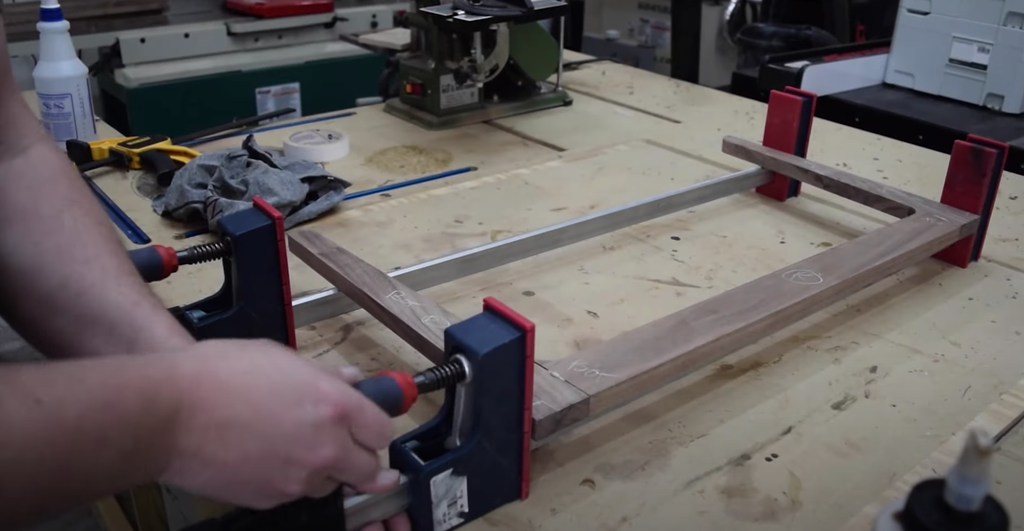
Glue and clamp the leg assemblies together.
MAKE THE STRETCHERS
Cut the stretchers to their final length.
Mark out the placement for the stretchers.
Cut in the mortises with the domino.


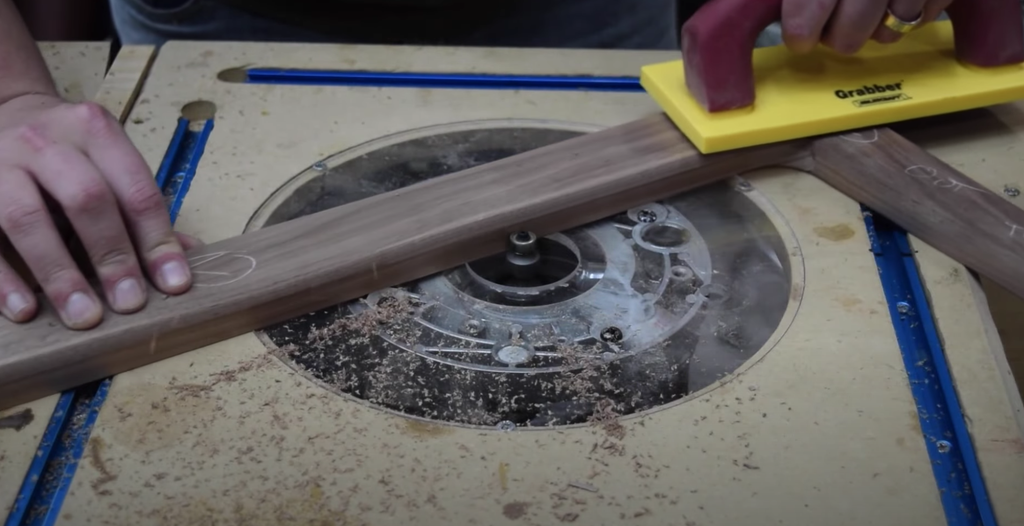
ADD ROUND-OVERS AND SAND ALL PIECES

Clean up the curve on the leg joints using a sander.
A thick dowel wrapped in sandpaper also works well here.
Use a large round-over bit, add an edge profile to the outside of the table legs.
Stop at the bottom of the base to give the table more surface area to contact the ground.
Do the same to the lower stretchers.
Use an 1/8" round-over bit for the outside edges of the legs as well as the upper stretcher and slats.
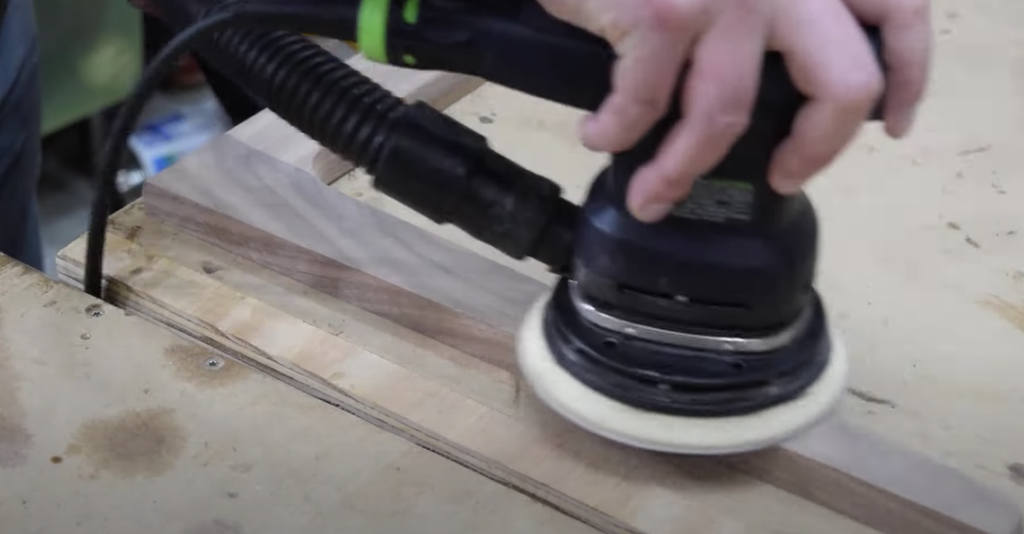
Sand all the pieces up through 220 grit.
Hand sand the round-overs to clean up any router marks.


GLUE-UP AND FINISH THE C-TABLE

Pre-glue the dominoes into the slats and stretchers.
Glue and clamp the rest of the piece together.
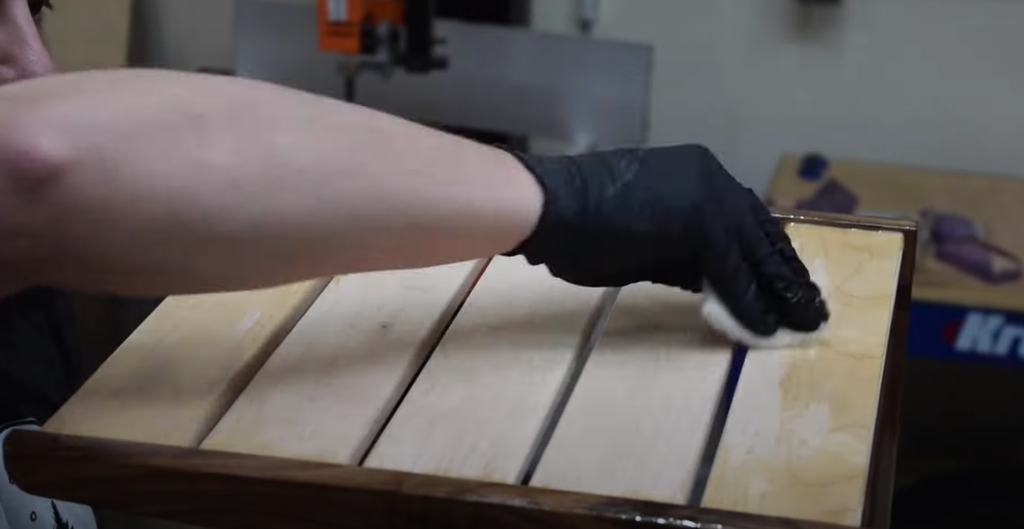
Apply the finish of your choice.
It's time to give your beverages a place to rest!


IT’S TIME TO GIVE YOUR BEVERAGES A PLACE TO REST!
The approximate cost for building this C-table as designed with all of the bells & whistles is about $60 (this will, of course, vary for everyone).
Tag me on social if you're building this project (@timberbiscuitwoodwork on Instagram) with the hashtag #BiscuitBuild - Happy building!