Building a Japanese-Inspired Bench

Today, I am building a modern bench with a shelf that has a unique lean to it. It is inspired by the simple yet elevated Japanese design style. This bench would be great for an entryway or double as extra seating and a shelf in smaller spaces. The design relies on a bit of physics and a couple of wall anchors to stay standing.
The angles and joinery on this bench are excellent- taking a simple bench to the next level. The bench seat, bench backrest, and shelf all feature a slatted design to keep the feel of the design light but also add rigidity. I chose to use hard maple for this bench for the same reason, but you could use any hardwood you like for your own build. Let me know what you think!
This woodworking project was a bunch of fun! And if you have any questions, I’d be happy to answer them in the comments (I reply to everyone). Enjoy the build!
Digital Project Plans: https://bit.ly/benchdigitalplans
Project Plans & MDF Templates: https://bit.ly/benchplansplusmdftemplates
Supplies
8/4 Hardwood
5/4 Hardwood
Table Saw
Circular Saw (Track Saw Optional)
Router
Router Bits
Clamps
Wood Glue
Domino or Dowels
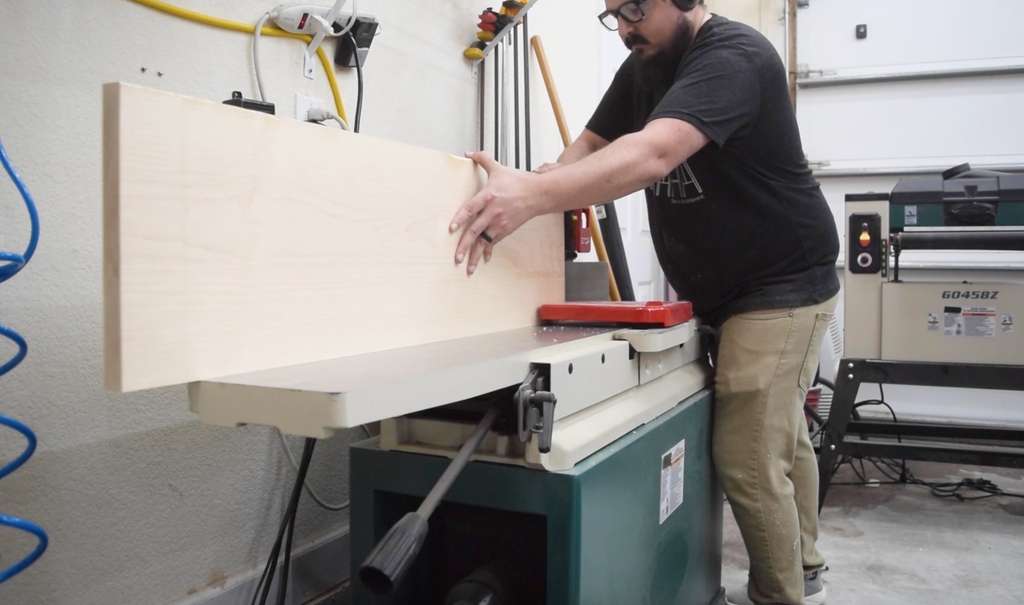
MILL LUMBER

Skip plane the boards to their final thickness using a planer. Then, at the jointer, put one square edge on all of the boards. My jointer did leave me with a little hand planing to do since the beams are so long.

CUT BOARDS TO FINAL DIMENSION


Next, cut the boards to their final dimension. I used a jigsaw to rough out the boards because the pieces were so wide and it allows you to avoid any spring in the lumber.
Cut the Beams to Size
Then rip the boards down at the table saw. Make sure to use a consistent feed rate when making these long rip cuts to avoid burning.
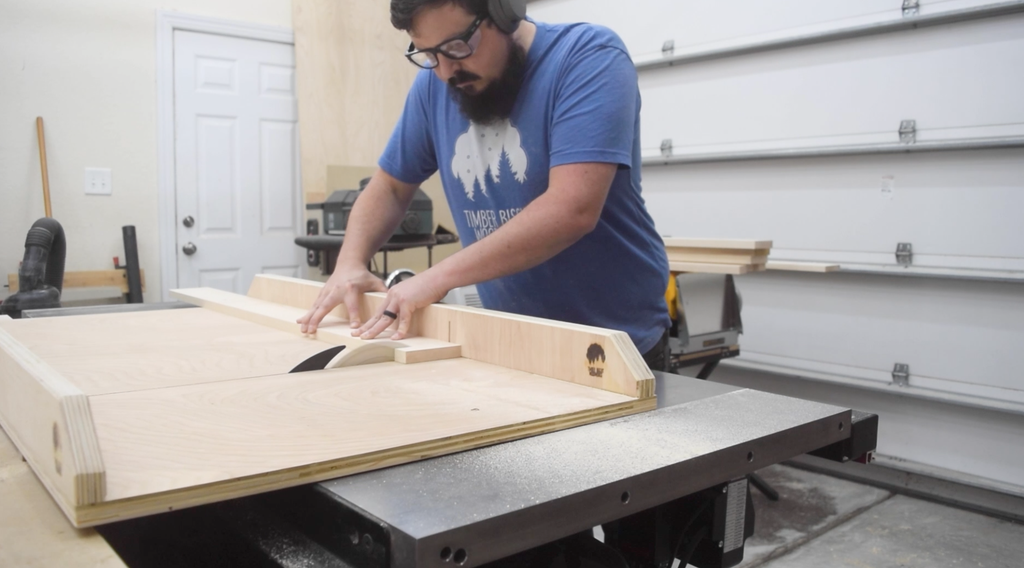
Cut the Slats for Bench, Backrest, and Shelf to Size
Rip the boards at the table saw then cut the boards to their final length using a crosscut sled.


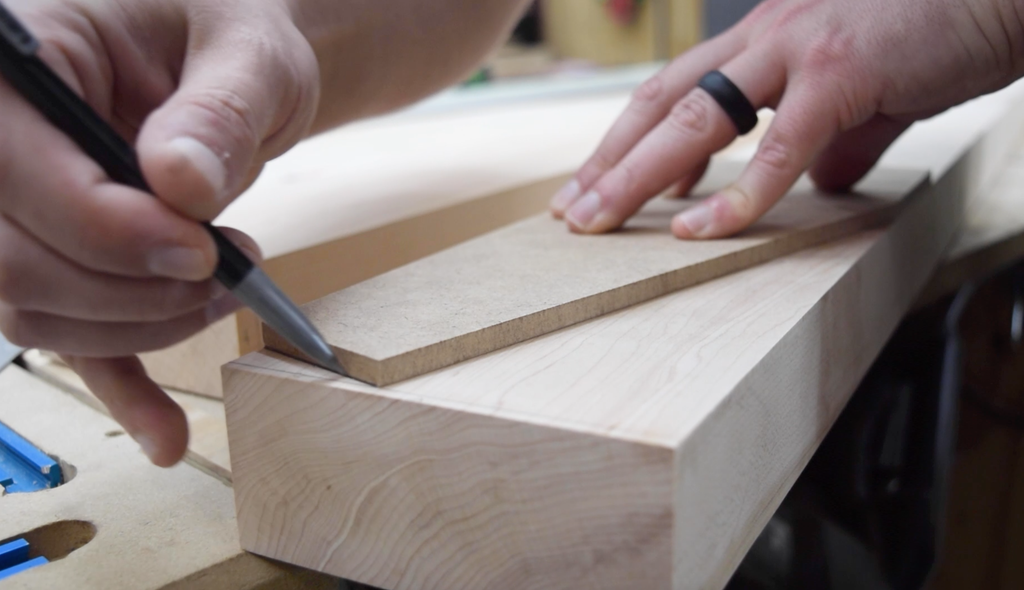
MAKE THE END CAPS

Cut the end caps to their final length and width (final shape will be done next). Then make the templates for the end caps using MDF. Next, add reference blocks to a piece of plywood to create a table saw sled using these templates. Then cut the end caps to their final shape. Adjust the reference blocks and repeat this process for the remaining end caps.


MAKE THE MITERED ANGLES FOR THE SIDE STRUTS
Using a track saw (or circular saw) and miter gauge, make the first angled cut for the bottom of the strut. Then, using the MDF template, mark out the location for the upper angles. Cut the angle with a track saw.


CUT THE DADOS INTO THE BEAMS

Sand down the beams and use a card scraper to get the pieces as close to finished as possible, so you don't lose too much material from sanding after the joinery is cut. Use a plunge router and template to flush cut the 4 dados - going 1/4" deep for each pass to reach a final depth of a 1/2". If you have any uneven bits, you can clean that up with a chisel.


ADD THE MORTISES AND DRILL HOLES
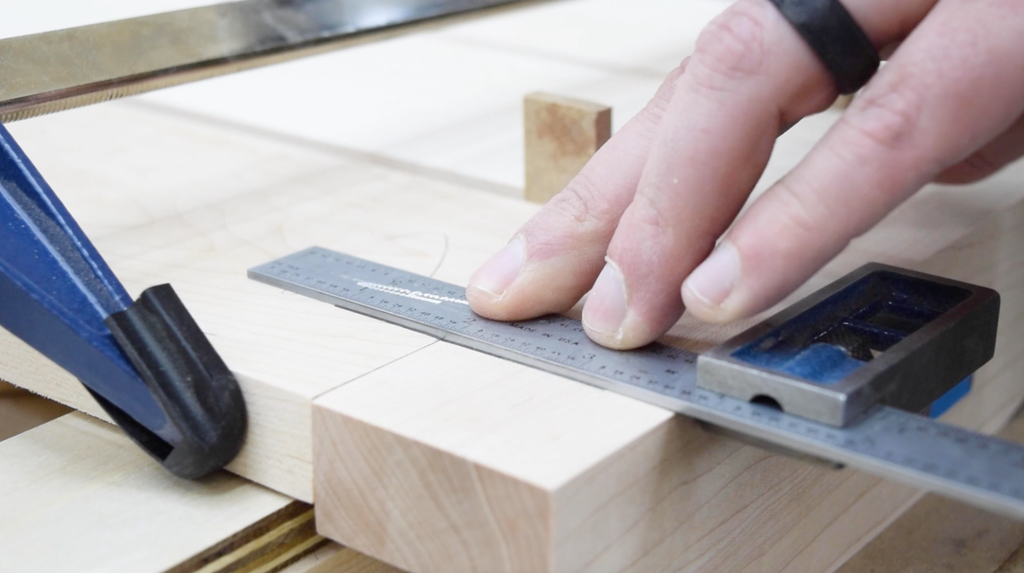
Mortises

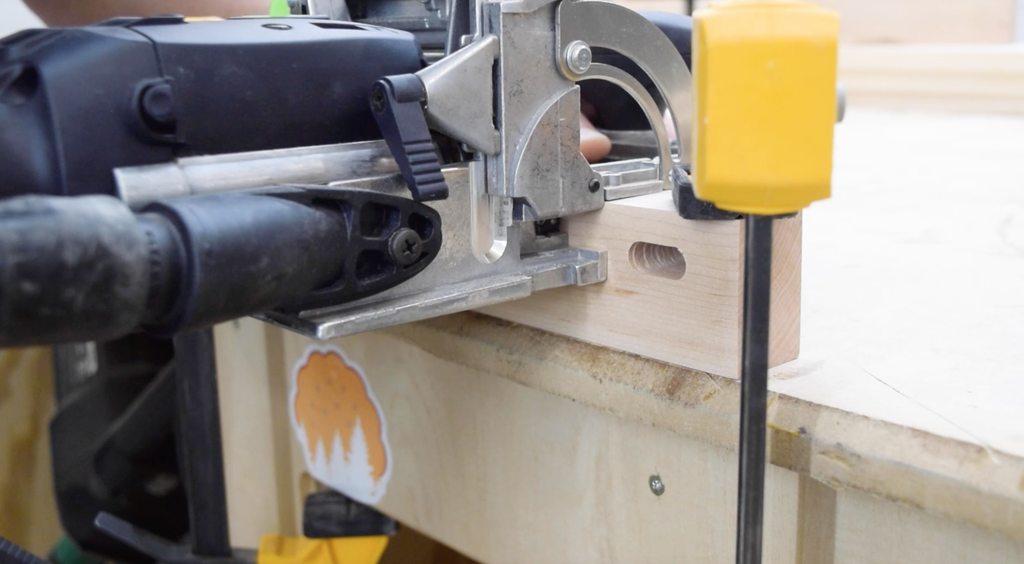
Layout the placements of the mortises for the slats and plunge the mortises. Once all of the slats have their mortises, add them to the end cap pieces. Offset these by 3/16" to create a more dramatic joint and add some visual interest. Then add 2 mortises into each beam for the backrest end caps.
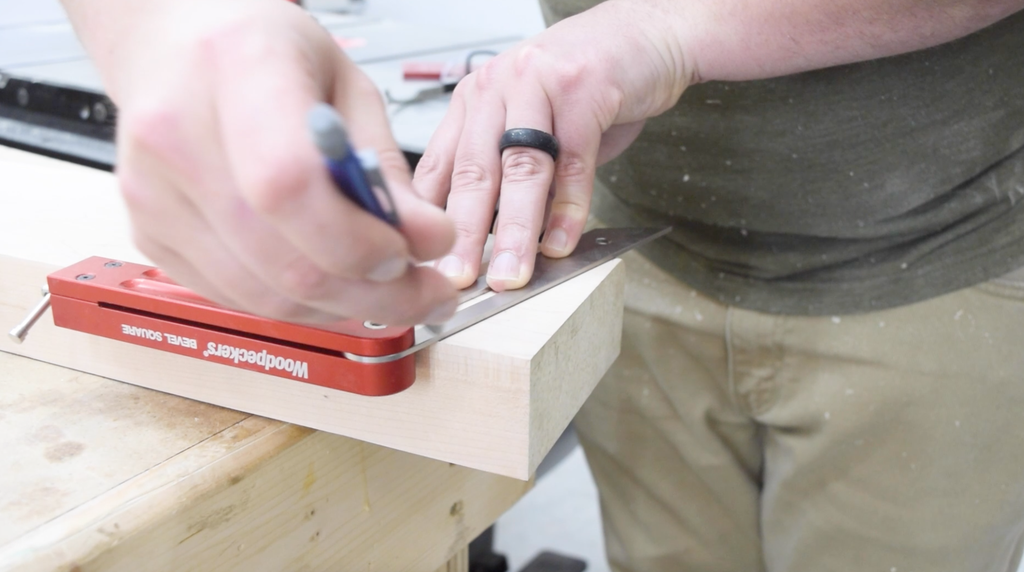
Drill Holes
You can drill these holes using a drill guide. Since I don't have one of those, I used a bevel gauge to help keep the drill bit in line. Flip the beam over drill some 3/8" holes to conceal the screws and accept plugs.


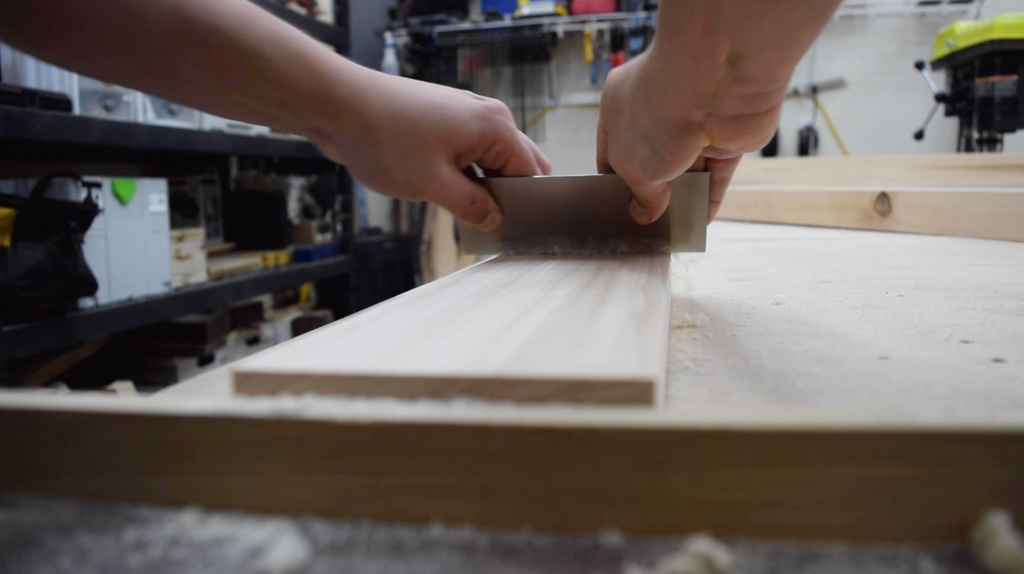
FINAL SANDING AND GLUE-UP

Final Sanding
Give all the pieces a final sanding and finish them up with a card scraper. Then, round over all of the edges. I used a corner plane to do this.
Glue Up
Glue up the bench, backrest, and shelf first using wood glue and clamps. Once those have dried, assemble all of the remaining pieces.
Finishing
Apply your finish of choice. I chose to go with a plant-based oil and wax blend.


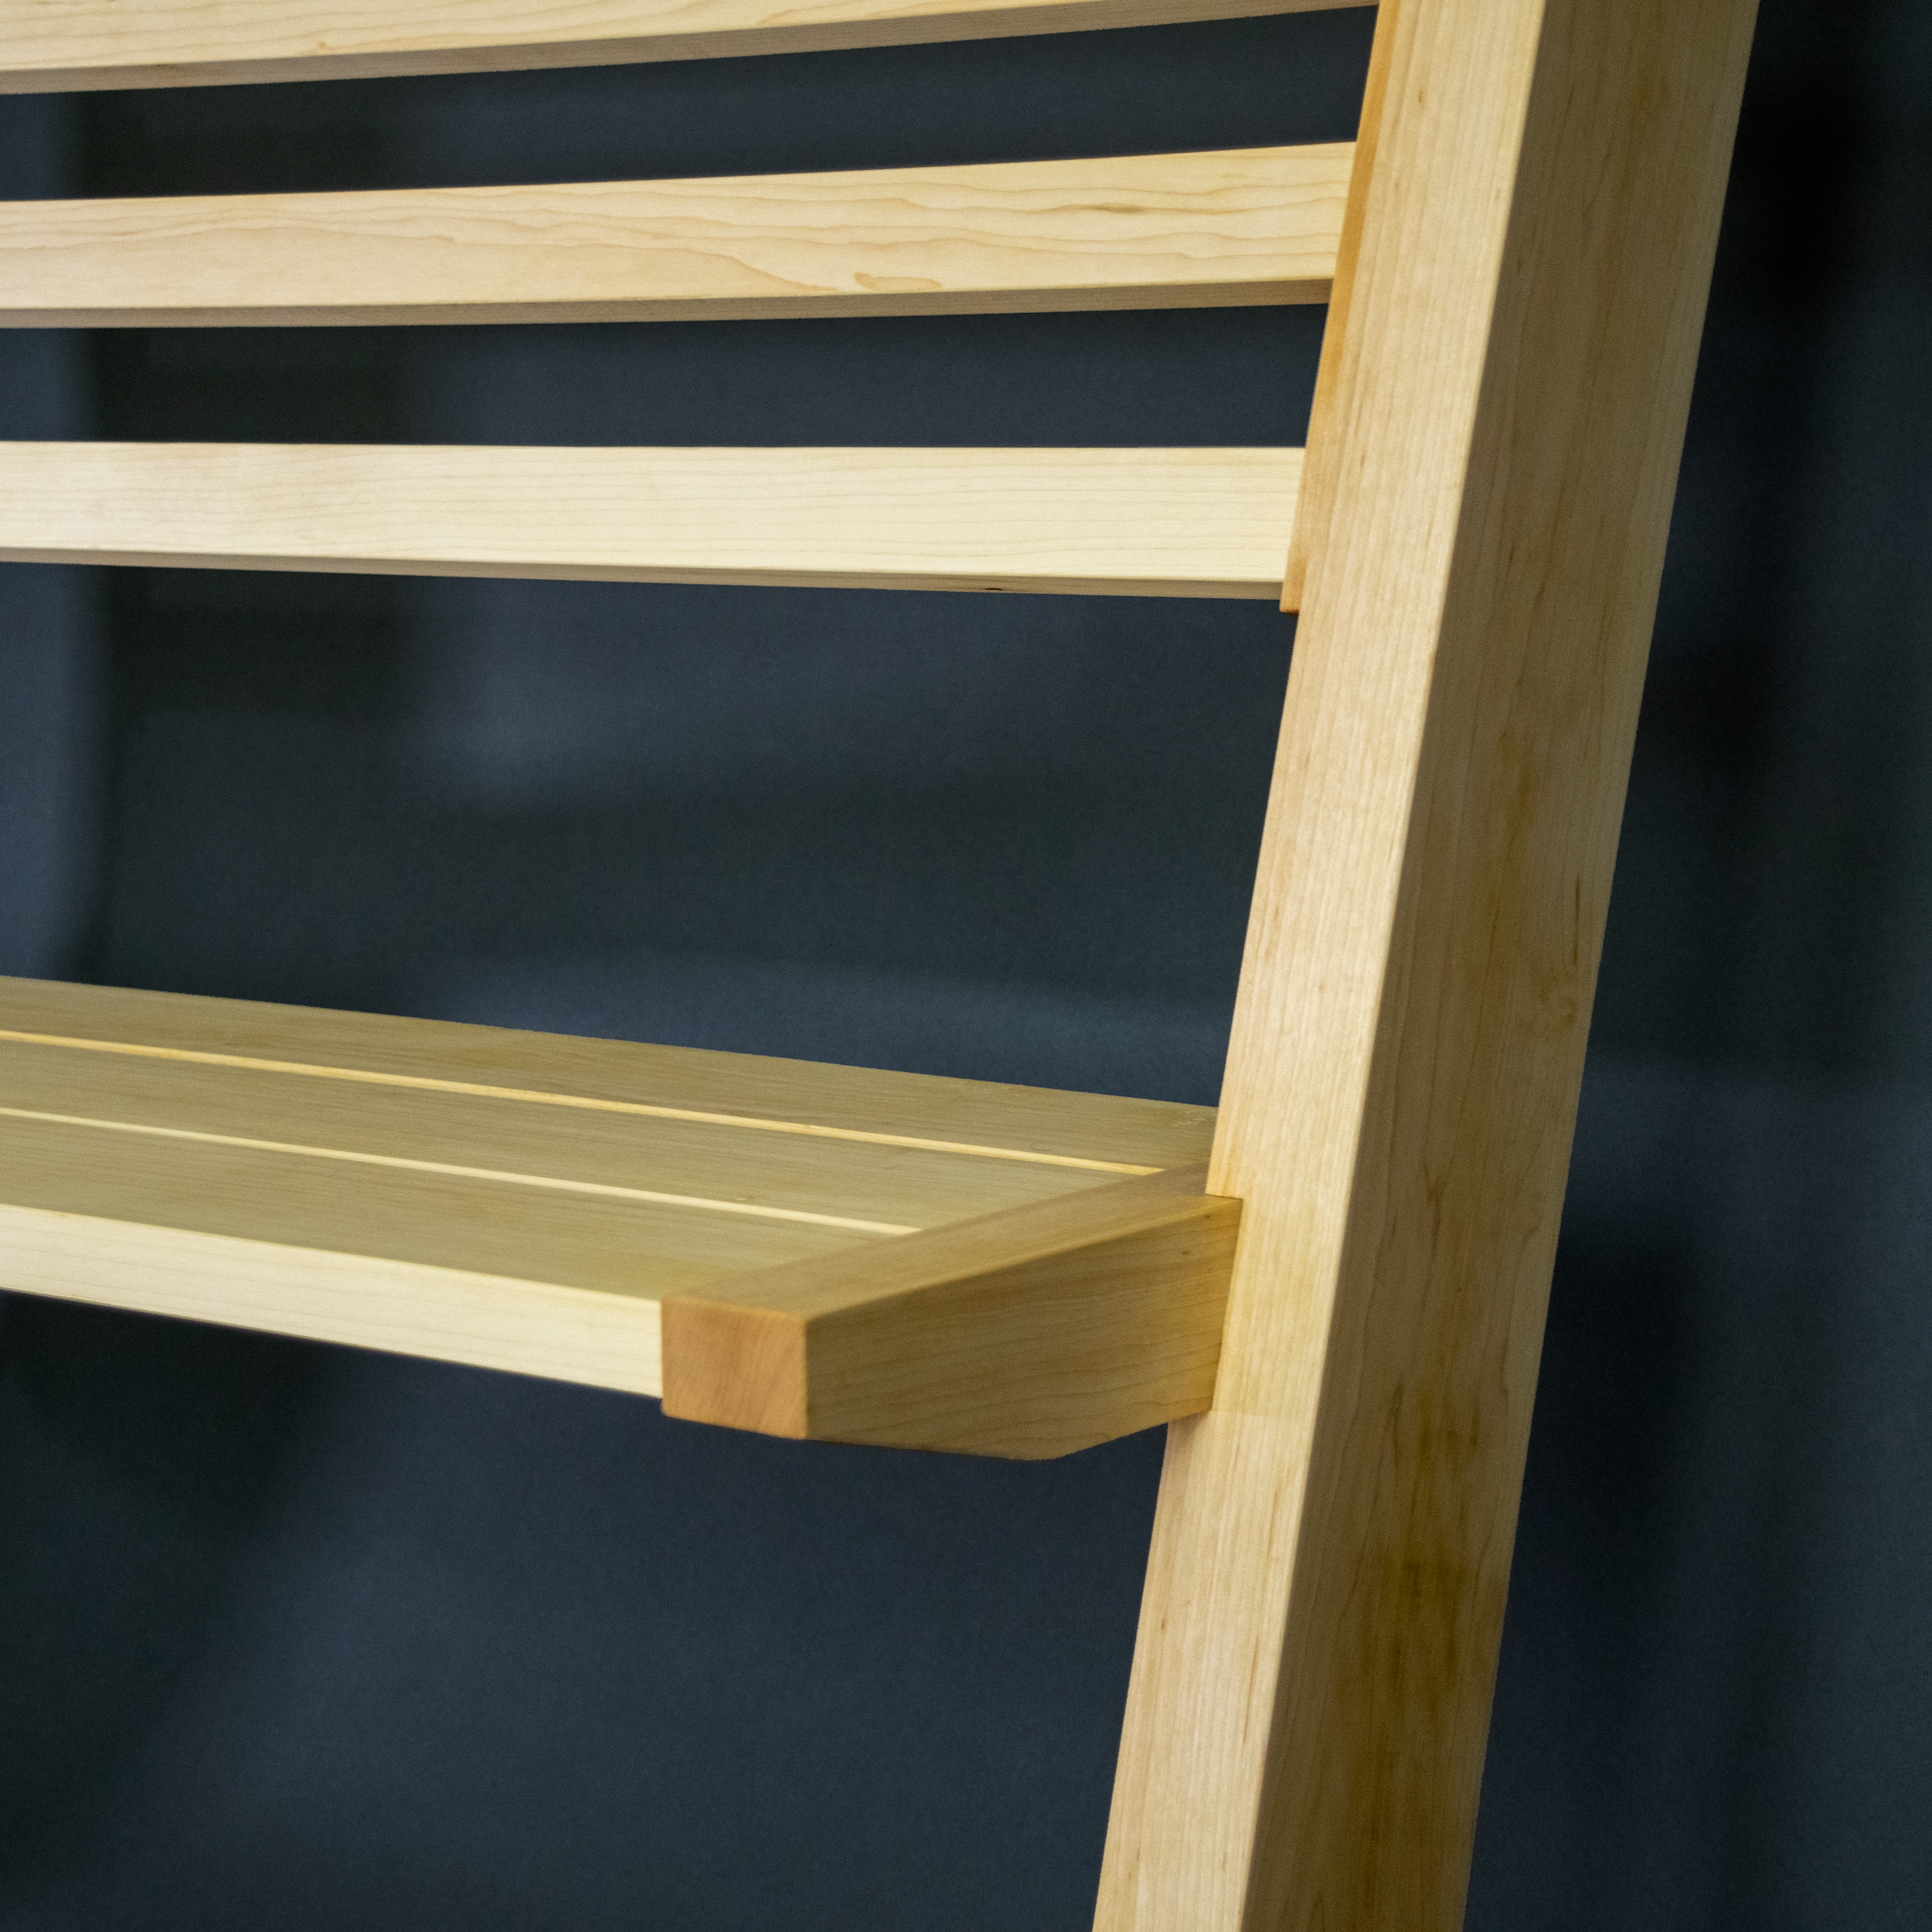

Now go and enjoy your new and unique wall bench!
The approximate cost for building this C-table as designed with all of the bells & whistles is about $60 (this will, of course, vary for everyone).
Tag me on social if you're building this project (@timberbiscuitwoodwork on Instagram) with the hashtag #BiscuitBuild - Happy building!