Building a Foldable Puzzle Mat


My son has been really into puzzles lately and this portable puzzle mat and board game table locks into a lazy susan base and was a lot of fun to build. I have seen plenty of gaming tables or puzzle boards out there, but nothing that could easily be folded and stored. This foldable piece is beautiful, sturdy, and functional as it can be used with or without the lazy susan base. And the folding butler hinges means we can use it pretty much anywhere. I know my son is going to love it as he builds and plays for years to come. Let me know if you have any questions down in the comments!
Project plans: Puzzle Mat Plans
Supplies
4/4 Hardwood of your choice
Plywood for the board and lazy susan
Butler hinges
Clasps
Handle
Table Saw
Sand Paper
Finishing Oil
Router and Bits
Lazy Susan hardware
Drill
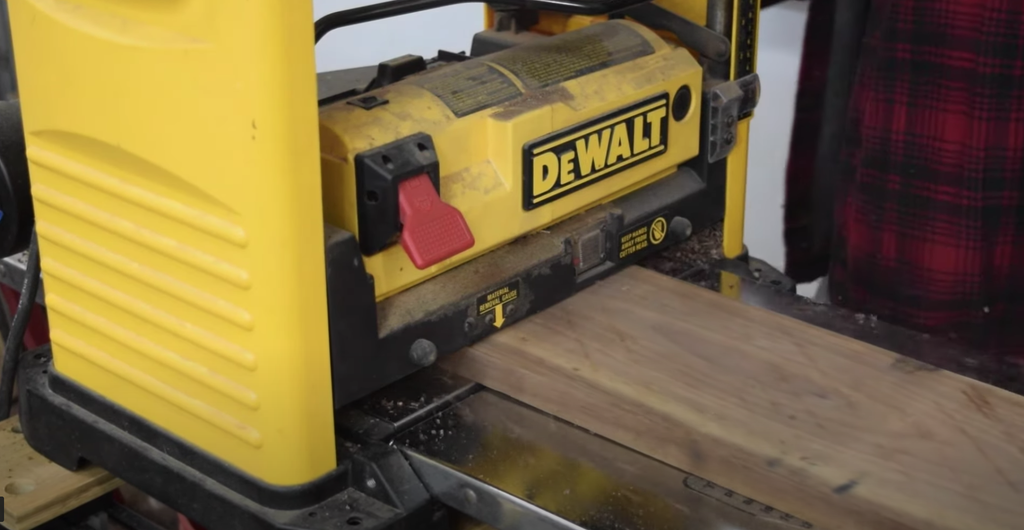
MILL THE LUMBER

Cut some four-quarter walnut lumber to rough length.
At a jointer, mill one face and one edge flat.
With the flat side down, plane the top at a planer.

MAKE THE FRAME PIECES

Using a table saw, rip the board into 2" strips
Using a miter gauge, cut a 45 degree miter onto one side of all 4 boards
Flip the boards and cut a mirroring 45 degree miter onto the other side.
Using a ripping blade, rip a 1/2" rabbet along the inside edge of the frame.
Adjust the fence and make a second cut for the rabbet.
Make sure the off-cut faces away from the fence when ripping the board to avoid kick back.
Using a crosscut sled, cut 2 of the mitered boards in half. These will be the sides for the hinged frame.
Cut these to the final length


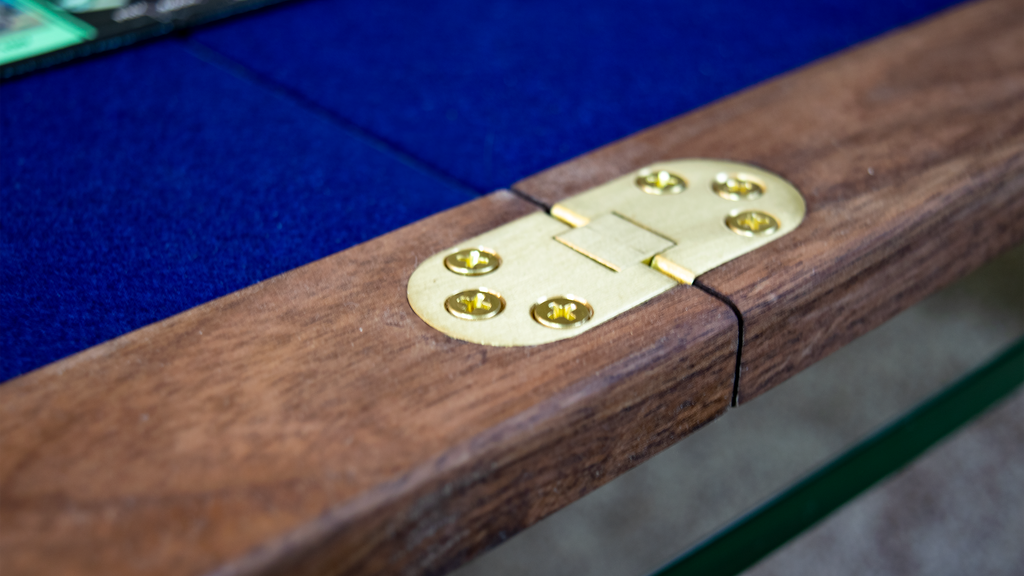
ROUTING OUT THE BUTLER HINGES


Use a router jig for the butler hinges. On one of the hinge frame pieces, carefully cut around the template and remove the material for the face of the hinge.
Referencing the same point as the first jig, use another to route in the deeper channel for the hinge pin.

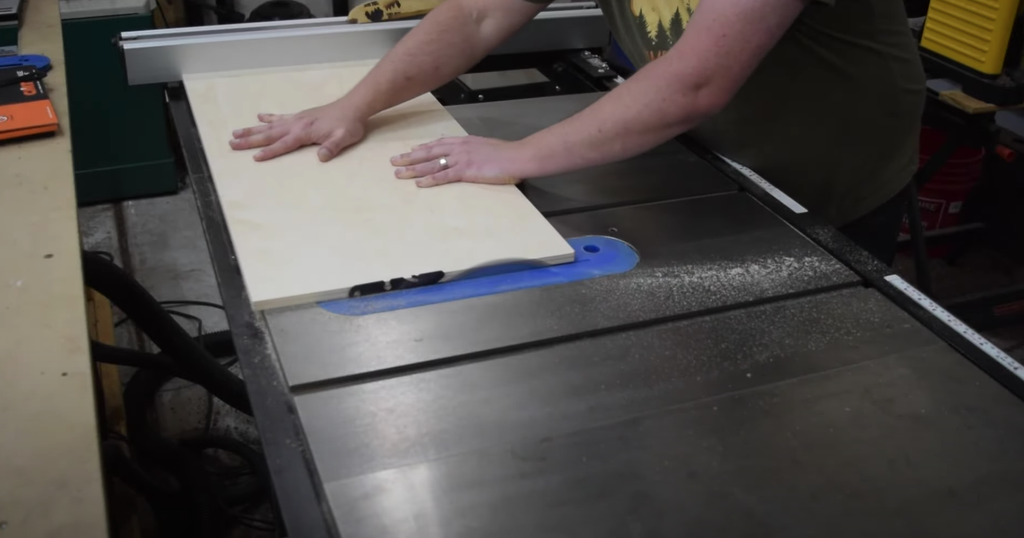
CUT OUT PANEL PIECES AND GLUE TO FRAME

Using 1/2" plywood (I used baltic birch), cut it down to match the dimensions of the interior frame. You should have 2 pieces here for it to be foldable.
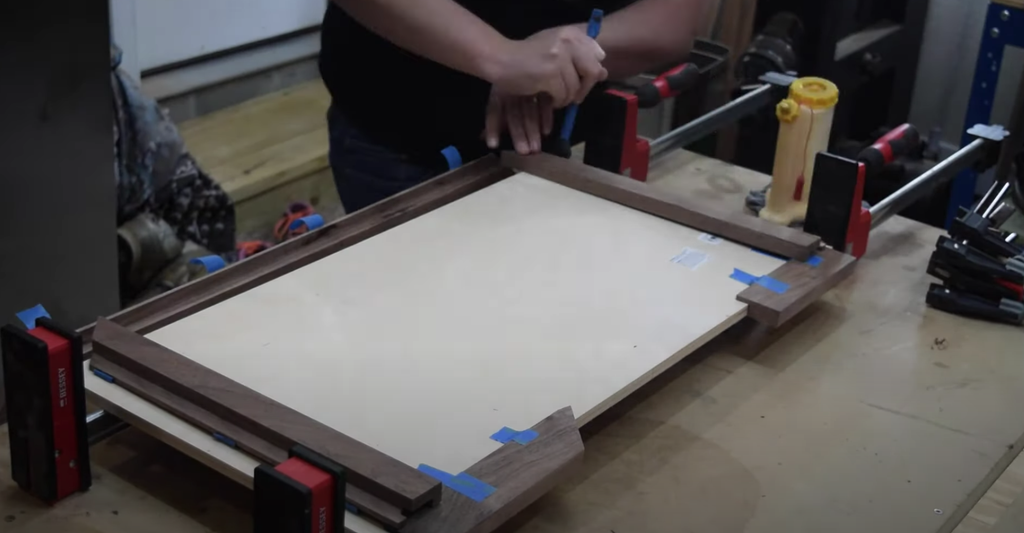
Glue the frames to the panels.

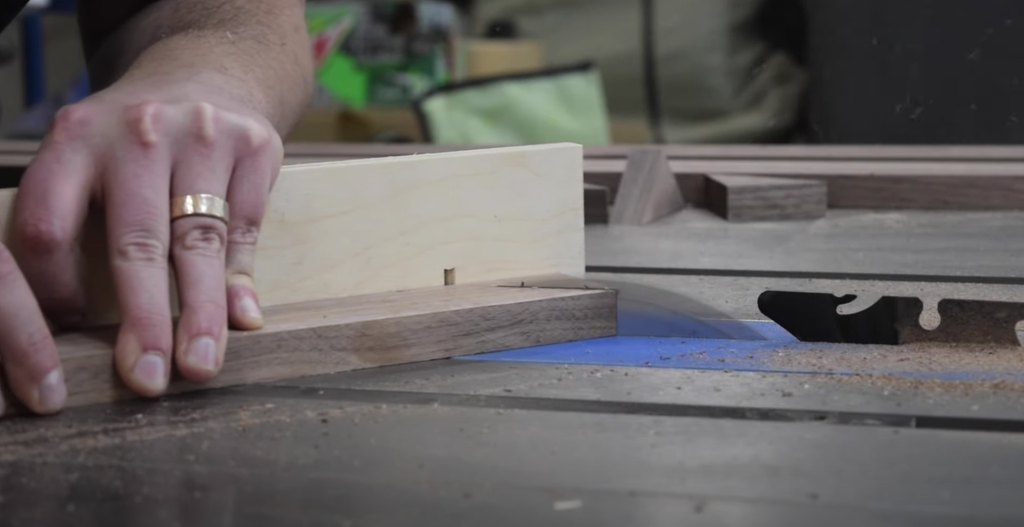
ADD THE SPLINES


Raise the table saw blade so that the cut depth and cut length were equal.
Using a stop block, cut the grooves for my splines.
These are both for strength and added design.
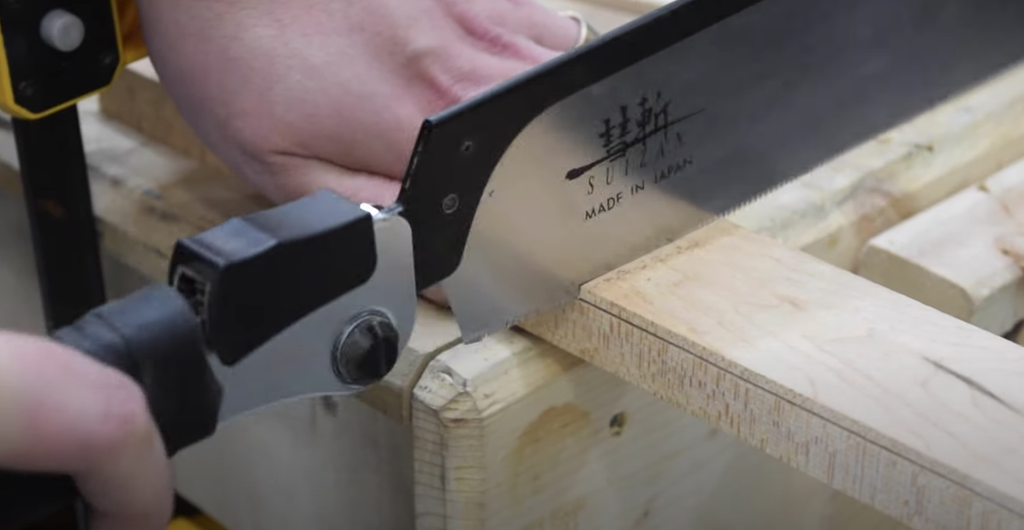
Cut out the splines at a bandsaw for the top end cuts, then use a pull saw to remove the rest of the material.
I used maple for the splines for contrast here, but use whatever type of hardwood you like.
Mark out the triangles for the splines and cut them out at the bandsaw.
Glue the splines into place.
After the glue is dry, use a flush trim saw to cut away the excess.
Make sure to cut away from the corner when trimming the spline to avoid blowing out the corner.


ADD THE BUTLER HINGES AND ROUTE THE FRAME


Clean up the rounded corners from the router for the butler hinges using a chisel.
To attach the hinge, use a self-centering drill bit to drill in pilot holes.
Then use a screwdriver to drive them home.
Clamp the hinge to the frame to hold it in place when you drill the pilot holes for the opposite side to connect the two pieces.
Test the hinge's functionality.
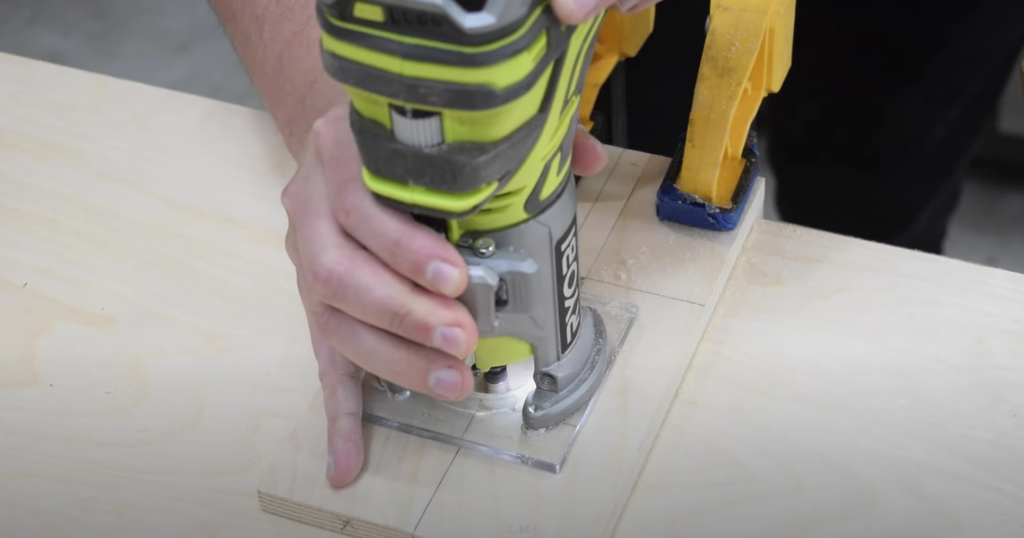
Using an eighth-inch round-over bit, soften all the top edges of the frame making sure to avoid the area where the locking clasps will go.

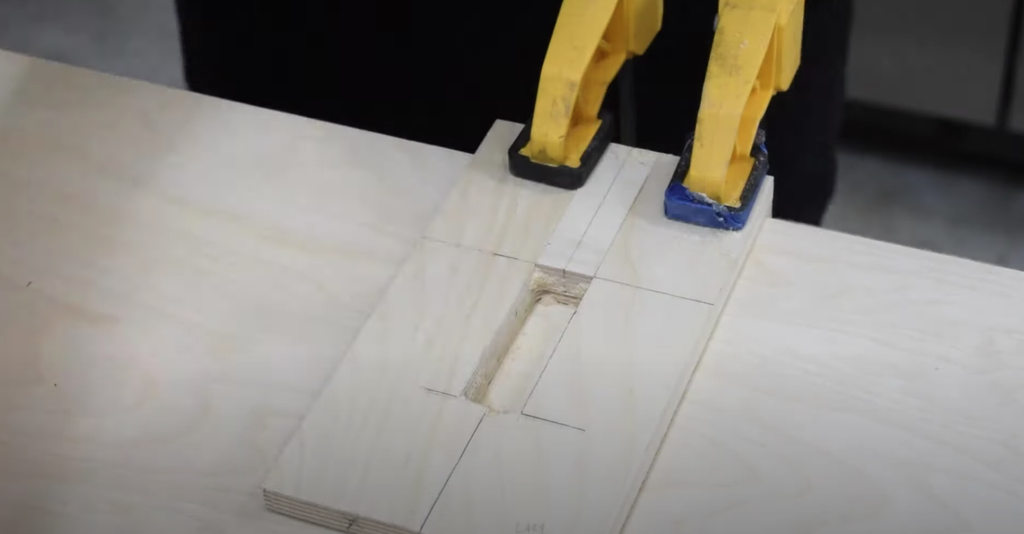
MAKE THE LOCKING CHANNEL
This will connect the mat to the top of the lazy susan.
Route a channel to the panel's bottom to accept the woodblock on the lazy susan.
MAKE THE LAZY SUSAN


Cut out the two blocks that will lock the mat for the lazy season using a bandsaw.
these are cut to the width and depth of the previously routed panel.
Check the fit into the routed panel.
Cut out the edge banding at the table saw.
Cut the top and bottom square for the lazy susan.
I used walnut plywood since I had some leftover from another project, but use whatever plywood you would like here.
Using a square shape for this base will help improve its stability.
Glue up the edge banding to the base.
Use a flush trim saw to remove any excess banding
Sand all of the banded sides
Mark the center point for the top of the lazy susan.
Mask off the edges of the blocks and then glue and clamp them in place.
The tape minimizes the glue cleanup
Mark out the placement for the lazy susan hardware.
Drill pilot holes for the mounting screws.
At the drill press, plunge the hole in the lazy season bottom for the access point.


SAND AND APPLY FINISH TO THE PIECES

Sand all pieces up to 180 grit. (220 if you are not using Rubio Monocoat)
Wipe down everything with mineral spirits.
Add finish of choice to all of the pieces.
I used Rubio Monocoat and applied it with a Scotch-Brite pad making sure to wipe away any excess.
Avoid finishing any areas where you are going to place glue down.


APPLY THE FELT PLAY AREA
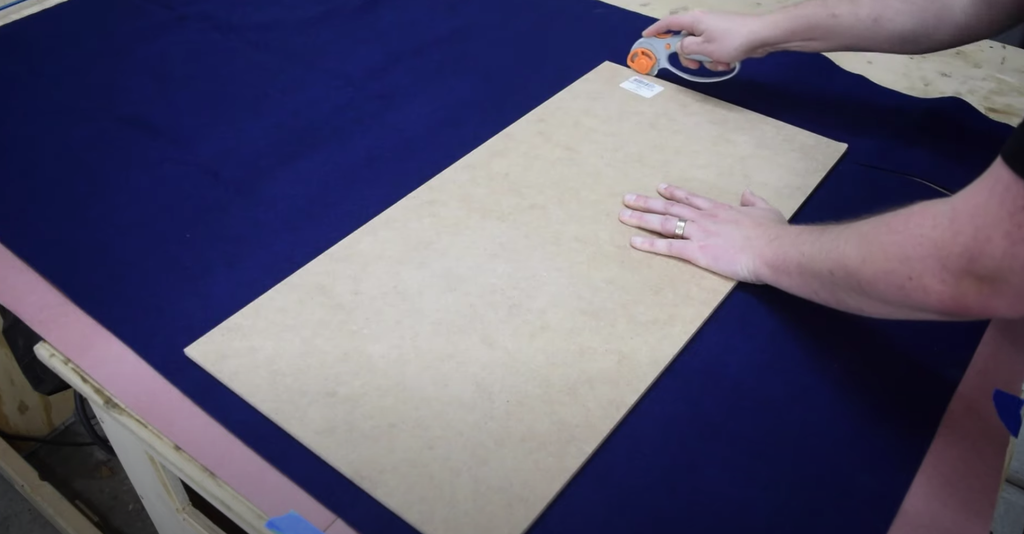

Make an MDF cutout or template for your playing space.
Using a rotary cutter, cut out the felt to its proper size.
Apply a thin layer of contact cement to the felt and board and press the felt onto the board.
It is easiest to remove the butler hinges for this part to glue up each panel separately.
With the felt down, go back with a roller to ensure the felt has no bubbles.
Trim any excess felt with a rotary cutter.


ASSEMBLE THE GAME BOARD


Attach the lazy susan hardware to the panels.
Reattach the butler hinges to the frame.
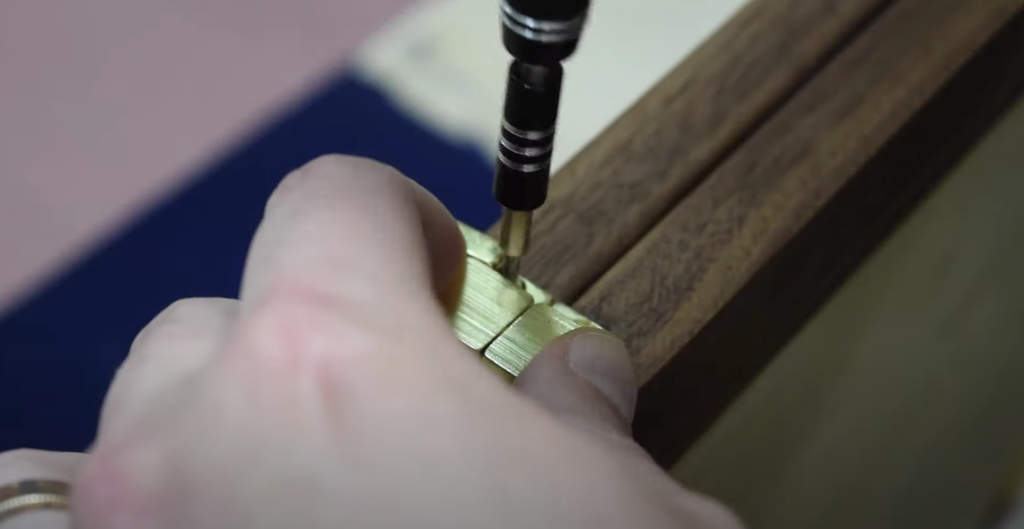
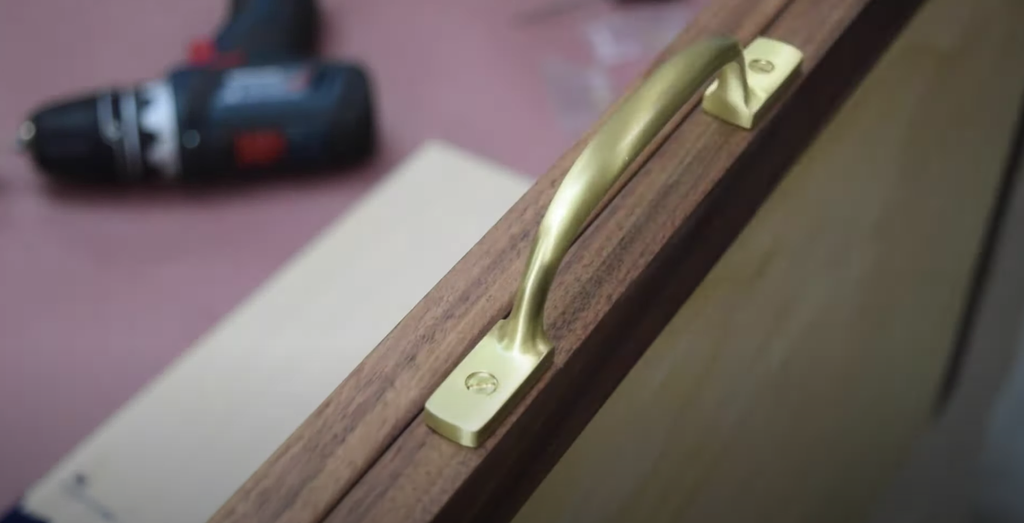
Apply double-sided tape to the back of the clasps and the handle (this will help to mark out the screw holes).
Use a reference square to make sure they sit vertically.
Mark the hole placement with an awl for the clasps and handle.
Drill in the pilot holes.
Drive in the screws for the clasps and handle.
I used a small screwdriver meant for electronics since the screws were so small.


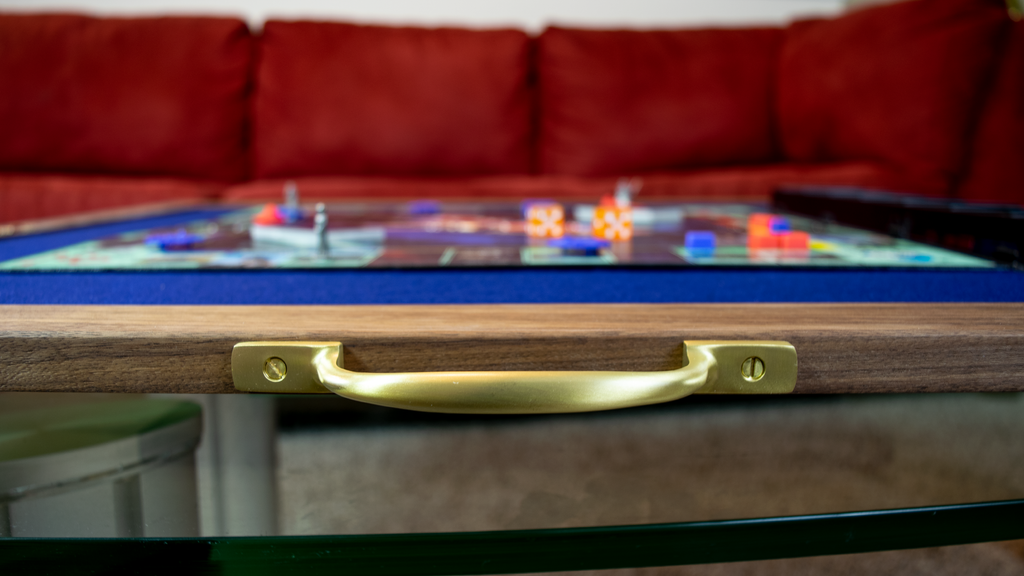
Enjoy your new game board!
Tag me on social if you're building this project (@timberbiscuitwoodwork on Instagram) with the hashtag #BiscuitBuild - Happy building!