Building Modern Bar Stools

Building these Modern Bar Stools was a fun challenge to undertake. The barstools we had were hand-me-downs from the 90s that were given to us from my in-laws. So, it was definitely time for an update. Now, building chairs, or stools for that matter, always seemed intimidating - they need to hold a full-grown human without breaking. So, I approached this bar stool design with sturdy functionality in mind that still looked modern and contemporary.
There were parts of this build that I questioned my order of operations. And, in the end, these bar stools got a lot of manual love from hand sanding and shaping—the result of that decision made for a beautifully hand-crafted look.
I had a ton of fun building these bar stools and learned a lot along the way. With a bit of patience and determination, you can too! The steps for this build are below and I added a link to the plans with full-scale templates if you are interested. If you have any questions along the way, I'd be happy to answer them in the comments section. I hope you enjoy this build!
Project plans with full scale templates: https://bit.ly/modernbarstools
Supplies
Hardwood of your choice (I used 12/4 - but you can use 6/4)
Jointer/Planer (or pre-surfaced lumber)
Router and Bits
Table Saw
Bandsaw or Jigsaw
Domino or Dowels
Sander (80 - 220 grit)
Rasp
Clamps
Wood Glue
Finish of Choice (I used penetrating oil)
Figure 8 Fasteners (See how to install them here: https://youtu.be/VMRuDE3BGs4)
CUT OUT THE TEMPLATES
You can find the full scale templates here: https://bit.ly/modernbarstools
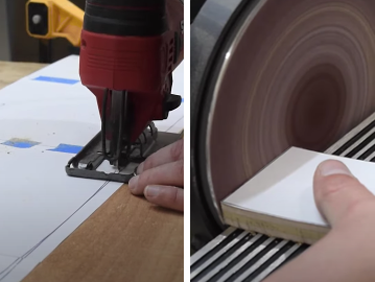
Once the full-scale templates have been printed out, tape them together and glue them to plywood with spray adhesive
Cut the templates out just outside the line with a bandsaw and/or jigsaw
Sand down the edges using a disc sander, spindle sander, and/or sanding block.
MILL THE LUMBER

I started out with 12/4 walnut, but choose your favorite hardwood for this project. Starting with 12/4 makes building the legs much easier (you will only have to make them once and then rip them at the bandsaw later on). Or, you can purchase pre-surfaced lumber if you don't have a jointer.
Mill the lumber flat through a jointer and planer

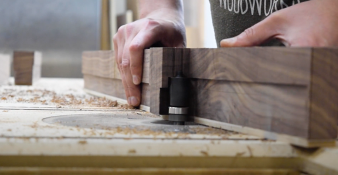
CUT OUT THE LEGS AND SIDE RAILS

Trace out the plywood templates for the legs and side rails onto your milled 12/4 tree slices. I use a dry white pencil when working with walnut because it is easier to see
Using a bandsaw, rough-cut the legs, and side rails.
Notes
Because these pieces are so thick, remove as much material in this step as possible while leaving enough room at the joints to cut them flush later on. For the tighter curves, slice in some relief cuts and then carve out the strips.


ROUTE AND RIP THE LEGS AND SIDE RAILS

Attach the templates with double-stick tape to the pieces you just cut out at the bandsaw
At the router table, flush-trim the legs and side rails in 3 STAGES (using a compression bit here lessens the tear-out).
Stage 1: Make an initial pass with the bottom bearing.
Stage 2: Raise the bit to make a second cut still using the bottom bearing.
Stage 3: Once the first two passes are done with the bottom bearing, swap in a taller top-bearing compression bit and route the other side (you could do all of this with a single combination bit, but it would just take a little longer).
Then over at the bandsaw, rip the pieces along their length. I used a re-saw feather board to help keep my pieces flat against the fence.
Side Note: if you notice any minor surface cracks in the wood like I did, you can fill it in with black epoxy and sand it down prior to ripping the pieces. Check out the full video for this process!


CUT THE LEGS AND SIDE RAILS TO FINAL LENGTH

For this, you will use a combination of a crosscut sled and miter gauge to get it done.


Use a crosscut sled and a stop block on the fence to cut down the feet for the front legs
Use the templates and screw in some reference blocks to hold the workpieces in place to set up the sleds.
The biggest thing here is to make sure the pieces don't move when you make the cuts. Screwing in some hold-down clamps keeps the parts tight to the sled.
Clamp the leg down to the sled and cut it to size. Do this for each front leg.
For the curved back leg joints, use the same technique as above and build a sled using the back leg template. Screw in a few extra blocks to hold the workpiece in the correct orientation. Swap out the template for the leg - this will let the leg slide into place and hold it there while you cut the joint.
Cut the angles for the feet using a crosscut sled.
Cut the stretchers and rails to their final length.


JOIN BAR STOOL SIDES TOGETHER
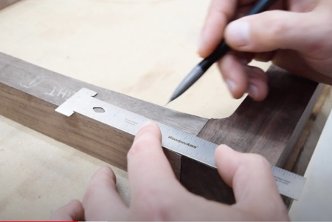
I used dominos for joints in this piece, but if you don't own a domino, dowels would also work great.

Mark out the domino location and plow the mortises. I like to also mark the outside face somewhere on pieces to avoid confusion about what side faces out.
Since the side will take most of the load, I went with double floating tenons for the joints.
Because the legs taper, the joints for the stretcher need to be mitered to 89 degrees
Cut the mortises into the stretchers, then mark and cut them into the legs.
Use a 1/4 inch round-over bit to break all of the hard edges on the stretchers.
Trim the dominos down to help with the fit on the mitered stretchers.
Glue and assemble the legs and stretchers. I used Titebond II Dark for this piece. The dark glue helps hide any squeeze out that may be missed when sanding. One thing to watch out for when gluing in dominos or any joint is using too much glue. Doing so can cause the joint to spit when clamping pressure is applied. So make sure to coat the inside of the mortise but don't flood it.


MAKE THE SEAT PANELS


Over at the bandsaw, re-saw some 8/4 chunks into 5/4 slices. I only had 8/4 chucks but you could just start with 5/4 here.
Mill them to one inch and cut them square over at the table saw.
Use the in-out method over at the jointer to clean up the edges. The idea behind alternating the edges and faces is that doing so creates complementary angles if the jointer's fence is not perfectly square, resulting in a perfectly aligned glue joint.
Mark out and plow the dominoes (make sure they are low enough in the panel if you plan to scoop the seats out or leave them out entirely).
After the panels dry, rough cut them out - starting at the bandsaw.
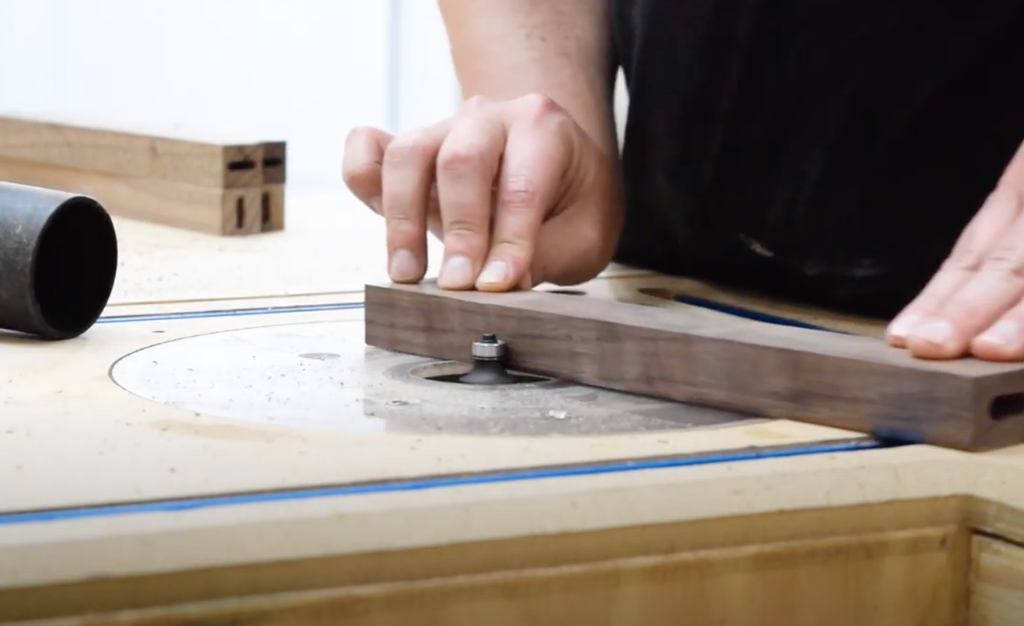
At the router table, with the template attached use a compression bit to flush-trim the seat.
Round over the top of the seats with a 1/4 inch round-over bit.
Use a 1/2 inch round over bit for the bottom.


MAKE THE FRONT AND BACK UPPER RAIL JOINTS

Cut the upper rails. I waited to do the upper rails until now, as having the sides assembled gave me more references for my measurements.
Plow the mortises and finish rounding over the remaining stretchers and rails.
ADD A THUMBNAIL TO THE BAR STOOL LEGS

Use a 3/4 round-over bit at the router table. Get as close as you can to the edges and carefully route around the rails. I like to use blue tape around the areas I need to avoid to make it clear where I should stop. Just remember that anything you don't get here will have to be done by hand later on.
Go slow, so you don't rock the piece and take a chunk out unintentionally
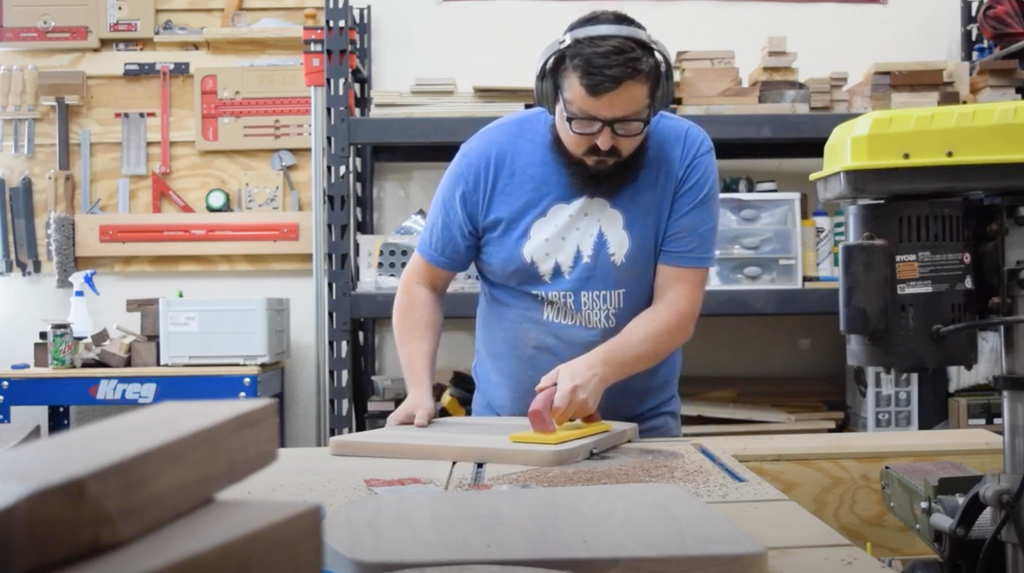
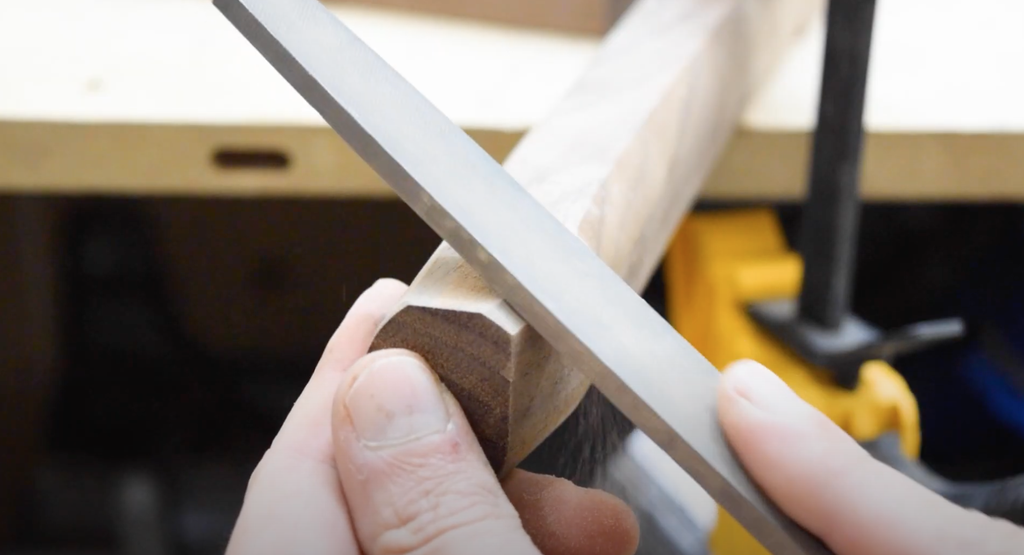
Using a rasp and sandpaper (80 up to 220) round over the remaining edges of the legs.
Side Note: Remember where I said I questioned my order of operations earlier...I wish I had done some of these round-overs before gluing the sides together because it left me with a lot of manual sanding. You can choose to do this step before the sides are glued together. However, one benefit of doing them the way I did is that the piece took on a more handmade look. But, if you want to save yourself about a day and a half of shaping and sanding, cut the bulk of the edge profiles before you glue up the sides
MAKE THE BACKRESTS


Rip the seat backs to their final width at the table saw.
Then, using a crosscut blade, cut them to their final length.
Use dominos to attach the back rest. Plunge the mortises into the blanks and legs. I did this now rather than after the profile for the back was cut, as this gives me a square edge to work off.
Hold the workpiece vertical and cut the profile using the bandsaw.
Using a spindle sander, smooth out the cut-marks from the bandsaw.
Finish sanding the pieces with a random orbit sander to 220 and ease the lower portion backrest to add a little comfort.
Add a compound round over to the top corners of the backrest. (this will make them look rounded over from the front and more square from the rear)
Add a 1/4 inch round over to the back rests.
Side note: I noticed some small cracks in one of the more figured pieces. So rather than toss it, I embraced it and filled the gaps with some black epoxy after step 4 and then sanded away any excess with the spindle sander in step 5.


FINAL GLUE UP AND ASSEMBLY

Glue up the legs together and attach the backrest
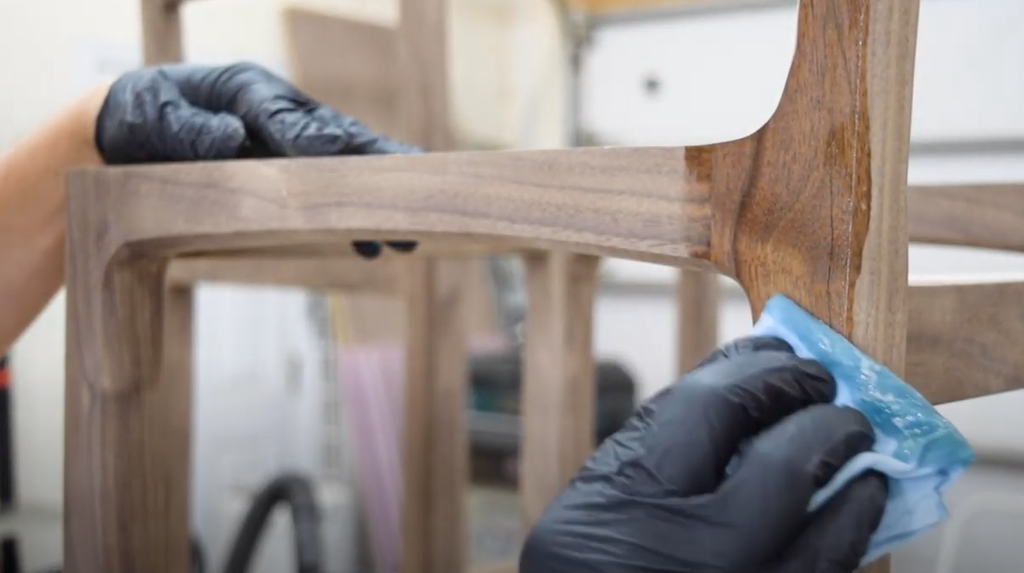
Finish the barstools using 4 coats of penetrating oil (or finish of your choosing).
Attach the seats using figure 8 clips to allow for seasonal movement of the panel.
Attaching Figure 8 Fasteners to Table Tops and Chairs #shorts
DISPLAY THEM PROUDLY AND IMPRESS YOUR FRIENDS AND FAMILY!
While this was a challenging project, it sure was fun! And being able to see these at the kitchen bar every day just makes all that hard work worth it! The approximate cost for building one Barstool as designed with all of the bells & whistles is about $135 (this will, of course, vary for everyone).
Tag me on social if you're building this project (@timberbiscuitwoodwork on Instagram) with the hashtag #BiscuitBuild - Happy building!