Building a Keepsake Box: A Masterclass in Small-Scale Woodworking
Hello, fellow woodworkers! Shane Mitchell here from Timber Biscuit Woodworks. I'm thrilled to share my latest project—a keepsake box that combines advanced techniques with practical woodworking skills. This project is a perfect opportunity to delve into the intricacies of small-scale woodworking, and I'm excited to guide you through the process.
Building a keepsake box is more than just a woodworking exercise; it's an opportunity to hone skills that are applicable to a wide range of projects. The techniques demonstrated in this build can be translated into larger furniture pieces, enhancing your overall craftsmanship. Whether you're interested in practical veneer techniques, small box joinery tips, or straightforward DIY woodworking projects, this video has something for you.
Project Overview
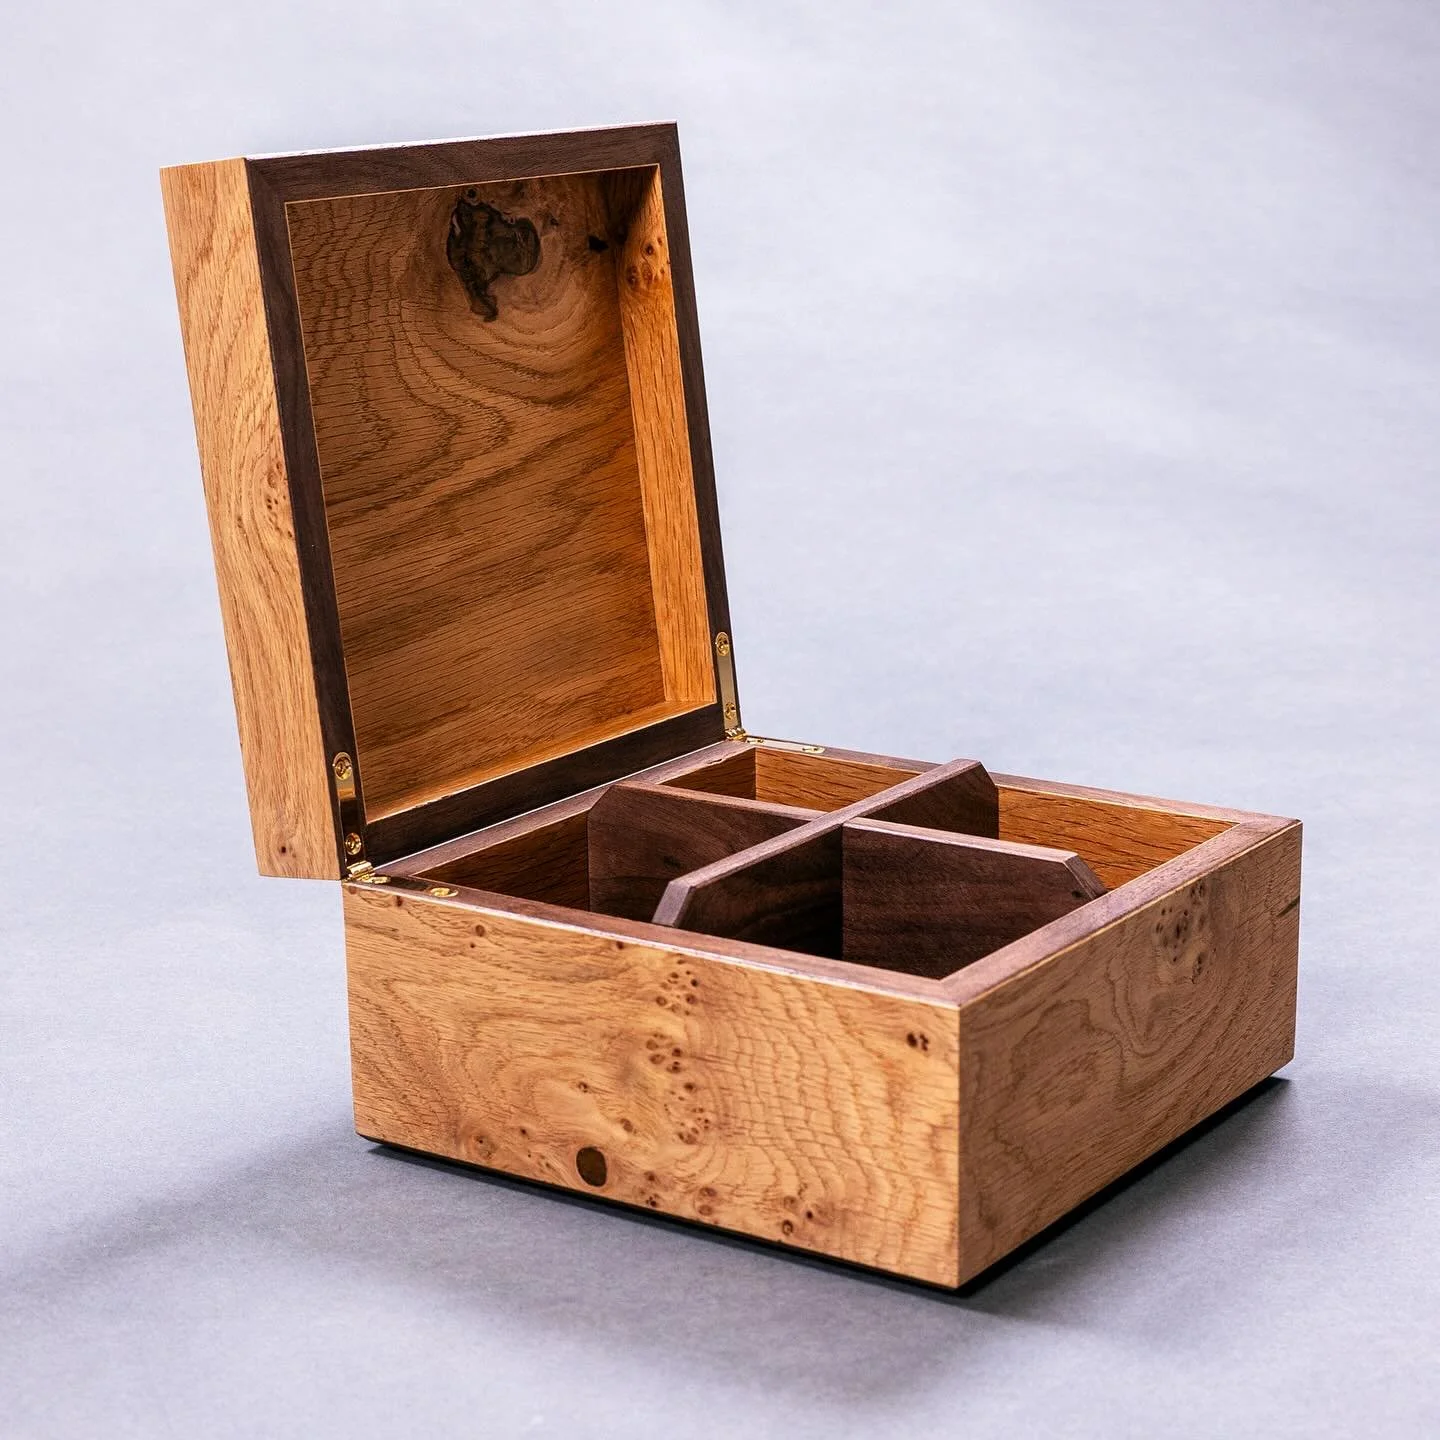
In this build, I crafted a compact keepsake box using white oak burl veneer, MDF, and walnut. The design features a suede-lined interior, offering a blend of elegance and functionality. Throughout the project video, I demonstrate various techniques, including:
Veneering with a Vacuum Press and Other Methods: Learn how to handle brittle veneer and achieve flawless bonds using a vacuum press.
Tinted Epoxy Fills: Discover how to incorporate tinted epoxy for aesthetic appeal and structural integrity.
Perfect Wax Finish: Find out my secret to the smoothest finish you’ve ever felt
Precise Joinery: Explore methods for achieving tight miters and clean hinge work without the need for fancy jigs.
This project serves as an excellent crash course in advanced small-scale woodworking, providing valuable insights for both beginners and seasoned woodworkers.
Check out the full build on my YouTube channel. In the video, I walk you through each step of the process, offering tips and tricks to help you achieve professional-quality results. You can find the video below:
Veneering with a Vacuum Press: Mastering Thin, Brittle Veneer
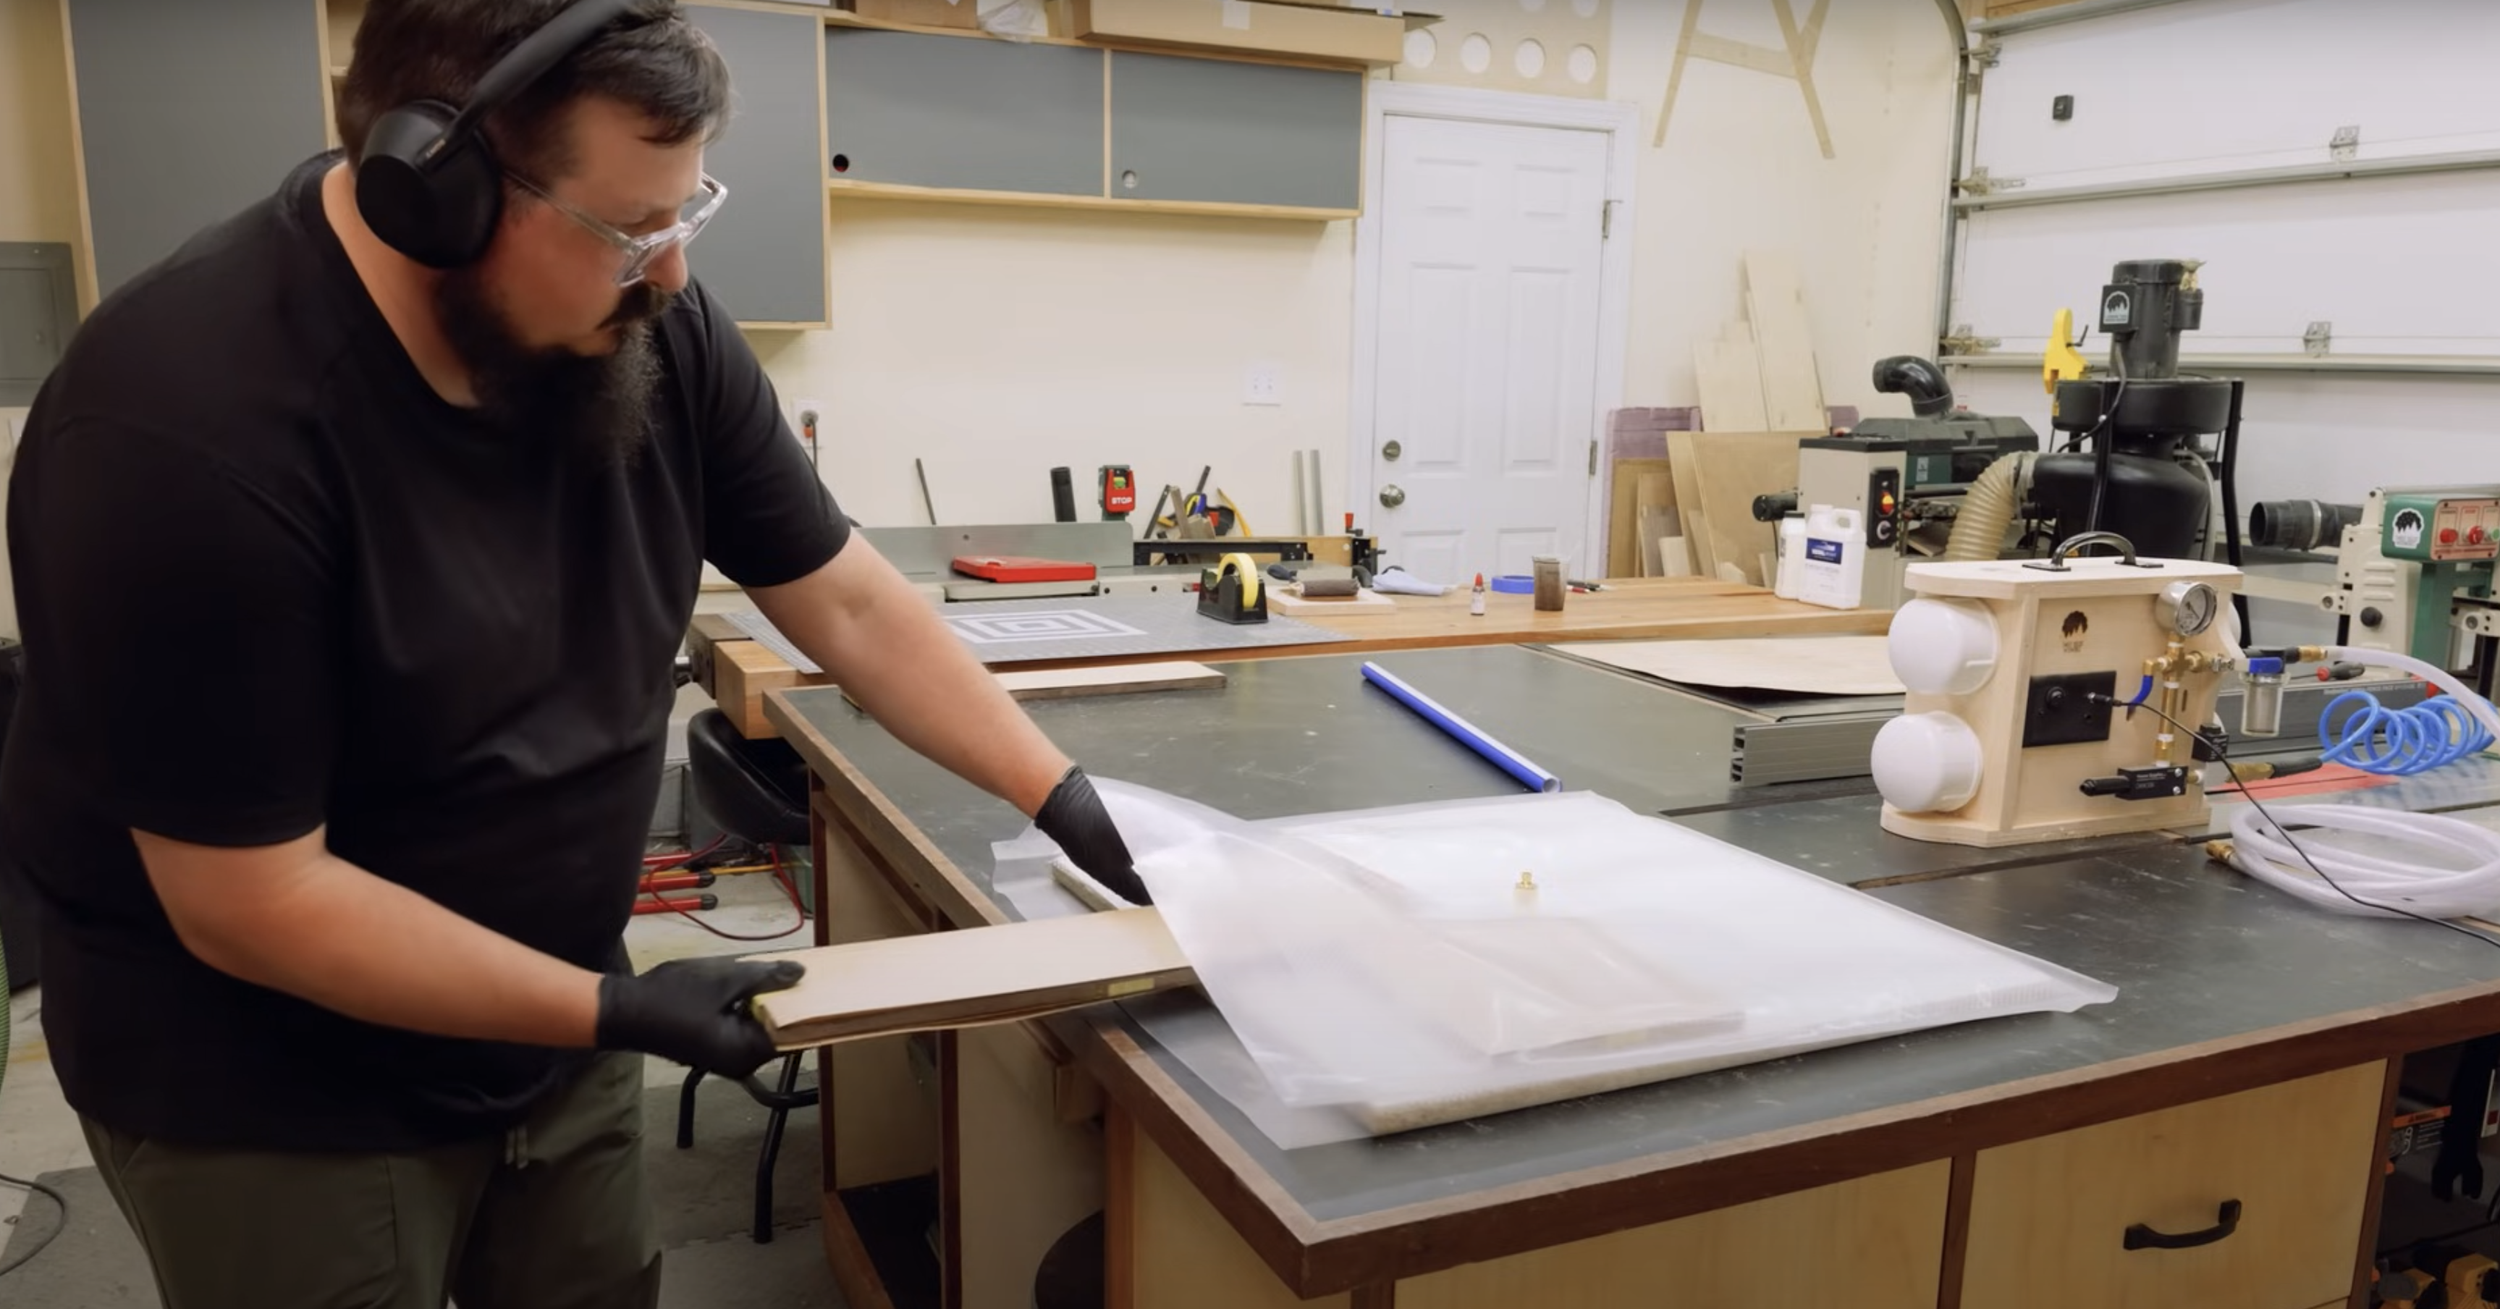
When working with veneer, one of the biggest challenges is ensuring a smooth, even bond without damaging the delicate material. Veneer is thin and can be brittle, especially when using intricate designs like burl. This is where a vacuum press becomes a game-changer.
In this project, I used a vacuum press to adhere the white oak burl veneer to the MDF substrate. The vacuum press evenly distributes pressure across the entire surface, ensuring that the veneer adheres uniformly. It’s particularly useful for working with materials like veneer, which can be prone to warping or bubbling when using traditional clamps.
The vacuum press creates a perfect bond without having to constantly worry about clamp placement or uneven pressure. Plus, it helps avoid creating unsightly marks or uneven glue lines, which would be especially noticeable on such a beautiful material like burl veneer.
Why Choose Veneer?
Veneering offers a way to achieve a luxurious wood finish without the hefty price tag or material waste associated with solid wood. It allows you to showcase the natural beauty of wood grain patterns like those found in burl while using more affordable core materials like MDF.
Other Ways to Adhere Veneer Without a Vacuum Press
1.Contact Cement Method
What It Is:
Contact cement is an adhesive that bonds when both surfaces—both the veneer and the substrate—are coated and pressed together. Once the cement dries, the materials are permanently bonded without the need for clamping or pressure.
How to Use It:
Start by applying a thin, even layer of contact cement to both the back of the veneer and the surface of the substrate (such as MDF or plywood).
Let the cement dry for about 15-30 minutes, or until it becomes tacky.
Once tacky, carefully align the veneer with the substrate and press it into place. Use a roller or a clean cloth to ensure good adhesion and eliminate air bubbles.
Pros:
Fast and easy application.
No need for clamps or a vacuum press.
Excellent for flat surfaces.
Cons:
Once the two surfaces come into contact, they bond instantly—meaning you need to be precise when positioning the veneer.
It can be difficult to reposition the veneer once it’s in place, so precise alignment is key.
2. Iron-On Veneer Method
What It Is:
The iron-on method is a simple and effective way to apply veneer, especially for smaller projects or edges. This method uses heat to activate the adhesive on the back of pre-glued veneer, bonding it to the substrate.
How to Use It:
Purchase iron-on veneer, which comes with a pre-applied adhesive on the back.
Cut the veneer to size and position it on the substrate.
Use a household iron (set to medium heat) and press it onto the veneer, moving in slow, even motions. The heat activates the adhesive, causing the veneer to bond to the surface.
After applying heat, use a roller to press out any air bubbles or wrinkles.
Pros:
Inexpensive and easy-to-find materials.
No special equipment required beyond a household iron.
Great for edge banding and small flat surfaces.
Cons:
Limited to smaller pieces or edges due to the nature of the adhesive and heat application.
The bond may not be as strong or durable as using a vacuum press or contact cement, especially on large surfaces.
3. Traditional Wood Glue and Clamping Method
What It Is:
Wood glue is a time-tested adhesive for woodworking, and it can also be used for veneering. This method involves applying a thin layer of glue to the substrate and the back of the veneer, followed by clamping to ensure a tight bond.
How to Use It:
Apply a thin, even layer of wood glue (like Titebond or similar) to the substrate.
Lay the veneer on top and align it carefully.
Use clamps or weights to apply consistent pressure over the entire surface. You can use veneer cauls (flat wooden pieces) to distribute the clamping pressure evenly.
Allow the glue to set for several hours (or overnight) to ensure a strong bond.
Pros:
Great for large surfaces and projects requiring high strength.
Provides a durable bond when done correctly.
Relatively inexpensive and easy to find materials.
Cons:
Requires careful clamping to ensure uniform pressure across the veneer.
The process can take longer than using contact cement or other methods, due to the curing time of the glue.
Clamping can leave marks if not done carefully.
4. Double-Sided Tape Method
What It Is:
This method uses double-sided adhesive tape as a temporary way to hold the veneer in place while you apply pressure and finish the bond. This technique is commonly used for smaller veneer projects or quick fixes.
How to Use It:
Apply strips of double-sided tape along the edges of the substrate where the veneer will be placed.
Carefully position the veneer on top of the tape, ensuring that it's aligned properly.
Press down firmly to secure the veneer. You can use a roller or your hands to help bond the two surfaces.
After securing the veneer with the tape, you can go back and apply your preferred method of gluing or finishing to fully secure the veneer.
Pros:
Quick and easy to set up.
Works well for smaller pieces or thin veneers.
No need for clamps or heavy pressure.
Cons:
The bond may not be as strong or permanent as other methods, especially if the veneer has a lot of movement or if there’s any moisture.
Best for small, light-duty projects; not ideal for large-scale veneering.
5. Cold Press Veneering (Manual Pressure)
What It Is:
The cold press method is an alternative that involves applying pressure manually rather than relying on a vacuum press. This technique uses a pressing system (or even just weights and clamps) to apply even pressure across the veneer.
How to Use It:
Apply a thin layer of adhesive (contact cement, wood glue, or even PVA glue) to both the veneer and the substrate.
Lay the veneer flat on the substrate and carefully align it.
Use a flat surface and apply even pressure using clamps, weights, or a dedicated veneering press.
Ensure that the entire surface is under pressure to avoid air bubbles or uneven adhesion.
Allow the adhesive to dry fully before removing the clamps.
Pros:
Works well for large projects, as you can adjust the amount of pressure applied.
Provides a strong bond when done carefully.
Can be done without expensive equipment.
Cons:
Requires significant time and patience for proper clamping.
The pressure must be evenly distributed, or the veneer may have areas that don't bond as strongly.
Which Method to Choose?
Each veneering method has its own strengths, depending on the materials you're using, the size of your project, and the tools you have available. The vacuum press is undoubtedly the most reliable and consistent method for large, complex veneer jobs, but there are plenty of alternatives that can work just as well, especially for smaller projects or when you’re working with limited tools.
For quick and small-scale projects, the iron-on method or double-sided tape is incredibly convenient.
For larger, stronger bonds, the contact cement or traditional wood glue with clamping offers a durable, reliable solution.
If you're looking for a balance of ease and strength, the cold press method provides a great option when you don't have a vacuum press.
So, don’t let the lack of a vacuum press hold you back! There are plenty of ways to achieve beautiful veneered surfaces in your woodworking projects. Try out a few and see which one works best for you!
Tinted Epoxy Fills: Adding Depth and Character
Now, let’s talk about the tinted epoxy fills. Epoxy is incredibly versatile, and when mixed with a colored dye, it can fill voids in wood, giving your project that extra layer of visual interest. For this keepsake box, I incorporated a tinted epoxy in the corners and where the burl veneer had natural voids.
I chose a deep, rich color for the epoxy to contrast against the lighter tones of the white oak burl. This not only enhanced the aesthetic but also helped to bring out the natural grain of the wood. The tinted epoxy fills provide a subtle, yet striking look that catches the light and adds dimension to the project.
Why Use Tinted Epoxy?
The advantage of using tinted epoxy is twofold: it’s functional and decorative. On the one hand, it’s a practical solution for filling small cracks, voids, or imperfections in the wood. On the other, the right tint can create a striking, polished appearance that elevates the entire project.
Versatility: This joint isn’t just for decorative boxes. I’ve used box joints in drawer construction, small chests, and even structural frames. They work in many kinds of wood – from plywood to hardwood – as long as you can cut a clean slot. You can adjust the finger width to suit the scale of your project (narrow pins for small boxes, chunky fingers for large chests). Once you master the technique, it’s a versatile joinery method to have in your skill set.
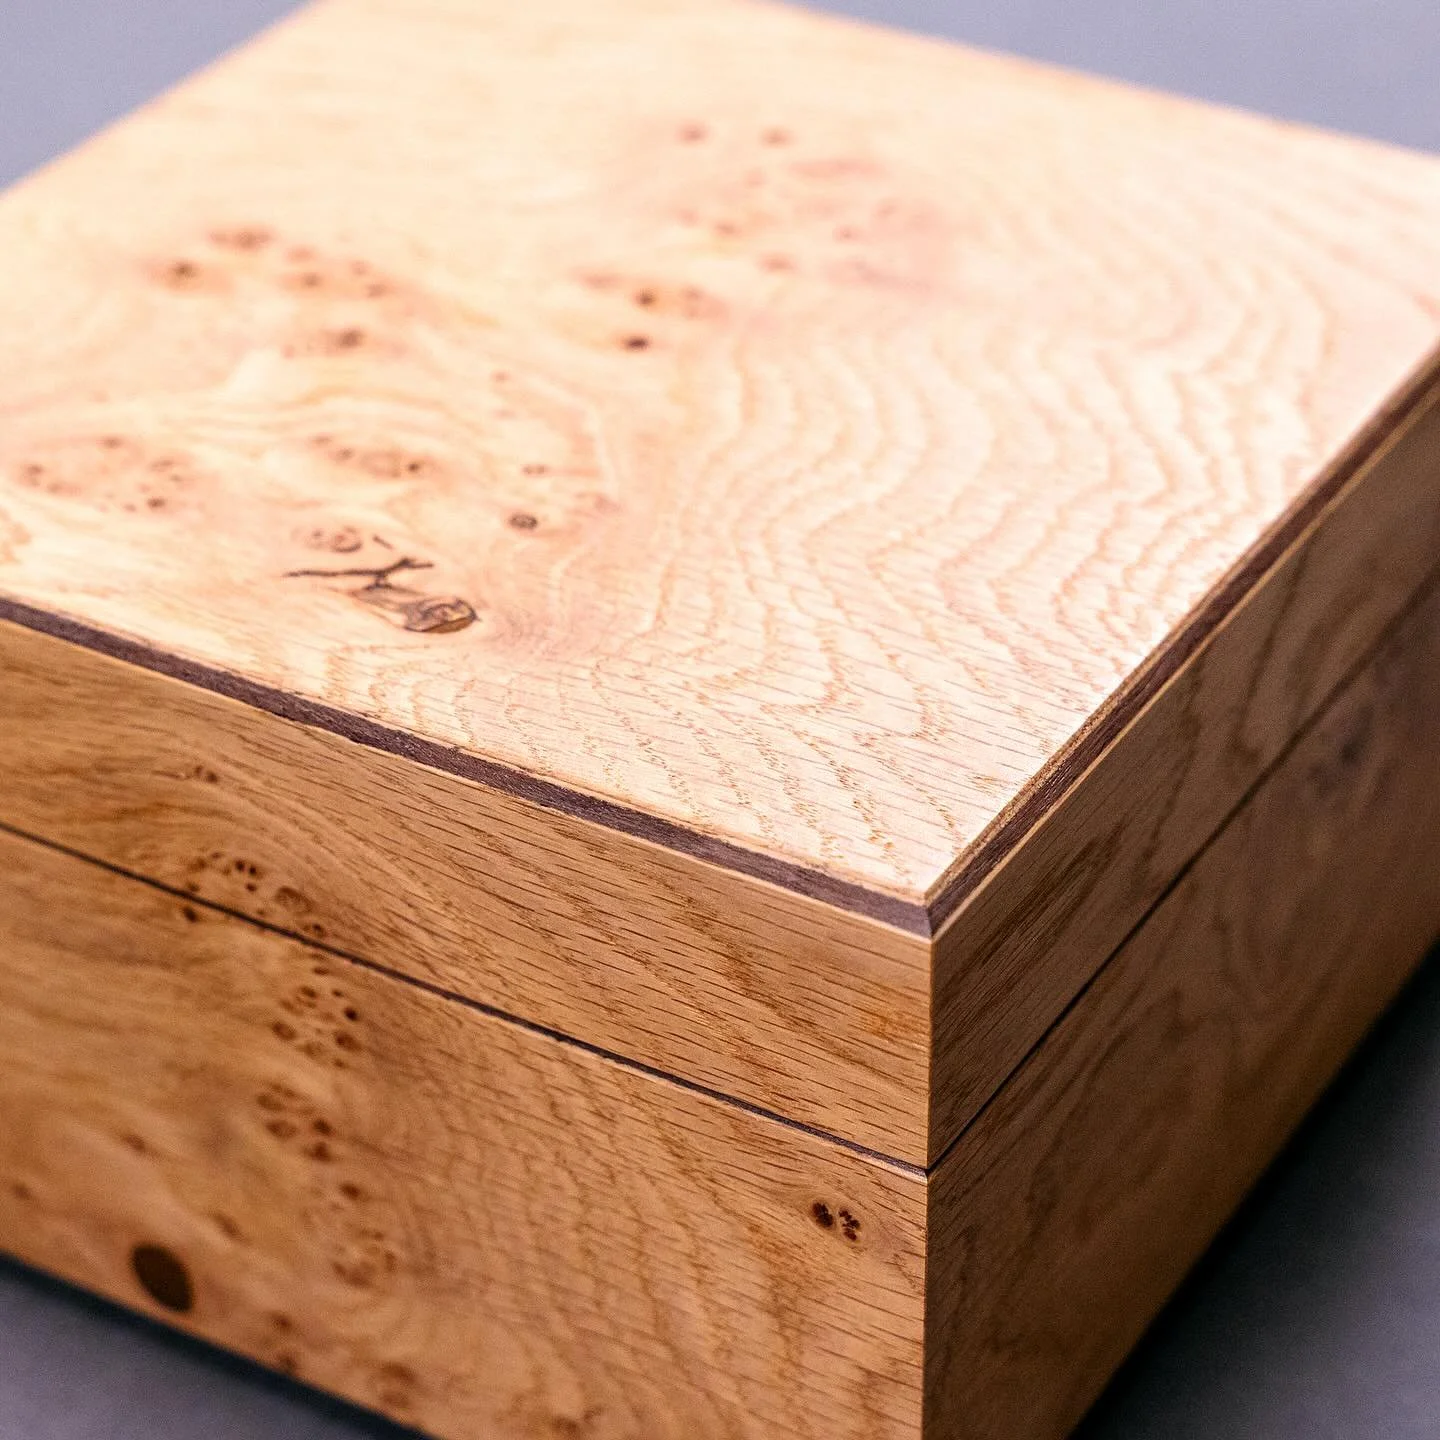
My Routine for the Perfect Finish
I wanted the burl veneer to pop, feel silky, and stay protected while I did the messy lid‑cut and hinge work. So I used a two‑part, shop‑friendly schedule: dewaxed sanding sealer first, then a hand‑rubbed paste wax topcoat. Here’s the exact rundown.
1. Surface Prep
Final sanding
Exterior veneer and walnut edges to 180 grit - interior faces get the same treatment after the suede is masked off.
Light passes only—burl can thin out fast.
Dust removal
Vacuum with a soft brush, then a quick tack‑cloth wipe. Any grit left behind will show up as pimples under the sealer.
2. Sanding Sealer (dewaxed shellac)
Why use it?
Burl has end‑grain pockets that drink finish unevenly. A 1‑pound‑cut shellac locks fibers, raises the figure, and keeps later coats from oversoaking.
Dewaxed means it plays nicely if I ever want to add lacquer or oil varnish later.
Application
Mask off glue areas with blue tape so the shellac doesn’t creep in and weaken future joints.
Flood on with a disposable foam brush, work fast.
Let it flash 15–20 minutes, until it’s no longer tacky.
Leveling
Very light scuff‑sand with 220 grit or a used piece of 180—just enough to flatten grain nibs.
Vacuum again.
3. Burnish with Double‑Zero Scotch‑Brite
Instead of micro‑meshing between coats, I use #00 gray pads under a random‑orbit sander (hook‑and‑loop circle cut from a full pad). It marries the shellac layers and leaves a satin‑smooth surface without loading the abrasive.
4. Paste Wax Topcoat
Product: Clear microcrystalline‑based paste wax (I like Renaissance or any high‑solids blend).
Why wax, not poly?
The box lives indoors and won’t take abuse - wax keeps the tactile feel of wood, buffs to a gentle sheen, and is easy to refresh.
Application
Scoop a dime‑size dab on a rag; less is more.
Work it in circles until the surface looks uniformly dull.
Wait 5‑10 minutes, then buff with a clean cotton cloth or white Scotch‑Brite pad.
Repeat once for extra depth.
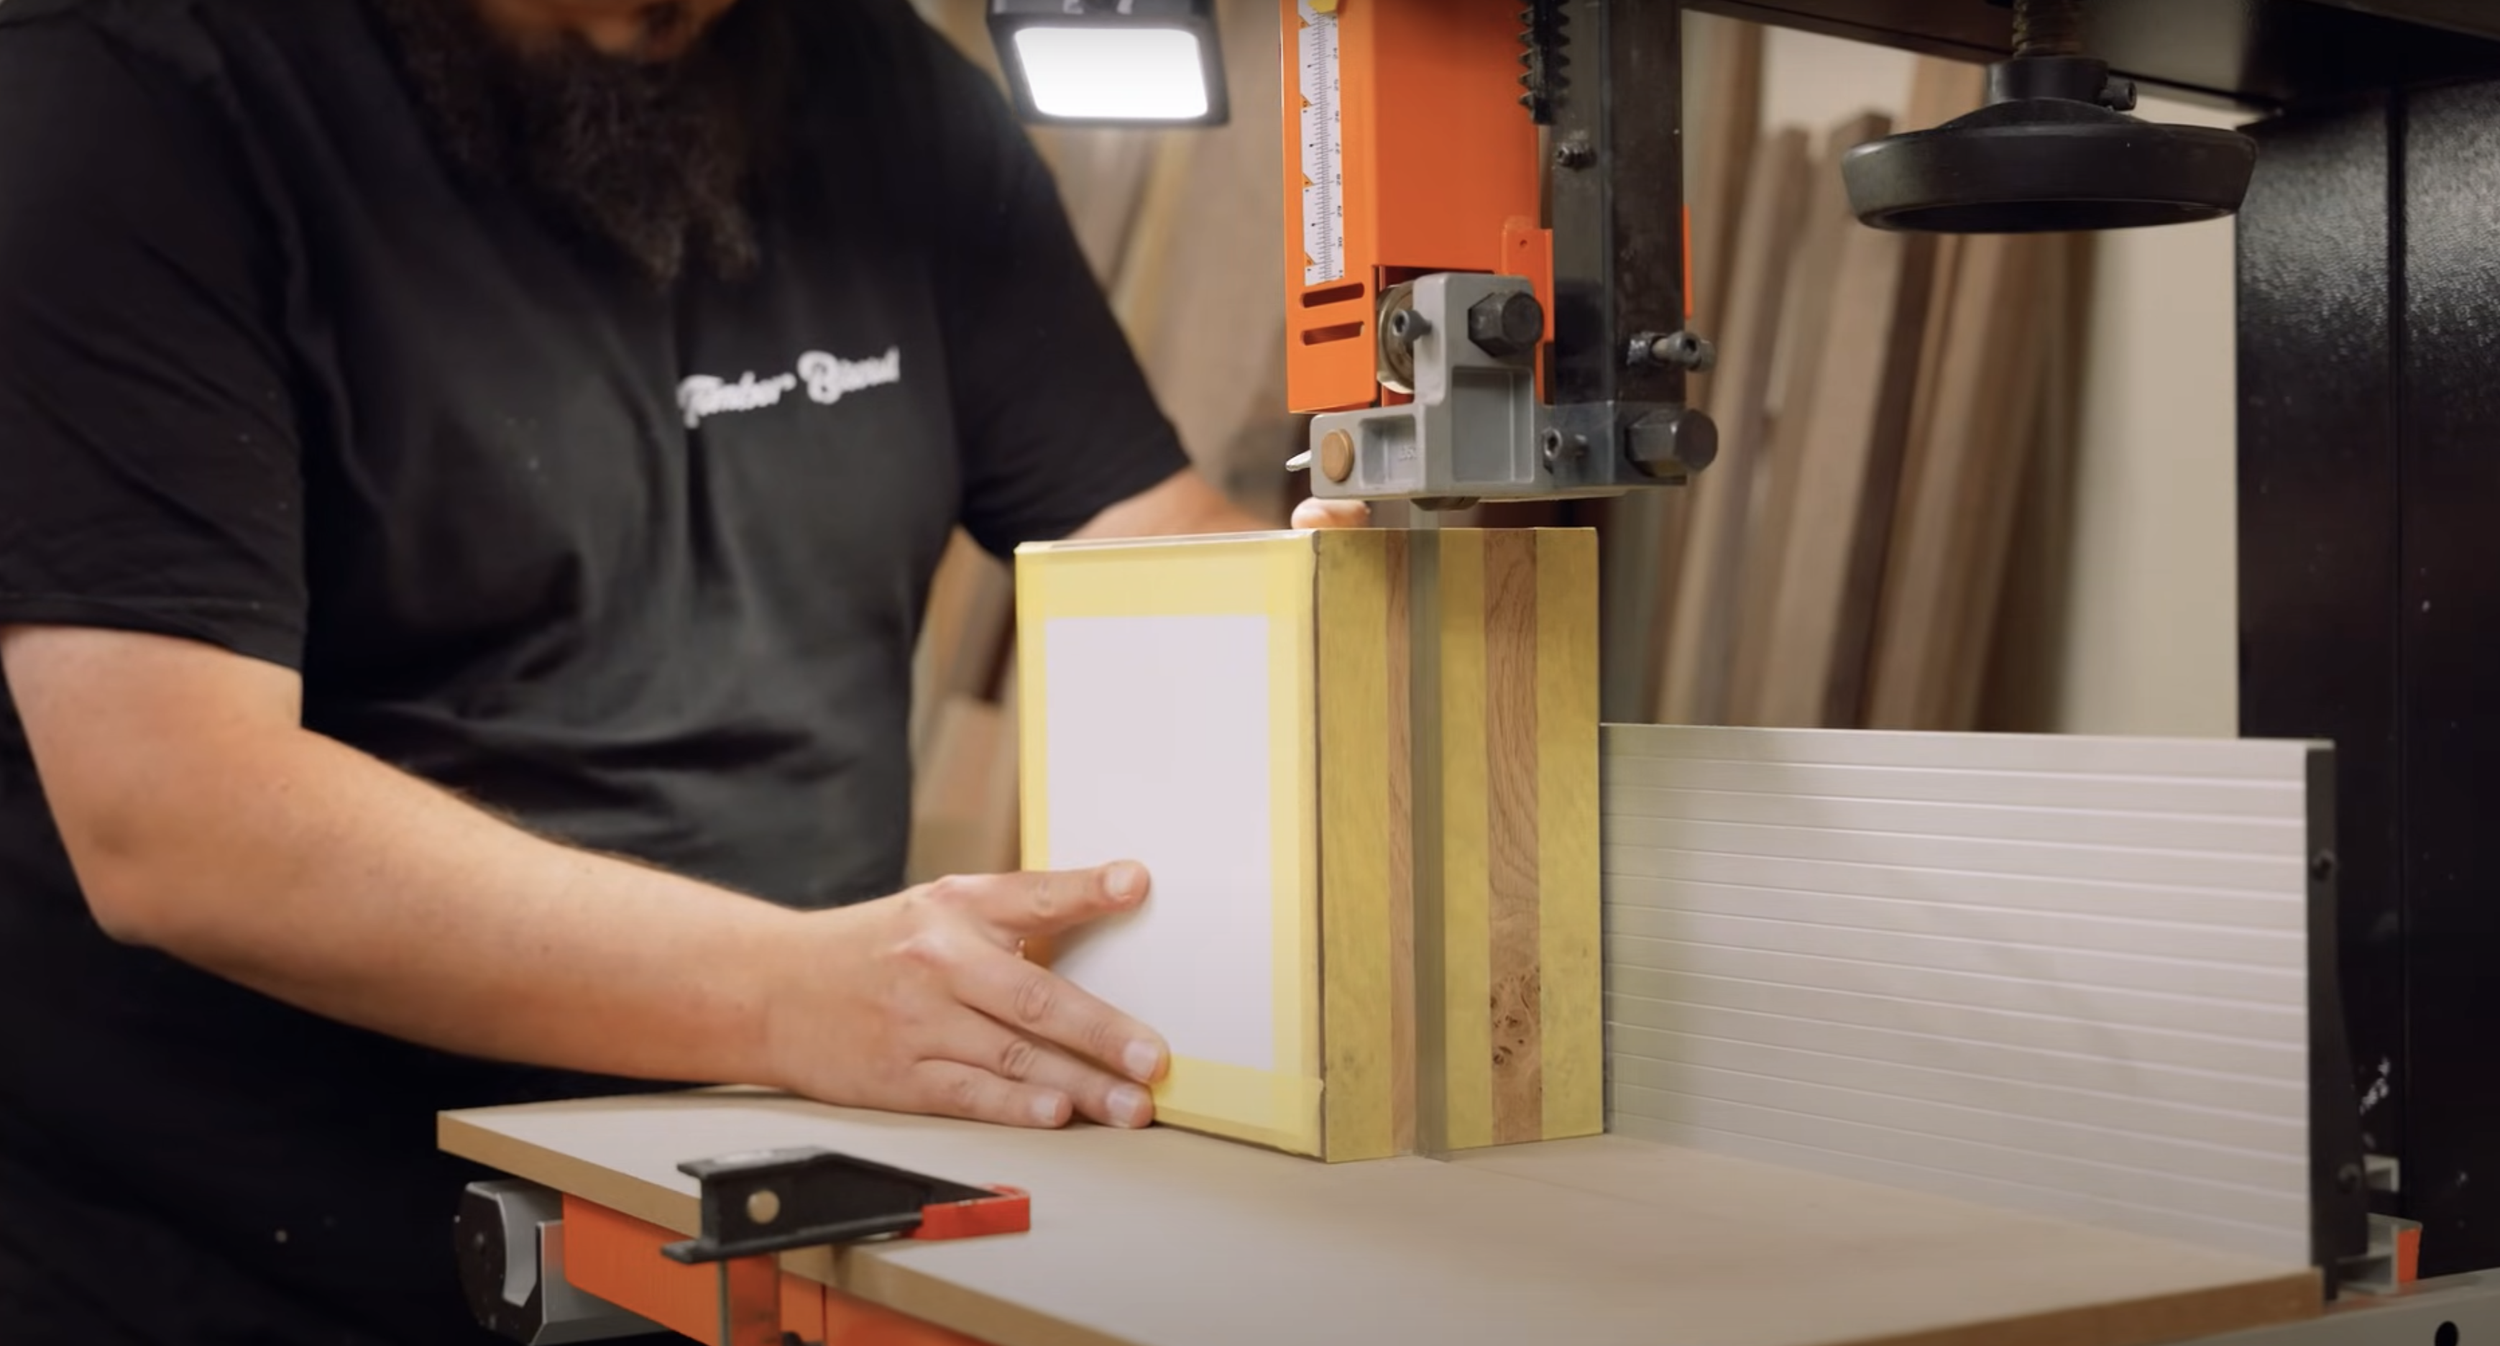
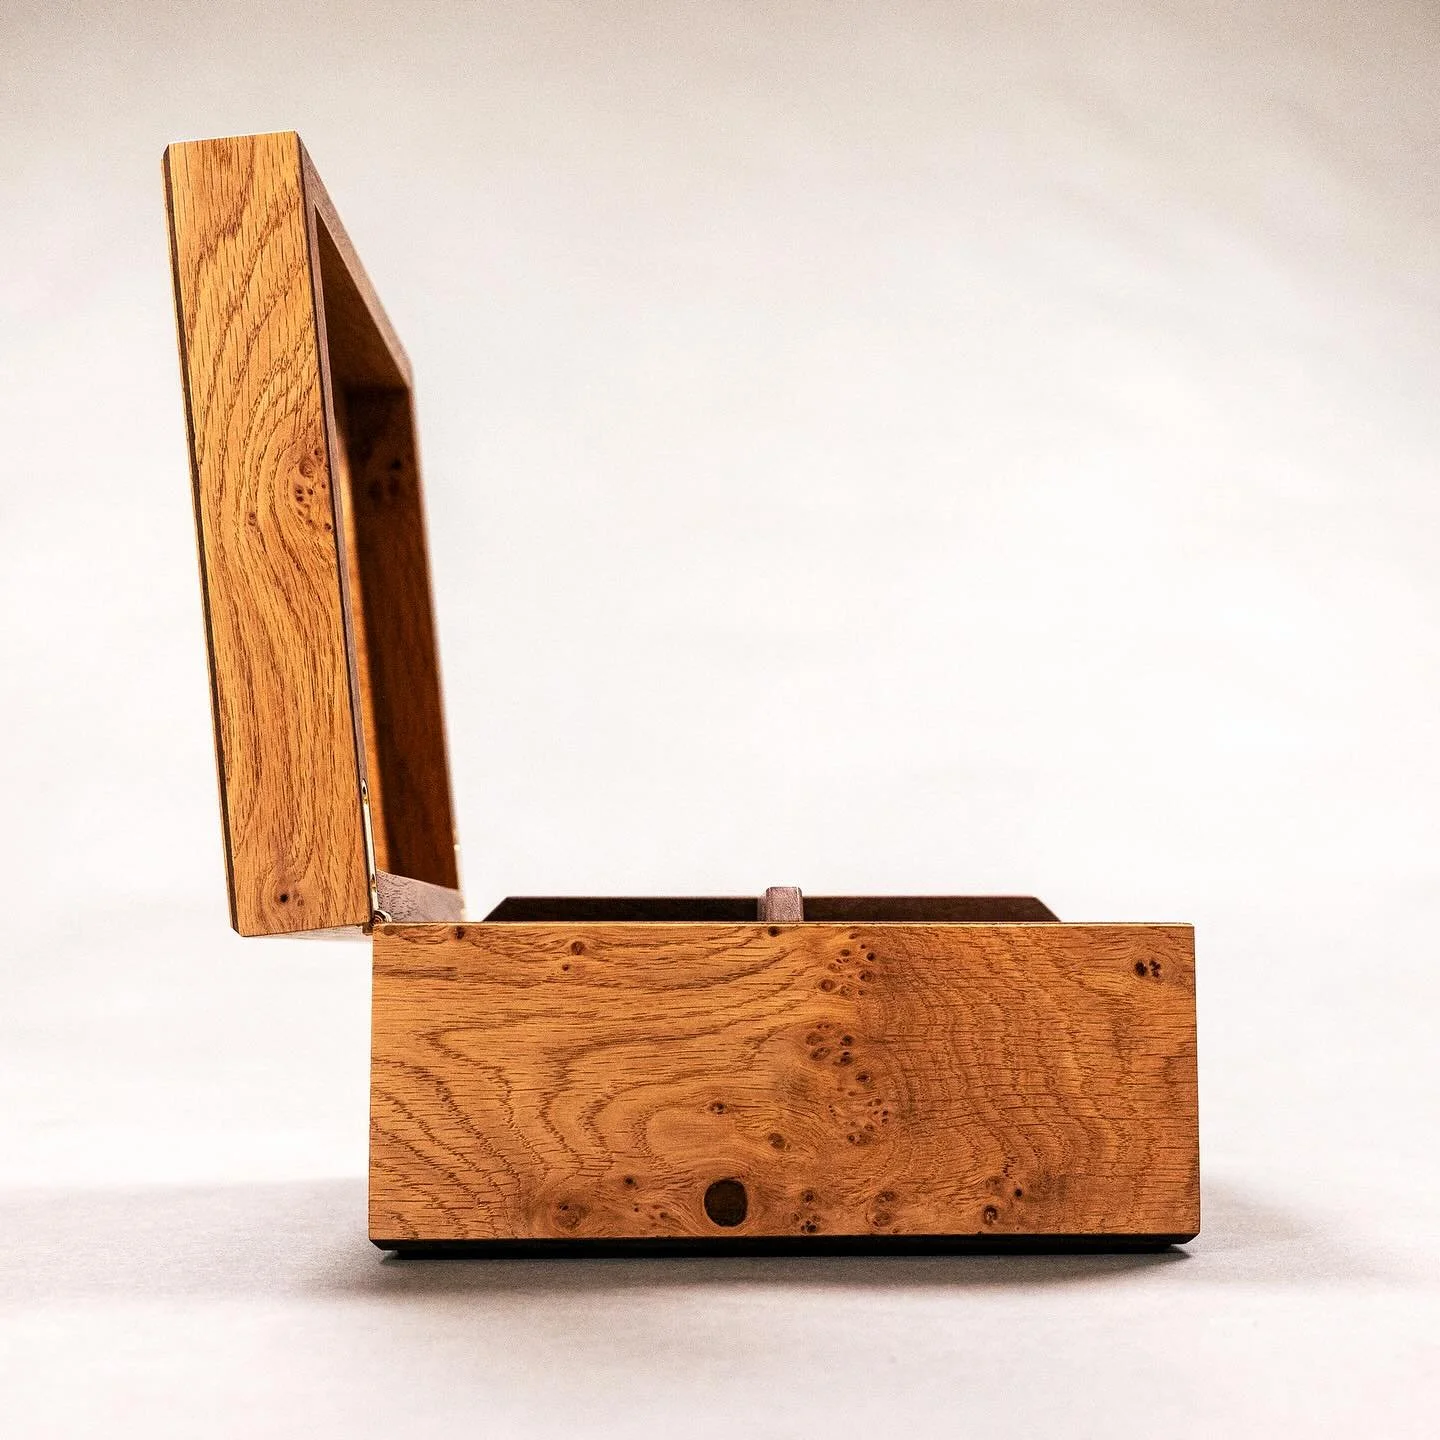
Cutting the Box in Half: Achieving the Perfect Look
Now, let’s address one of the more unconventional techniques I used in this project: cutting the box in half. At first glance, this might seem like a step backward, but it’s an essential part of achieving the precise and professional look I wanted.
The reason I cut the box in half was to perfect the mitered corners and ensure that all the joints fit together perfectly. By cutting the box, I could access the internal angles of the joints more easily and refine the fit, something that would have been much more difficult to achieve without this step. After all, a keepsake box isn’t just about function—it’s about creating a polished, high-quality piece that looks flawless from every angle.
Once I made the necessary adjustments, I glued and reassembled the box. The result? Tight, seamless miters that were practically invisible once the finish was applied. This technique allowed me to get that ultra-clean, crisp appearance that’s a hallmark of fine woodworking.
Why Cut a Box in Half?
Cutting a box in half allows you to tweak joinery and improve angles that might be hard to adjust otherwise. It’s also useful for making perfectly aligned inlays and fitting components like hinges and locks with extreme precision. In this case, cutting the box in half allowed me to perfect the joints before gluing it back together, ensuring that the mitered corners were flawless. Without this step, the look would have been compromised, and you wouldn’t get that high-end, professional finish.
Combining Techniques for a Flawless Build
Veneering with a vacuum press, adding tinted epoxy fills, and cutting the box in half were all techniques that helped me elevate this project to the next level. Each method, in its own way, contributed to the overall finish and aesthetic of the keepsake box.
If you're looking to tackle a similar project, or if you're just curious about these techniques, I encourage you to check out the full video, where I walk through each step in detail. Whether you're working on small-scale projects or just want to learn more advanced woodworking skills, this build is an excellent opportunity to push your craftsmanship further.