How I Built a Steam Box to Bend Wood (Without Losing My Mind)
There’s something about steam bending that feels like bending the rules of physics. Solid wood, which usually snaps when you ask it to curve, suddenly becomes pliable with the right amount of heat and humidity. It’s weird, it’s cool, and it opens up a whole new world of woodworking possibilities.
In this build, I put together a custom steam box from plywood and a few hardware store essentials. It's designed to be big enough for things like chair parts but compact enough that I don't need to build an addition just to store it.
How Steam Bending Works
Steam bending is a process that uses heat and moisture to make wood pliable. When wood is exposed to steam, typically at around 212°F, the heat softens the lignin, which is the natural glue that holds wood fibers together. Once the lignin is softened, the wood can be carefully bent into curved shapes without cracking or breaking. After bending, the piece is clamped into a form and left to dry, which allows it to retain the new shape as the lignin hardens again. It’s a centuries-old technique that’s still incredibly useful today for furniture making, boat building, and any project where curves are part of the design.
Project Overview
This project kicked off with a pretty straightforward goal: build a box that could reliably steam wood blanks for bending. I wanted something simple, solid, and reusable. I also wanted to avoid overbuilding it because, well, it’s literally a hot wooden box. But steam is no joke, it’s hot, it’s wet, and it wants to destroy your materials if you’re not careful. So the design needed to stand up to high temps, moisture, and repeated use.
I settled on a basic rectangular plywood box with a front door, a few internal dowels for support, and proper steam and drainage ports.
Dimensioning Sheet Goods
I started with a full sheet of 3/4" plywood, which I broke down into manageable pieces using the track saw and table saw. The box has plenty of room for most furniture parts like chair rails and slats.
The key here was clean, accurate cuts. Even though it's "just" a shop jig, tight seams are important for retaining steam. I dry-fit all the pieces before assembly just to make sure nothing was out of square or warped.
Pro tip: mark all your pieces clearly and label orientation before you start assembling. It’ll save you from accidentally turning your top into your side panel (ask me how I know).
Prepping the Interior
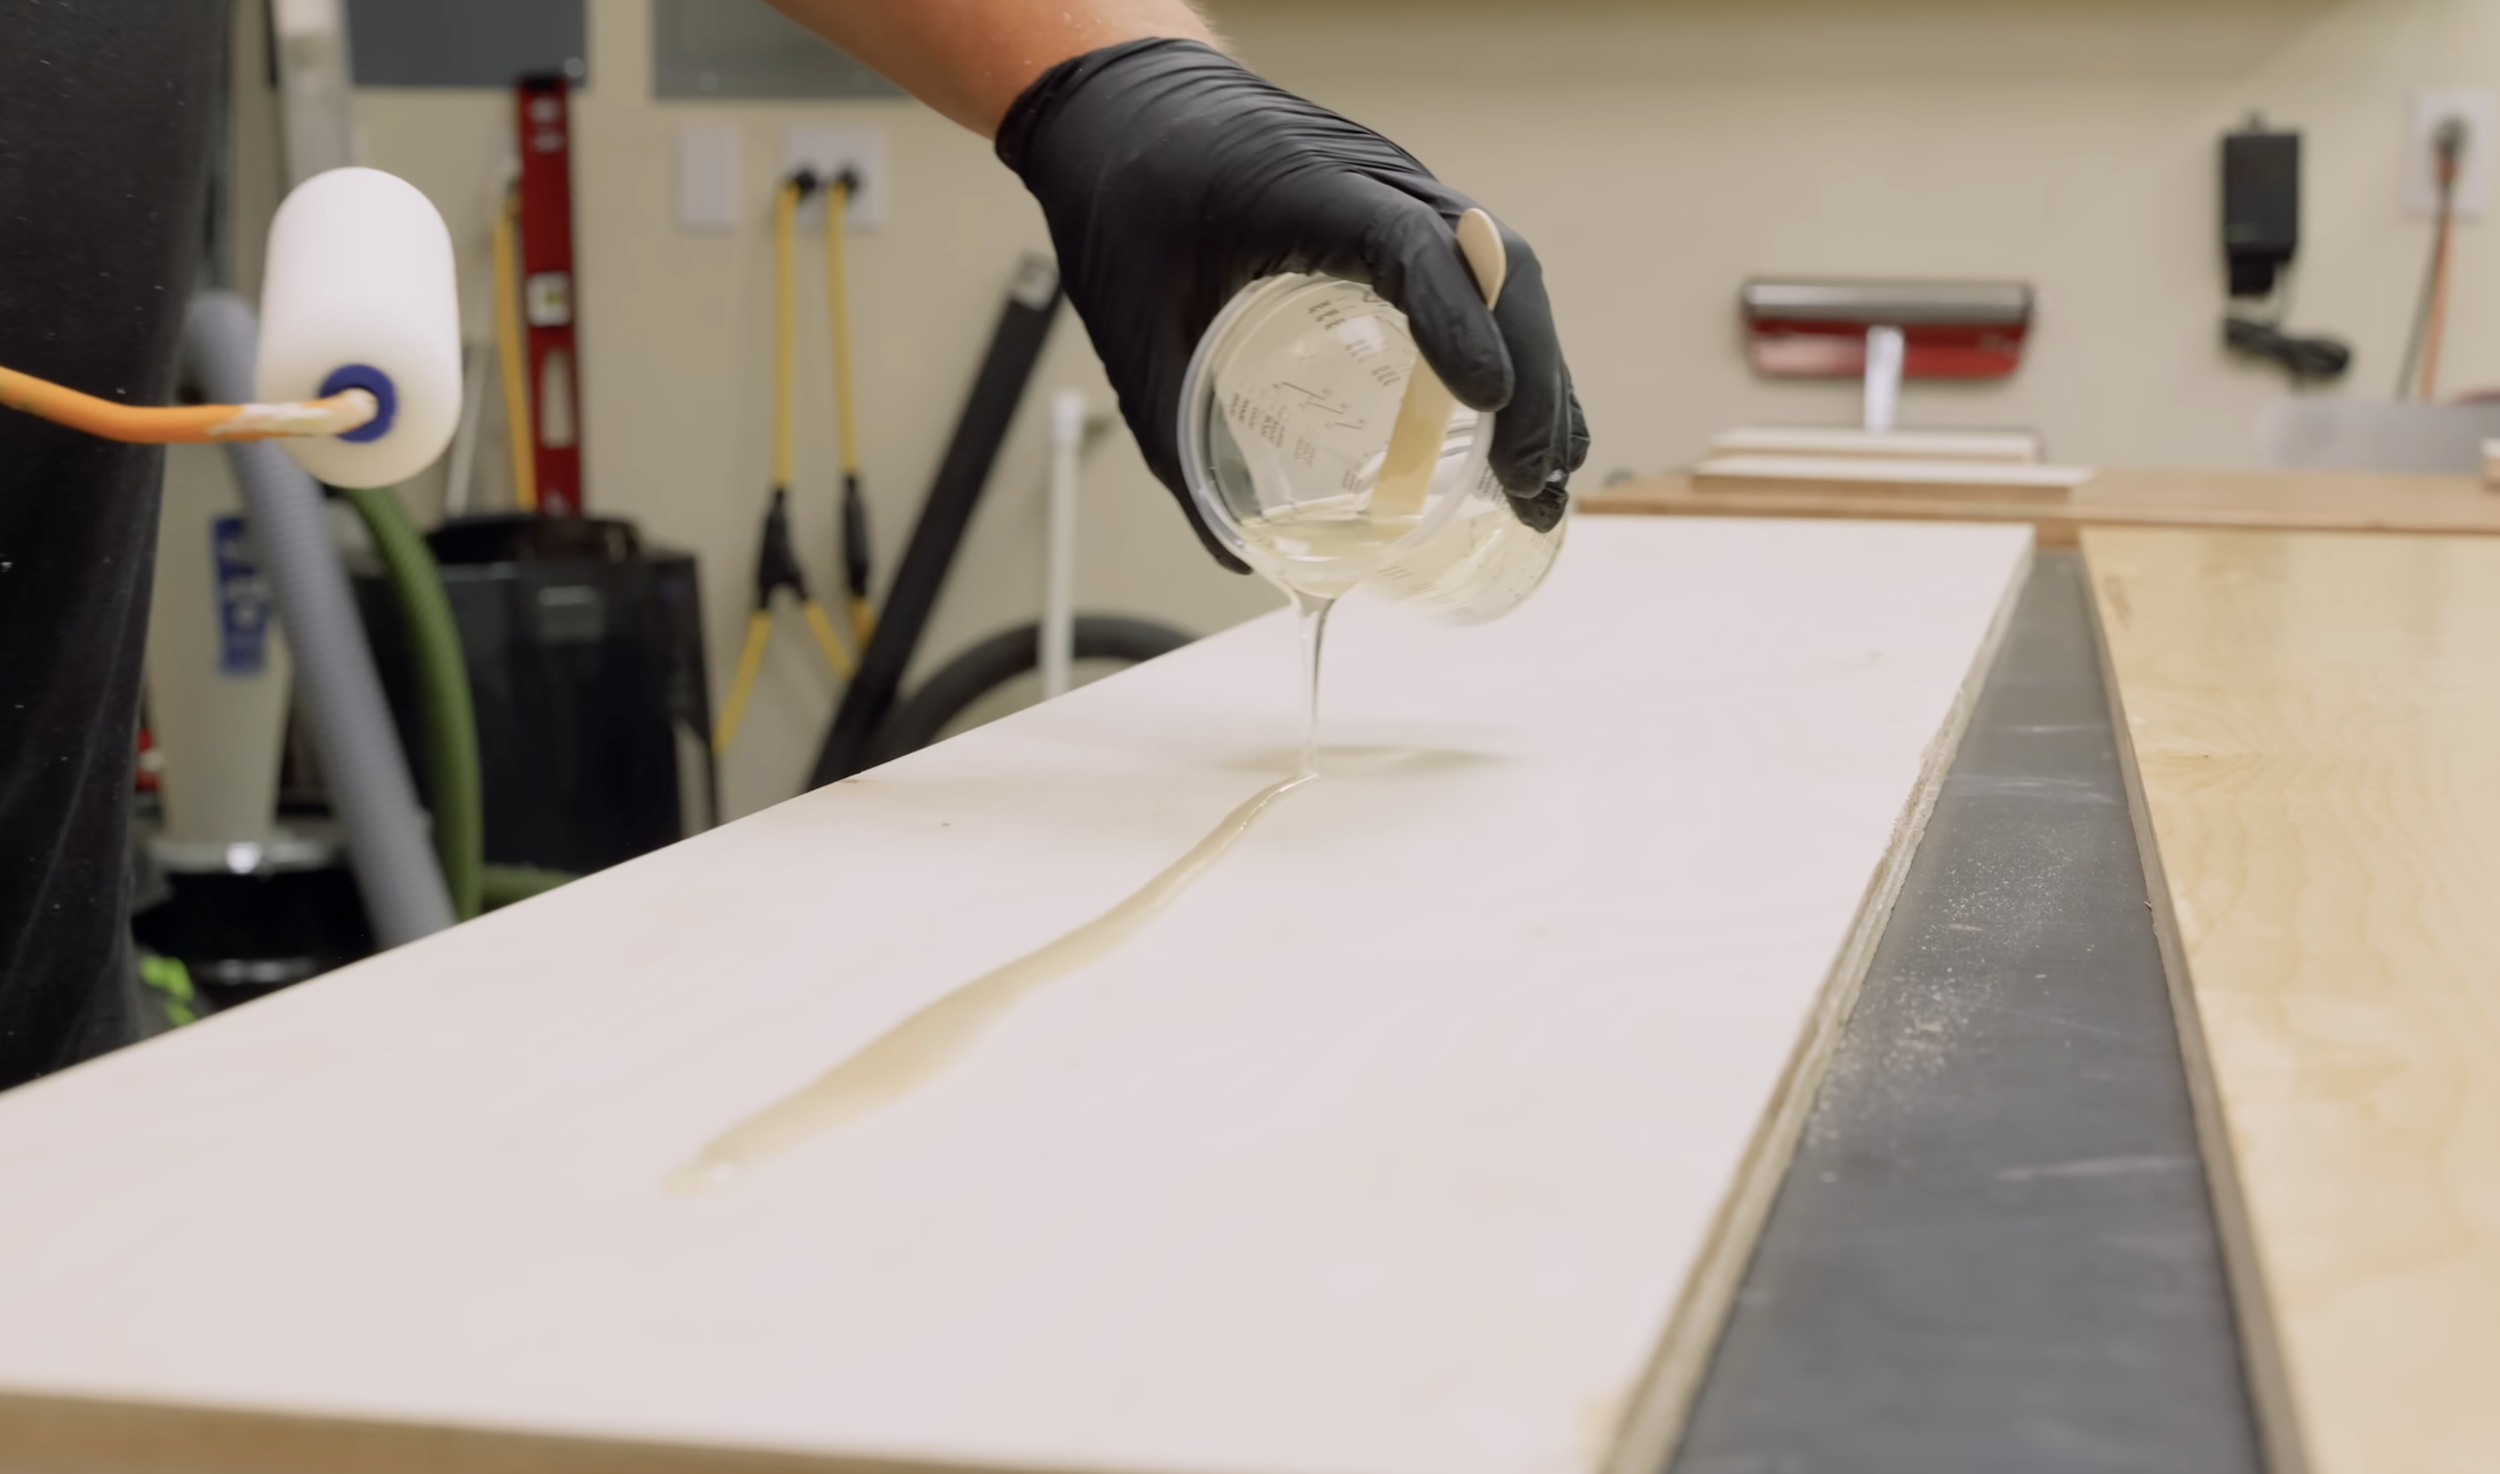
This part’s critical. Steam equals moisture, and moisture plus wood equals eventual mold, rot, and sadness. I wanted the inside of this box to stand up to repeated use, so instead of just painting or sealing it, I coated the entire interior with epoxy.
I used a standard two-part epoxy and brushed on a full coat over all the interior faces, bottom, sides, top, back, and door panel. Epoxy isn’t just water-resistant; it’s waterproof once cured, and it adds a little strength to the plywood. Plus, it's easier to wipe clean between uses, which is a big win when you’re working with moist, sappy wood.
Give the epoxy 24 hours to cure fully before subjecting it to any kind of heat or humidity.
Fasteners
With the panels prepped and sealed, I assembled the box using exterior wood screws and wood glue on all joints. I pre-drilled all screw holes to avoid splitting the plywood and clamped each joint as I went.
I could’ve used pocket holes, brads, or fancy joinery, but screws and glue gave me fast, reliable joints that will hold up to warping and swelling from heat and moisture. Plus, it’s a jig, I didn’t need this thing to win any beauty contests.
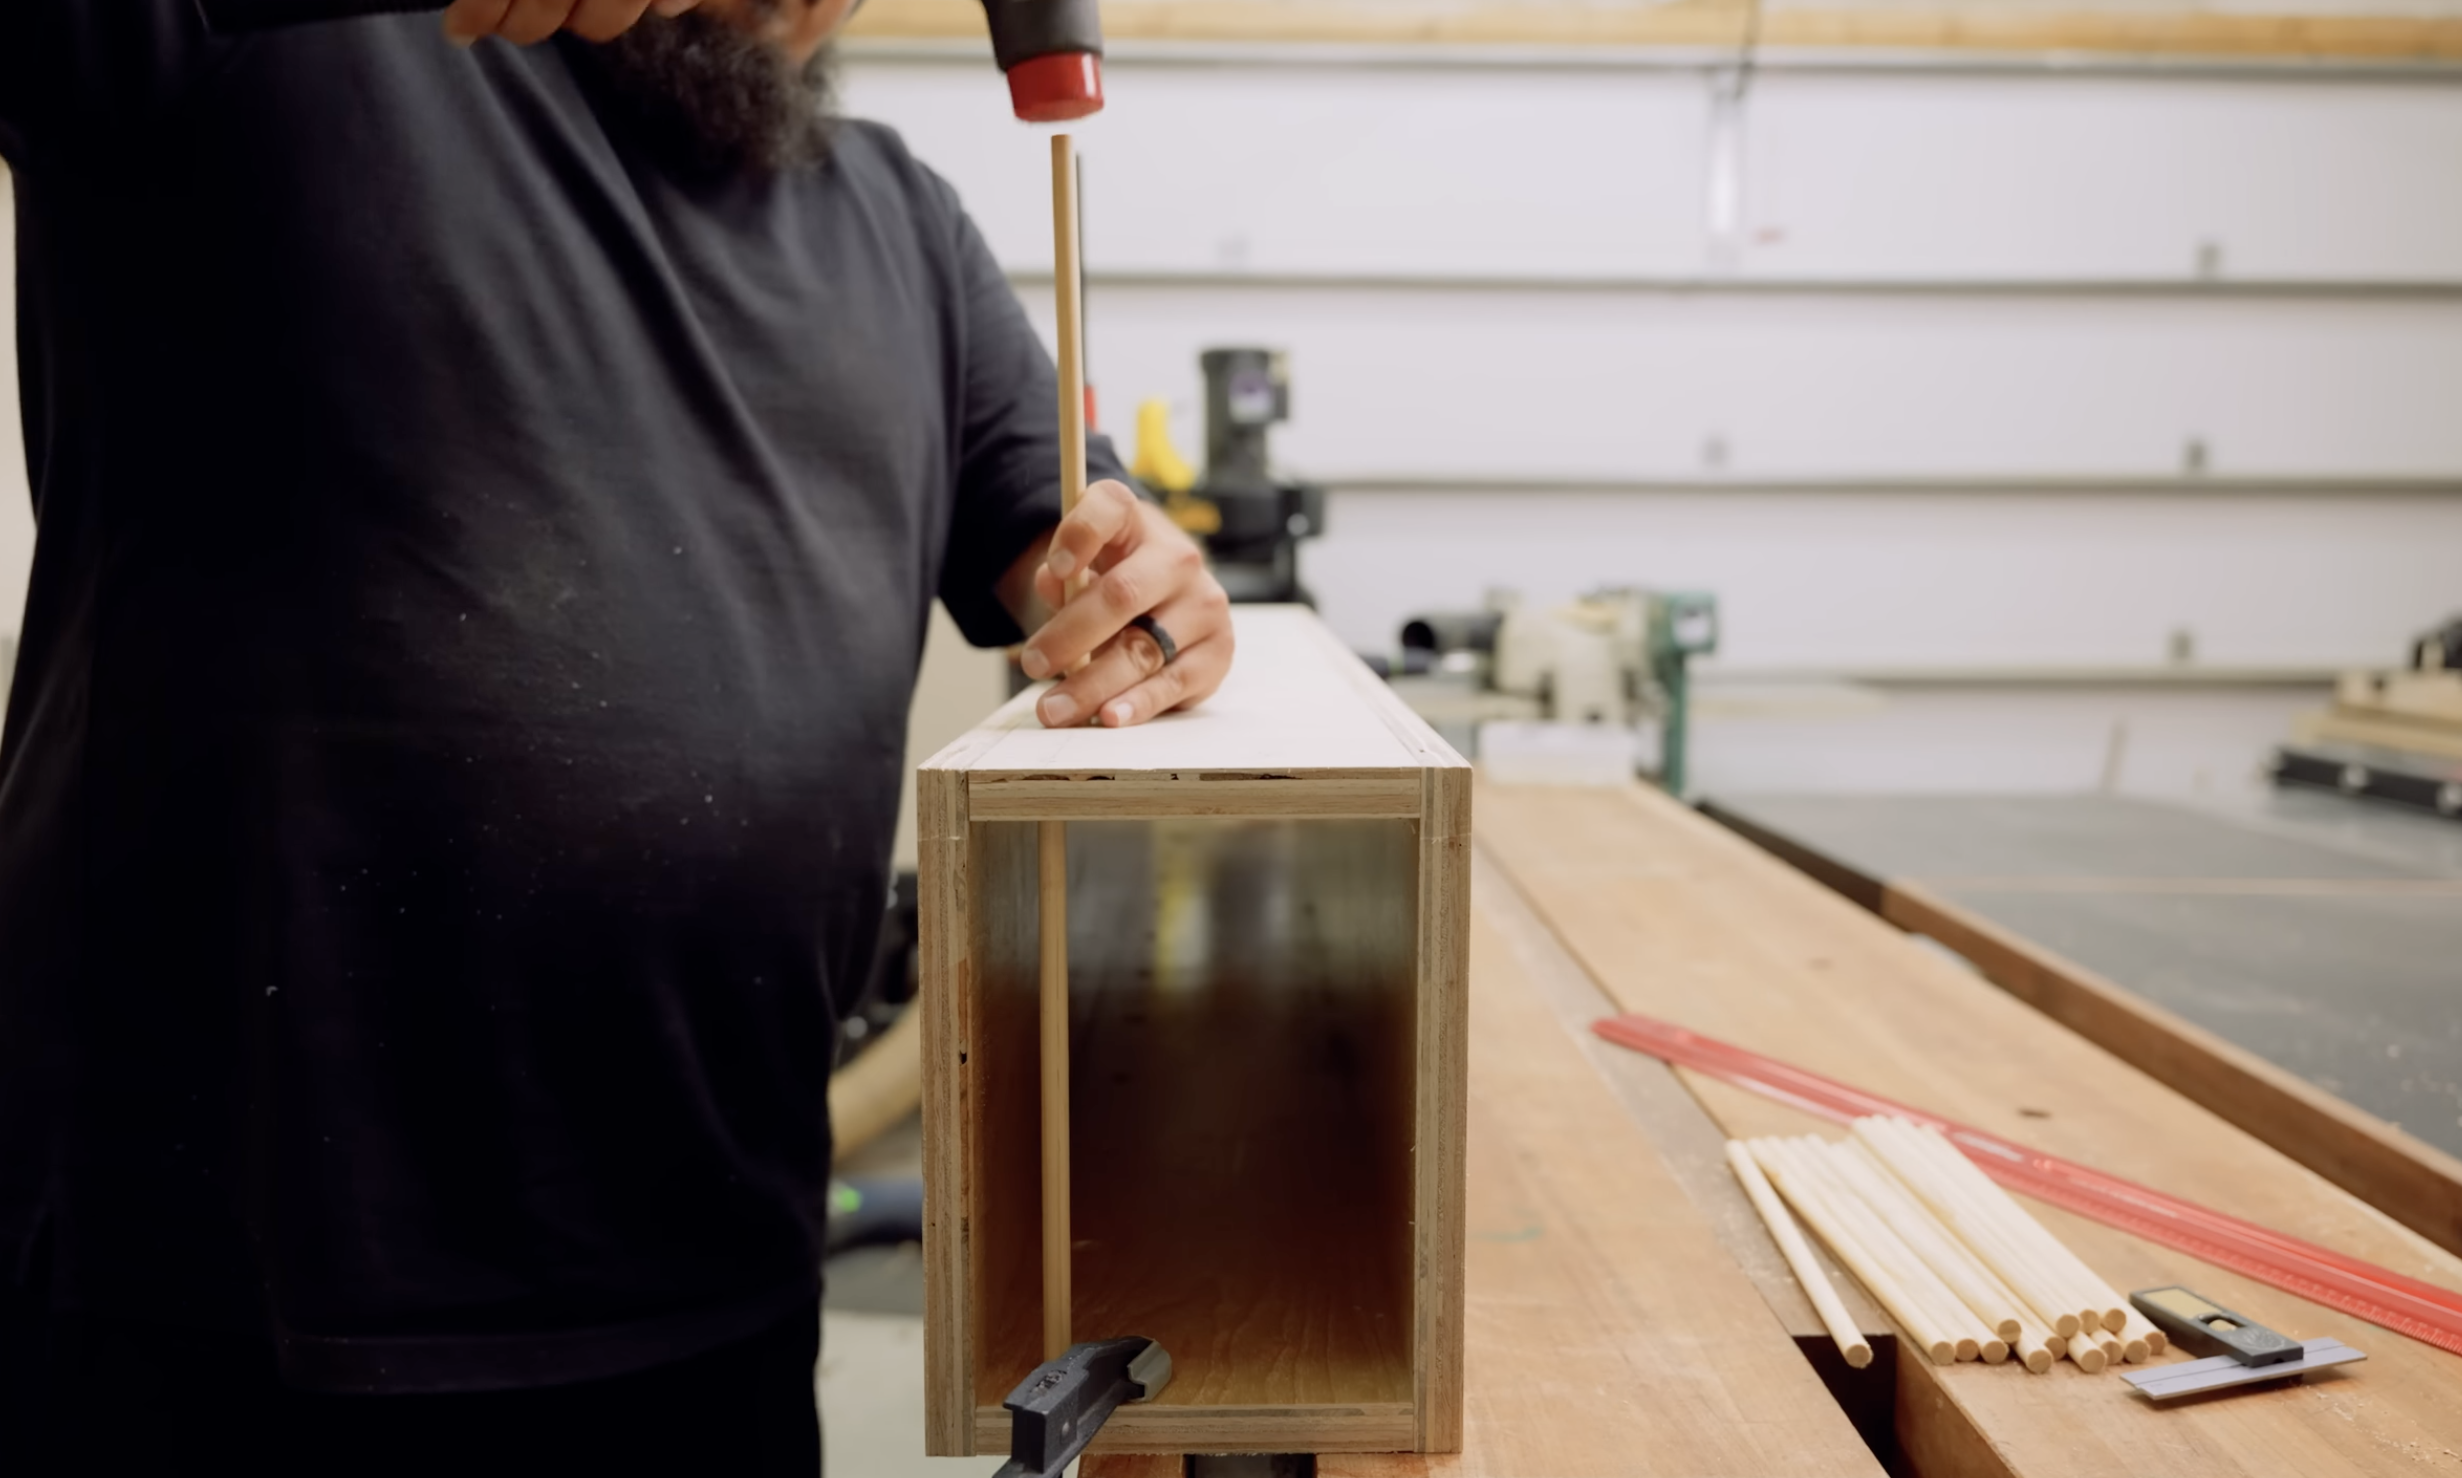
Dowels
Inside the box, I installed three rows of 3/4" hardwood dowels to act as shelves for the pieces being steamed. These keep your wood off the bottom of the box and allow steam to circulate freely around all sides of your workpiece.
I measured and marked the dowel positions on the side panels before assembly and drilled holes just slightly larger than the dowels themselves. After gluing the dowels in place, I flush-trimmed them on the outside for a clean finish.
You don’t want your bending blanks sitting in puddles of condensation, so this step matters more than you might think.
Clean Up
Once everything was together and dry, I gave the whole exterior a light sanding to knock down splinters and sharp edges. This is a shop tool, but that doesn’t mean it has to leave splinters in your forearms every time you move it.
I also gave the interior another inspection to make sure the epoxy had cured cleanly and the dowels were solid. Steam boxes live hard lives, it’s worth making sure everything is locked in before firing it up.
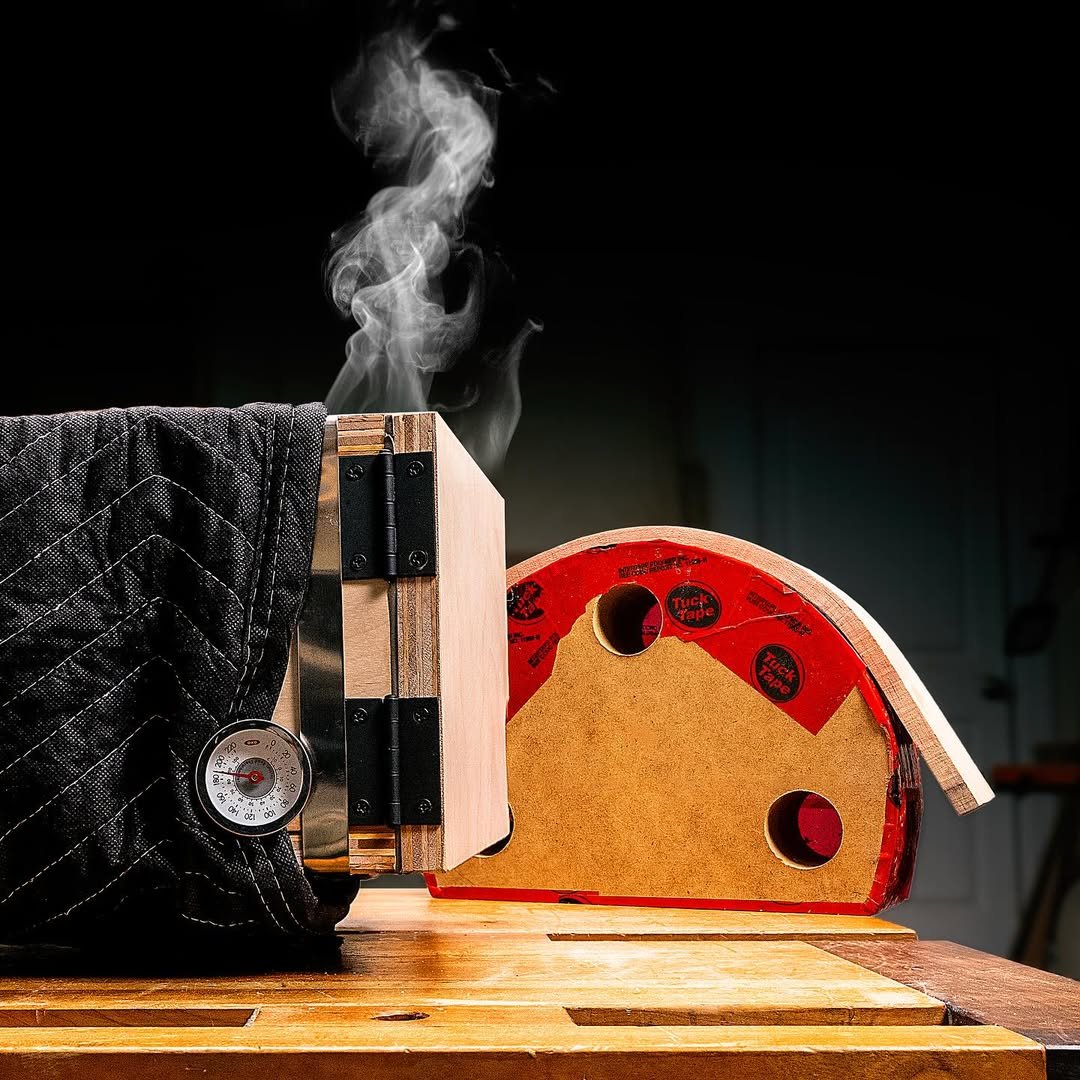
Building the Door
The front of the box needed to be sealable, but also easy to open and close. I built a simple door from a plywood panel framed with a perimeter strip for rigidity. I added a piano hinge to one side for strength and alignment, and installed a weatherstrip-style rubber gasket around the inside edge to trap steam.
To hold it shut, I used two toggle clamps mounted on the front. These let me apply enough pressure to get a good seal without cranking it down so hard that I risked deforming the box.
Test your seal before you fire it up. A dollar bill test (closing the door on a bill and seeing if it pulls out easily) will tell you if you're good to go.

Steam and Drain Tubes
I drilled a hole in the bottom-rear corner of the box to install a brass steam inlet tube, which connects to my steam generator via a heat-resistant hose. On the opposite end, I drilled a small drain hole to let condensation escape.
You want your steam inlet to be low and your drain to be high (but not the top). This creates circulation and keeps water from pooling inside the box.
A note on steam sources: I used a dedicated steam generator, but a wallpaper steamer or even a converted kettle will work as long as it can hold pressure and run for 45-60 minutes.
Final Steps and Testing
With everything built and assembled, I ran a test cycle. Steam started building in about 5 minutes, and I used a thermometer to confirm it was reaching and maintaining around 212°F inside the box.
No major leaks, no warping, and the dowels held firm. I steamed a test board and it came out soft and bendy like a cooked noodle, mission accomplished.
I also recommend adding a small temperature gauge if you want to be fancy. It’s not required, but it’ll give you some peace of mind.
Wrapping It Up
Building this steam box was a weekend project that paid off immediately. It’s a simple design, but now I’ve got a dedicated tool for bending arms, legs, slats, or even weird sculpture pieces if the mood strikes.
So if you’ve been thinking about dabbling in wood bending, I say go for it. Build yourself a box, grab a steamer, and start cooking up some curves.
If you dig the build, give the video a thumbs up and subscribe to the Timber Biscuit Woodworks channel. More builds, more sawdust, and probably a few more slightly over-engineered shop jigs coming your way soon.